


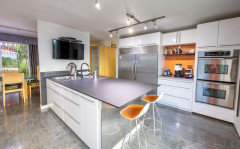
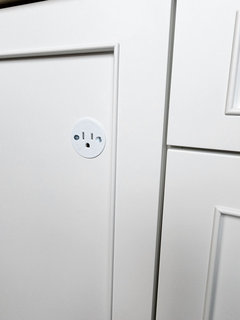
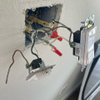
Electrical outlet placement in full overlay kitchen cabinets
megesp
last year
Featured Answer
Sort by:Oldest
Comments (12)

darbuka
last yearlast modified: last year
KW PNW Z8
last yearRelated Discussions
Full granite backsplash and Electrical Outlets
Comments (7)Gneegirl - Chill babe... it's all good !!! HA! ;-) This is NOT a problem AT ALL - here's what needs to happen: 1. Determine what the thickness of your stone is - 2CM or 3CM? 2. Have a sample piece 4" x 4" on hand for your electrician to use when he comes over to your home to re-set the depths of the outlet boxes. This (IMHO) should NOT be a new experience for EITHER your Electrician OR your Fabricator.... 3. Have your Electrician re-set the depths of the outlet and switch boxes.... (this should be done without the outlet recptacles and/or switches and trim plates in the boxes when he does this - just the wires should be sticking out with the protective wire nuts on each wire to prevent getting a shocking experience) ...so that that the finished stone will extend past the outside edge of each box when it is set by about an 1/8" - this means that prior to the splashes coming, your outlet boxes will protrude from the walls by the thickness of the stone PLUS an eigth of an inch. (the extra 1/8" will alow for adhesive to set the slab pieces to the walls) AND ... NO WALLS ARE PERFECTLY PLUM AND STRAIGHT, so allow for some variation - 1/8" should be enough, BUT - you may need to go 1/4" - this depends on your walls - if they are really flat, true and plumb or if they are "ca-ca"..... HOWEVER -AND THIS IS ALSO VERY IMPORTANT: IF your walls are nice and flat, you could have the boxes set so that they are flush with the stone - WITHOUT the extra 1/8" too - this will all depend on how wacky your walls are...make sense??? Ask your Fabricator to get involved on this if you have trouble.... 4. Check your walls with a 6 or 8 foot straight edge to be sure.. you may have really wacky walls, and in that case, you should (again) have your Fabricator check them (hopefully, he already did) This is something that I go over in detail with all of my customers that receive full height slab splashes, so they don't get all freaked out over something like this - it's really not a big deal at all - they (your Fabricator) should have gone over it with you already (IMHO).... Any ways............... Once the full height backsplashes are installed, your Electrician will be able to install the outlets & switches without much wailing or mashing of teeth... HA! ;-) Problem Solved !!!!! Hope that helps kevin Kevin M. Padden MIA SFA Fabricator, Trainer & Consultant to the Natural Stone Industry www.azschoolofrock.com...See Moreelectrical outlets in the kitchen backsplash
Comments (27)Thanks Circuspeanut! I just adore your kitchen. Looks like the kitchen that's my paint-inspiration (Sally Wheat's) uses vertical plates on subway tile as well! See pic below... Also Circuspeanut, you've just inspired me to possibly do my outlet/light switch plates in nickel! :) I've been wondering whether or not to do a nickel color or a white color, because my backsplash will be mostly white subway tile (the white calacatta marble subway). I was worried the plates should match the backsplash to avoid looking too busy and take away from the tile...and was also concerned that with having a stainless counter, faucet and polished nickel bin pulls/latches, nickel plates might be overkill. But your copper counter w/ copper outlet plates - and non-matching tile - is really pretty. Love it. Hmmm... my countertop will be stainless, my faucet is polished stainless (not chrome, not nickel), but they don't make stainless switch plates. So what will match better - brushed or polished nickel?! :-p As for considering having my plates be white, they don't make plastic plates for the push-button style. However, they do make porcelain white plates (as well as other great colors, FYI everyone) which is another thing I could consider, only they're a bit chunky and probably from the 1940's period...still kinda cool though. Only those have the outlet plates but not the pushbutton plates. But hey - I just found white painted metal ones!: http://www.kilianhardware.com/swreplinwhpa.html Here's that Sally Wheat kitchen (for the thousandth time):...See Moreoutdoor electrical outlet placement and uses?
Comments (16)bluesanne I love that! I have a bass and guitar playing son who named our dog Hendrix. Just tonight he (my son not my dog) used one outdoor outlet to vacuum out the car that he drove to The Peach Music Festival. I use my outlets for holiday lights in front, party lights in back, and sometimes random stuff on the sides (like an electric hedge trimmer.) Super handy and wouldn't plan a new house without them. For outlets that you'll use for holiday lights, be sure to have them work from switches inside the house so you don't have to go outside and unplug them when you want to turn them off. (Timers work too, but I like having the option of switches.) Placement: one in back, near the driveway side of the house; one on the side on the non-driveway side of the house; two in front on either side of the front door....See MoreKitchen Cabinet Layout - Full Overlay and Spacing/Filler Dilemma
Comments (18)Buehl- Thank you for the feedback! I didn’t know that the Hood should be wider. I will have to do more research on the different sizes and specs and the price differential. I’ll also have to look at changing some wall cabinet dimensions to accommodate a bigger hood. I believe the manufacturer (Schrock) does allow for modifications to the stiles on wall cabinets for that purpose you mentioned. The frame of the cabinet is 1.5” with a door overlay of 1.25”. How much more “space” is needed? I feel like another .5” of stile should suffice? Especially if I get the special closing hinges that prevent the door from opening to 90deg..? I am aware the upper diagonal cabinet does generate wasted space, but I prefer a staggered cabinet look to them being all even. Could using a 90deg cut EZ reach corner at a 42” compared to the 36” height for the other wall cabinets look ok? Want to maintain the staggered look if possible. I am not sure if the manufacturer needs more wall space allotted for the bottom corner cabinet. I will have to research further. I never realized 12” cabinets aren’t “useful” in the sense of practicality. I will look at alternate layouts that don’t involve single 12” cabinets. I will also look at combing the 12/24” cabinets. I was caught up on each door should appear similar (~12”) that forgot the practicality and functionality of them. Fridge Surround - I initially had two tall end panels that were L shaped with the front face 1.5” wide and 24” deep on each end of the 36” fridge wall cabinet. That would have given me 39” of wall space for the fridge. I also had the notion that the fridge was going to stick out of the surround. I’m not sure what else I can or should do with the fridge placement. The island is how the stick builder’s floor place is laid out. I think I would prefer a 8ft rectangular island. I have never given much thought to the “prep” aspect. I’ve never had two separate sinks growing up and neither has my wife. And the tiny kitchen we have now has made us use to the fact we use our sink for both cleaning dishes and prepping food. It is something we will have to look into. Attached is my floor plan I’ve been working on. Again I am no designer/draftsman. I have literally taken a basic floor plan from one of the local stick builders and tried to modify it within the physical layout of their plan i.e I’m using their dimensions for each room as starting points. I’m basically trying to see if I can take their plan and modify it to where I can get the layout I want of the cabinets without physically altering the foundation and walls and what not. Please feel free to point out any obvious mistakes/errors I’ve made. It really is appreciated!...See Moreanj_p
last yearmegesp
last year PRO
PROKristin Petro Interiors, Inc.
last yearanj_p
last yearmegesp
last year- PRO
Patricia Colwell Consulting
last yearlast modified: last year chispa
last yearSuper Lumen
last yearlast modified: last yearB Lott
last year
Related Stories
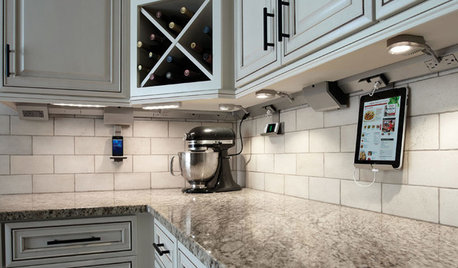
KITCHEN DESIGN7 Awesome Add-ons for Kitchen Cabinets
Useful gadgets, docks for your devices, extra lighting ... when it comes to cabinets, do look down
Full Story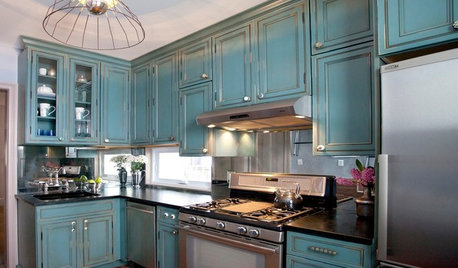
KITCHEN DESIGNKitchen of the Week: Turquoise Cabinets Snazz Up a Space-Savvy Eat-In
Color gives a row house kitchen panache, while a clever fold-up table offers flexibility
Full Story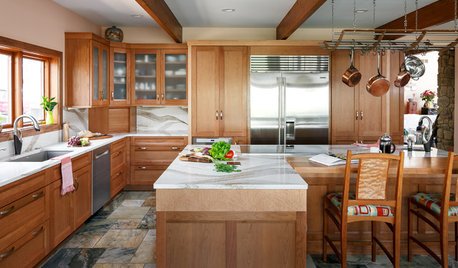
KITCHEN OF THE WEEKKitchen of the Week: Cherry Cabinets and 2 Islands Wow in Indiana
Warm wood cabinets, a reconfigured layout and wave-pattern countertops complement the home’s wooded surroundings
Full Story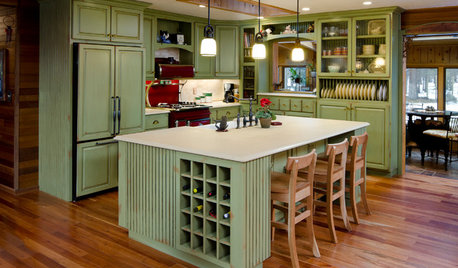
MOST POPULARHow to Reface Your Old Kitchen Cabinets
Find out what’s involved in updating your cabinets by refinishing or replacing doors and drawers
Full Story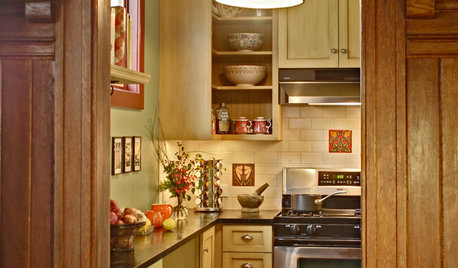
BEFORE AND AFTERSKitchen of the Week: Bungalow Kitchen’s Historic Charm Preserved
A new design adds function and modern conveniences and fits right in with the home’s period style
Full Story
KITCHEN CABINETS9 Ways to Save Money on Kitchen Cabinets
Hold on to more dough without sacrificing style with these cost-saving tips
Full Story
KITCHEN DESIGNHow to Lose Some of Your Upper Kitchen Cabinets
Lovely views, display-worthy objects and dramatic backsplashes are just some of the reasons to consider getting out the sledgehammer
Full Story
KITCHEN CABINETSPainted vs. Stained Kitchen Cabinets
Wondering whether to go for natural wood or a painted finish for your cabinets? These pros and cons can help
Full Story
KITCHEN CABINETSThe Pros and Cons of Upper Kitchen Cabinets and Open Shelves
Whether you crave more storage or more open space, this guide will help you choose the right option
Full StoryWHITE KITCHENSWhite Cabinets Remain at the Top of Kitchen Wish Lists
Find out the most popular countertop, flooring, cabinet, backsplash and paint picks among homeowners who are renovating
Full Story
A G