


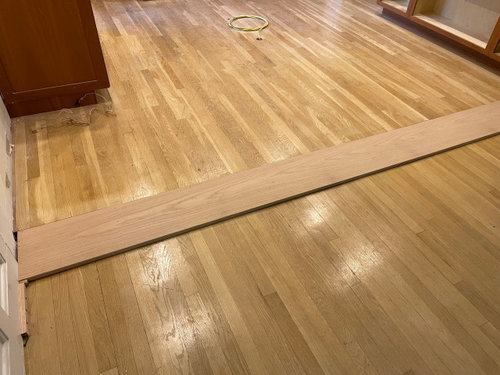
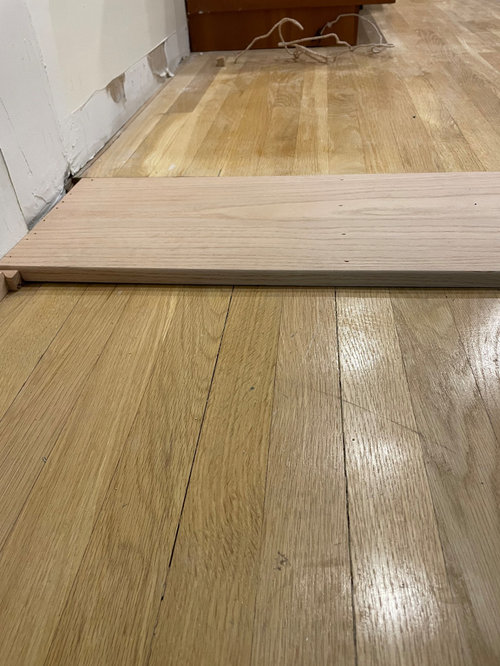
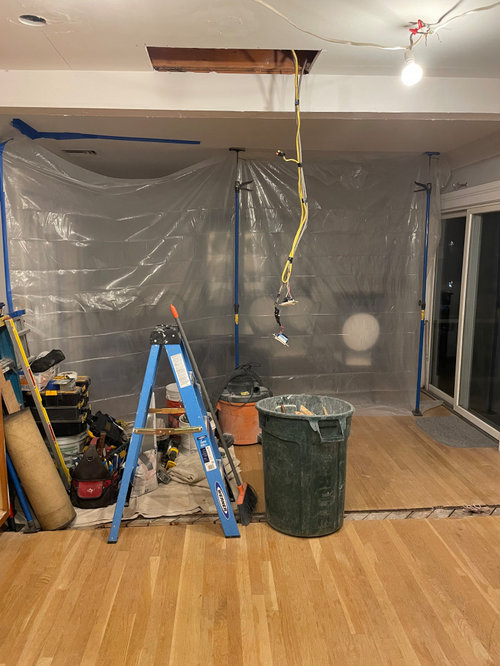
Flooring repair question
gtdj519
last year

Featured Answer
Comments (20)

gtdj519
last yearRelated Discussions
To Repair or Not To Repair, That is the question
Comments (3)I just went through some of the same thought process. I estimated fixing my 2002 Bosch Axxis WFL 2060 at around $400. I found a new Bosch Vision 500 for $895 with $400 in rebates so I went with that instead. It still has an on-board heater and a high spin speed and I really did like my Axxis while it was working. I decided if overall quality of all machines seems to be down, I'd rather pay as little as possible and not have a stomach ache when I have to toss it in 7 years rather than pay $1000+ for a Miele and still have it break in the same time span. Now I'm jaded, but I think this time I won't be disappointed since I expect the worst....See More3' PVC Repair (Slip) Fitting question
Comments (4)First off, be sure you get a repair coupling, not a regular coupling. A regular coupling has an internal stop ring that will only allow a pipe to be inserted 1/2 way, but the repair coupling has no internal stop ring. To make your joint you begin by sliding the repair coupling on one pipe and slide it about 4" from the end of the pipe. You then clean both pipes to be joined, apply glue to both pipe ends and slide the coupling back over the joint....See MoreFiberglass bathtub floor repair question
Comments (8)We had the same problem. I would definitely advise replacing it, but if you need a short-term fix, go to an automotive store and get a fiberglass repair kit (like Bondo), with the fiberglass cloth sheets and hardener. You'll first have to sand down the tub at the cracks through all the color layers until you get to the bare (brown) fiberglass; make sure you sand at least 3 or 4 inches beyond the cracks, as you will need the extra space to lay down the new fiberglass sheets. (Don't be surprised if you find that the cracks are much larger than you thought, or you find more that you didn't know about!) If you can, I would advise sanding with s power-sander, or at least with something attached to a cordless drill-- I did it the first time by hand, and it took forever. Next, get rid of ALL the dust from the tub floor (a wet sponge works well), and cut the fiberglass cloth sheet into pieces to fit where you need it. Expect to put down at least 2 layers, or more if you want some extra security. I stagger the sizes so that the bottom-most layer is the smallest and the layers get progressively larger. Just make sure the layers you are putting on do not go beyond the sanded area of the tub floor-- it won't adhere properly to the colored enamel coating. Next, prepare the liquid hardener as instructed on the box. Wear rubber gloves and make sure the area in which you're working is VERY well-ventilated-- the smell is AWFUL!! Get the cut pieces of fiberglass cloth saturated in the liquid and spread them out over your cracks, making sure to get ALL the air bubbles out from underneath. This will dry pretty quickly (again, read the directions on the box). You can safely do two layers at a time; if you need more, sand in between coats and repeat. When you are satisfied that the floor has been repaired, you can cover over the ugliness with an enamel tub and shower fiberglass paint (sold at Lowe's or HD). This stuff advertises itself as a repair kit, but it's more geared to fixing walls, not floors. We found it in almond and white-- we ended up having to get both and then we mixed the colors to get the color we needed. Note, this stuff takes FOREVER to dry, at least overnight or longer. Be sure to paint it on with a brush and don't let it "puddle." When all was said and done, it took a whole weekend (mostly with waiting for drying time) and cost about $50 total in materials. It lasted for the last year we were in that apartment, and you could only notice it if you were specifically looking for it....See MoreSubfloor repair question
Comments (1)I'd install the thicker layer first. Screwing the second layer to the joists would be nice but it's not necessary. Fastening it to the first layer should suffice....See Moregtdj519
last year PRO
PROBeth H. :
last yeargtdj519
last yeargtdj519
last yeargtdj519
last year PRO
PROUptown Floors
last yearlast modified: last yeargtdj519
last year- PRO
Uptown Floors
last year gtdj519
last year PRO
PROG & S Floor Service
last yearlast modified: last yeargtdj519
last year- PRO
G & S Floor Service
last year gtdj519
last year

Related Stories

GREEN BUILDINGConsidering Concrete Floors? 3 Green-Minded Questions to Ask
Learn what’s in your concrete and about sustainability to make a healthy choice for your home and the earth
Full Story
TILE6 Questions to Answer Before You Install Tile Flooring
Considering these things before tackling your floors can get you a better result
Full Story
ARCHITECTURE5 Questions to Ask Before Committing to an Open Floor Plan
Wide-open spaces are wonderful, but there are important functional issues to consider before taking down the walls
Full Story
REMODELING GUIDESYour Floor: An Introduction to Solid-Plank Wood Floors
Get the Pros and Cons of Oak, Ash, Pine, Maple and Solid Bamboo
Full Story
FLOORSWhat to Ask When Considering Heated Floors
These questions can help you decide if radiant floor heating is right for you — and what your options are
Full Story
REMODELING GUIDESWhat Lies Beneath That Old Linoleum Kitchen Floor?
Antique wood subfloors are finding new life as finished floors. Learn more about exposing, restoring and enjoying them
Full Story
DECORATING GUIDESDesign With an Edge: Leather Tiles for Floors and Walls
Leather tiles can warm up a floor or a wall, providing a fun design element. Best of all, they can be swapped in and out on a whim
Full Story
REMODELING GUIDESThe Case for Linoleum and Vinyl Floors
Have pets, kids and a tight budget? Easy-care resilient floors may be the choice for you
Full Story


Joseph Corlett, LLC