


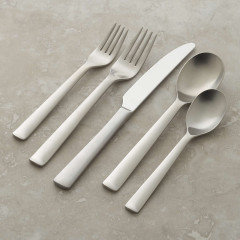
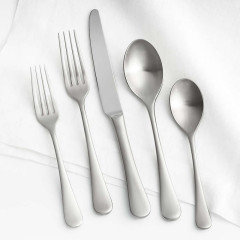
Any recommendations for flatware/silverware?
Meagan T
last year
Featured Answer
Sort by:Oldest
Comments (26)

Aphaea
last year
Jen K (7b, 8a)
last yearlast modified: last yearRelated Discussions
Food Photo Tips: Part 10 Self-timer, Flash & Silverware
Comments (2)I have a problem with the camera I am using now in that I often accidentally set the flash because of where the toggle wheel is place. My camera looks very similar to yours, and I find it very easy to press the flash without realizing it. Sometimes it is difficult to turn off the automatic flash, and this is most irritating. Most of the photographing I do now is of furniture and of cardboard models of furniture that I make at work, and I really do not need a flash for this. In the past, I have photographed wall sconces for tear sheets and these were difficult because the finishes were often polished silver plate or polished nickel. I had to be very careful about what was reflected in the mirror finishes. Of course I had to be even more careful when I photographed mirrors, and I often did those on a dock with the background very far away, so that it would be blurred. That was before I could fix them in Photoshop. Lars...See MoreFood Photo Tips: Part 10 Self-timer, Flash & Silverware
Comments (0)Posted by canarybird (My Page) on Sun, Sep 20, 09 at 11:23 Food Photo Tips: Part 10 - Hi again everyone. I'm back with another entry on how to use your digital camera for taking tabletop photos. I apologize again for the delay in posting this next-to-last tutorial. After publishing the last entry I had computer problems and couldn't work until our repair man came with a new graphics card, which is now installed. The Self-Timer Function Perhaps you are accustomed to using the self timer so this will be nothing new for you, but if you have hesitated to try this very useful function on your P & S (point and shoot) camera you will be pleased to see how easy it is to not only to put yourself into a picture but also to sharpen some of your tabletop photos by avoiding camera shake when you press the shutter. Here is the icon for the self-timer and where it may appear on the back of your camera body: And here are the settings on my camera, which may be different on yours: And as seen displayed in the camera menu after entering the self-timer option you could have: OFF, 12 Seconds, 2 Seconds. The procedure to use the self timer couldn't be simpler. Assuming the camera is either firmly attached to a tripod or resting on a stable surface, find the self-time menu and decide how long you want the camera to wait before it takes the picture. If you are going to jump into a group photo, then give yourself the longest time in order to settle yourself comfortably in the photo, eg 12 seconds. On the other hand, if you are going to use the timer to avoid possible camera shake during a tabletop photo shoot while you stand behind the camera, then set the shortest time lag. Then press the OK button. Press the camera shutter button half way down and look to see that the green focus light doesn't blink. (If it blinks then you have to move the camera further or closer to your subject since blinking means the camera can't focus at the distance you have chosen.) When the green light is steady, press the shutter button all the rest of the way down. Take your finger off the camera and either run to join your group or wait without touching while it beeps a countdown and takes the photo. You've just used the self timer! By doing this you have avoided any possible movement of the camera that could occur as your finger presses the shutter button. While the camera is in countdown, you can do other things, such as holding a white reflector near your subject to improve the lighting. That's another advantage to using a tripod. Your hands are free while the camera takes the photo. The Flash Menu The flash menu is usually accessed by pressing the lightening bolt flash icon on the back of the camera touchpad. See again the above photo of the back of the camera with red arrows. Pressing the touchpad at that point brings you into the flash menu, where the icons are quite easy to understand. You may need to press the flash pop-up button (3rd photo) to begin using the flash. The flash will fire automatically when there is insufficient light. The camera decides if you need flash or not. Red-eye reduce mode. The camera emits pre-flashes before firing the regular flash in order to avoid red-eye. Fill-in flash. The flash will always fire regardless of light conditions. Useful for eliminating deep shadow on the subject's face when subject has back to sunlight, or in similar circumstances where you want to eliminate shadow. Always emits pre-flashes for red-eye reduction. Flash off. When the lightening bolt is surrounded by a circle or square, it means the flash will not fire even in low light conditions. Remember that a P & S camera flash will make your food look very flat and unappetizing, so don't ever use it for food photos. Photographing Silverware Although it doesn't quite fit in to the subject of food photography, a tablesetting is often included in a closeup food photo. Flatware can be a difficult subject to photograph due to the reflective surfaces, especially when dealing with spoons, where the room surroundings are often reflected in the bowl. I'm going to show examples taken in daylight by a window using white and black backgrounds, with and without a tripod. Here is my setup, using one and later two styrofoam reflectors on the dark side. Here below are examples on black velveteen. (One of my old Christmas party tops pulled from the back of the cupboard!) The first photo shows a bad example of how a handheld camera shot at this arrangement of three spoons reflects my hands and camera. In the next two photos, the spoons have been arranged differently so they reflect more the surrounding room. The following photos will enlarge with a mouseclick. Here at the left is another example of a bad reflection. Although the pattern of the silverware shows up nicely, the bowl again reflects the photographer. The centre photo shows a closeup using macro mode where the pattern is the prime object. But the picture on the right is not a photo at all, but rather one taken in a flatbed scanner. Don't forget that for posting to auction sites a scanned image may serve your purpose. Using the Tripod and Self-Timer When you have your camera set up on a tripod you will surely be able to take clear, sharp images of something as fine as silverware, where you want to display the pattern clearly. In order to get yourself and your hands out of the picture, using the tripod and the self timer allows you to duck out of the way so you are not reflected in the silverware. Here below is the sequence for doing this: 1) Photo left - set up the flatware on black velveteen, black or white paper or cloth and with camera on the tripod, adjust the level of the view and zoom a little until you are happy with the image in the viewfinder or LCD screen. 2) Photo centre - set your timer for the delay in seconds, enough for you to move away from the camera. Press the OKAY button to confirm your choice. 3) Photo right - press the shutter halfway and when the green focus light gives a small beep and a steady green light... press the shutter the rest of the way down. You haven't yet taken the picture but the camera is now counting down the number of seconds you have set, so move yourself out of the way. The shutter will open and the camera will take the photo without your touching it. Remember that if in step 3 the green focus light blinks rather than stays steady, the camera can't focus at the distance you have set. Change your zoom level (more zoom or less zoom) or if necessary, move the tripod further away. Here's the photo just taken in the example above, at left. Centre and right photos are a couple more done using tripod and timer where the reflection in the spoons is of the window. I hope you are understanding it all and if you have questions please ask here or PM me. So thanks for joining me. The next tutorial will be the last one, so I hope to have it ready soon. . And please feel free to save the pages on your computer. Sharon (Canarybird) :-) (All text and photos copyrighted) Free for personal, non-commercial use Follow-Up Postings: o RE: Food Photo Tips: Part 10 Self-timer, Flash & Silverware clip this post email this post what is this? see most clipped and recent clippings * Posted by publickman (My Page) on Mon, Nov 2, 09 at 2:45 I have a problem with the camera I am using now in that I often accidentally set the flash because of where the toggle wheel is place. My camera looks very similar to yours, and I find it very easy to press the flash without realizing it. Sometimes it is difficult to turn off the automatic flash, and this is most irritating. Most of the photographing I do now is of furniture and of cardboard models of furniture that I make at work, and I really do not need a flash for this. In the past, I have photographed wall sconces for tear sheets and these were difficult because the finishes were often polished silver plate or polished nickel. I had to be very careful about what was reflected in the mirror finishes. Of course I had to be even more careful when I photographed mirrors, and I often did those on a dock with the background very far away, so that it would be blurred. That was before I could fix them in Photoshop. Lars o RE: Food Photo Tips: Part 10 Self-timer, Flash & Silverware clip this post email this post what is this? see most clipped and recent clippings * Posted by canarybird (My Page) on Mon, Nov 2, 09 at 9:23 It's annoying when a flash goes off unexpectedly and also when the option to turn it off is buried somewhere down in a menu. Good idea of yours to take things outside to an open place if you can to avoid reflections of a room, but as you say, in the end one can also blur them out with an editing program....See MoreThoughts on this blush colored flatware/silverware?
Comments (16)We know that you like how these look. Do you like how they feel in your hands? These are very trendy. That means they won't be around several years from now when you need to replace the piece that some fool bent in the garbage disposal. Will you have moved on to something else by then or do you need to buy an extra set now? I'm really picky about how utensils feel on the lips and tongue, but I know that's probably a little out there! Prices: You can buy a 5-piece place setting of sterling at Replacements for $200 up. With daily use almost any sterling will outlive modern stainless, but the patterns tend to be traditional. A 5-piece place setting of Onieda's better flatware is in the $40 to $70 range. The pattern you like is by Cutipol. Goa (gold and white) is $90 at ABC carpet and home in NY. It's on backorder. Crate & Barrel has Aero (black and stainless or all stainless) for $60....See MoreYour Everyday Flatware?
Comments (38)I have never seen the flatware with the bees before! Glasses, dishes, linens, but never flatware. Marie_cate, I have a similar amount of the Monet after 12 place settings not being enough of the Nouveau. I started out thinking I would just get some additional place settings for the times we needed them and found 4 pl setting set of the Monet at HomeGoods. When I verified my suspicion that it was a discontinued pattern, I set to work and found more. I think I also have 24 pl setting and I got iced tea spoons, serving pieces, extra teaspoons and even cocktail forks. I knew I had one chance, so I loaded up. LOL Does anyone here have Reed & Barton stainless pattern with a shell at the end of the handle? That was my mom & dad's stainless and my youngest son has it now. I don't know the pattern name....See Morechispa
last yearclt3
last yearlast modified: last yearkempek01
last year
Maureen
last yearshermybeagle
last year
chloebud
last yearptreckel
last yearYvonne Martin
last yearUser
last yearblueskyquilts
last year PRO
PROBeverlyFLADeziner
last year PRO
PROCelery. Visualization, Rendering images
last yearlast modified: last year PRO
PROJAN MOYER
last yearJen K (7b, 8a)
last yearlast modified: last year
Rachel
last year- PRO
Patricia Colwell Consulting
last year functionthenlook
last year- PRO
BeverlyFLADeziner
last year - PRO
Patricia Colwell Consulting
last year functionthenlook
last yearlast modified: last yearshermybeagle
last yearAphaea
last yearlast modified: last yearAnne Duke
last year


Related Stories
KITCHEN STORAGEHow to Store Kitchen Tools and Flatware
Find out the ideal width and depth of drawers, get ideas for vertical storage and see how to work with existing cabinets
Full Story
KITCHEN DESIGNGet Organized: Rethink the Silverware Drawer
Keep your knives and forks clean and organized with two easy storage ideas
Full Story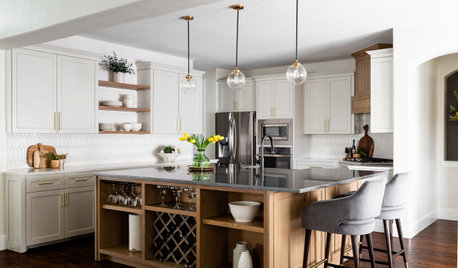
ORGANIZINGHow to Organize Your Kitchen on Nearly Any Budget
Make your kitchen more efficient and enjoyable by decluttering and designing your space to suit your needs and means
Full Story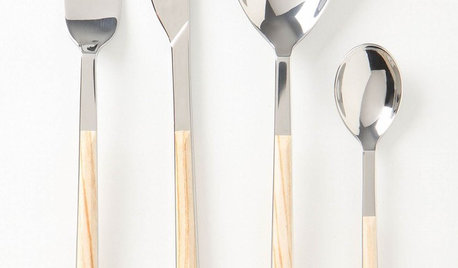
DINING ROOMSGuest Picks: Gorgeous Flatware
Don't settle for so-so flatware. With these 20 delicious options, there's sure to be the perfect set for your dining table
Full Story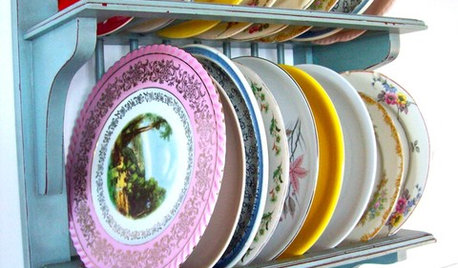
ENTERTAININGMix Your Plates for Memorable Table Settings
Hodgepodges are happenin’ — learn how to combine different-style dishes, silverware and glassware for a highly personal look
Full Story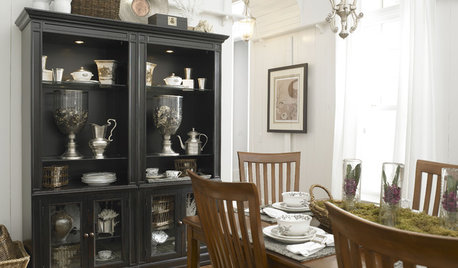
HOUSEKEEPINGHousekeeping 101: How to Clean Silver
Learn from a pro how to properly clean and care for your precious silverware
Full Story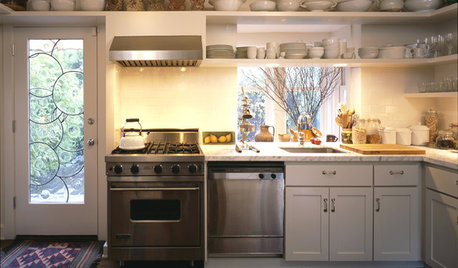
KITCHEN DESIGNHouse Planning: How to Set Up Your Kitchen
Where to Put All Those Pots, Plates, Silverware, Utensils, Casseroles...
Full Story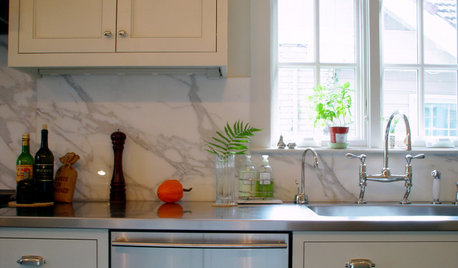
KITCHEN DESIGNHow to Keep your Dishwasher in Tip-Top Shape
As your dishwasher goes into overdrive, here are a few tricks for getting your plates, glasses and silverware sparkling clean
Full Story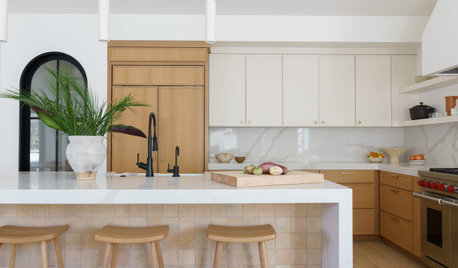
KITCHEN WORKBOOKHow to Plan Your Kitchen Space During a Remodel
Good design may be more critical in the kitchen than in any other room. These tips for working with a pro can help
Full Story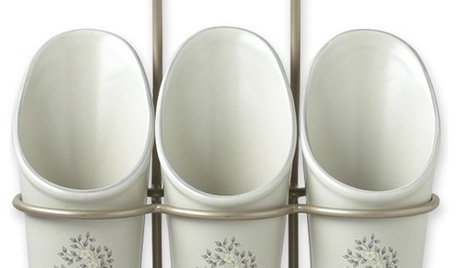
PRODUCT PICKSGuest Picks: Corral Kitchen Utensils in Style
Caddies and holders for silverware and more add character and keep your kitchen organized
Full StorySponsored
Central Ohio's Trusted Home Remodeler Specializing in Kitchens & Baths


JAN MOYER