


kitchen layout help
Neha Mehta
last year
Featured Answer
Sort by:Oldest
Comments (70)

rebunky
last yearlast modified: last year
Lisa Dipiro
last yearRelated Discussions
Kitchen layout help please - new kitchen
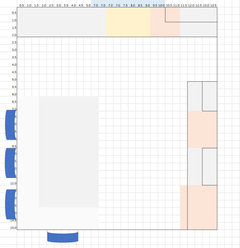
Comments (17)Here's my layout - very, very similar to Sena's. It provides three separate Prep Zones, all with approximately 60" of workspace and access to water. The primary Prep Zone is in the island with the Prep Sink and across from the cooktop. The two secondary Prep Zones are on either side of the cleanup sink. If someone is also cleaning up, then the secondary Prep Zone on the DW side will not be available until cleanup or unloading the DW is complete - but the one on the non-DW side is still available for use. Dish storage is on the Pantry side of the kitchen with 15" deep uppers as well as base cabinets. This location puts the dishes close to the DW for ease of unloading as well as on the side of the kitchen opposite the Cooking Zone and two of the Prep Zones, including the primary Prep Zone. This will keep those setting the table out of these zones and out from under foot of those working in the kitchen. The refrigerator is on the periphery for the same reason - it is easily accessible from the kitchen and the Dining Room and the rest of the house. Snackers and someone setting the table will not get in the way. There is a 6' long built-in pantry with 12" deep shelves on three sides. 12-inch deep shelves ares deep enough for the majority of items but not so deep that things get lost. 12" seems to be the ideal depth. You can get away with 15", but any deeper and things start to get lost! There are several advantages of a built-in pantry over a pantry cabinet: Much less expensive More storage space - no lost space due to cabinet walls & roll out tray shelf (ROTS) hardware and you can utilize the entire space - floor to ceiling More useful storage - no deep shelves over your shoulders that are almost impossible to see b/c even w/ROTS you still cannot see the middle of the shelves. You can see everything at one glance - no opening ROTS after ROTS looking for something Tray storage (cooking racks, cookie sheets, roasting pans, long platters, etc.) is above the MW oven in the oven stack. The trash pullout is in the island in the primary Prep Zone and near the Cooking Zone - both zones in which you generate the most trash & recyclables. It's also near the Cleanup Zone and the secondary Prep Zones. Note that the trash pullout is needed more in the primary Prep Zone & Cooking Zone than in the Cleanup Zone - but ideally it should also be near the Cleanup Zone. The island has seating for 5 - with one seat on the short end of the island. Having seats on two sides is more conducive to conversation. The cabinets on the sink run are 3" deeper than standard. This gives you more storage space as well as 3" more workspace depth. The base cabinets are 27" deep - if you can get them and they're in your budget. If not, then pull the base cabinets out 3" from the wall when they're installed. I did put in upper cabinets on the two side walls to give you more dish/prep tool/cooking tool storage space. The uppers on the Pantry side are 15" deep so even 12" wide dinner plates will fit. The uppers on the cooktop wall are 12" deep. They could be 15" deep as well, if desired. If you do not put upper cabinets on the walls, then you will need to create dish storage elsewhere. I don't recommend open shelves for anything other than items you use every single day. It only takes a couple of days for dust to start settling on items - requiring you to wash the items b/f using them and to frequently dust just to keep items looking clean. On the cooktop side, dishes on the open shelves will not only collect dust, but any stray grease, etc., will also settle on them. The hood is 6" wider than the cooktop - this is the minimum recommended. In addition, it should be 24" deep and the fan should be at least 600cfms. If you do plan to grill inside, then I recommend going even wider and a getting a more powerful fan (at least 900cfms). If all you do is boil water - then you can make do with a hood the width of the cooktop as long as you have upper cabinets flanking the hood. (If you do only boil water, then I question the need for a 48" cooktop.) The window is 10' wide to give you a lot of natural light and to open up the space. Normally, I would recommend a window to the counter, however, in this case I think it should be raised a few inches above the counter. It appears your kitchen is in the front of the house, so you don't want to make it easy for people to look in and see your dirty dishes or Prep Zones or Cooking Zone. Raising the window and putting in window treatments that can be partially closed when needed will help keep your kitchen condition private. (This is one of the reasons you don't normally put a kitchen in the front of the house.) Finally, I put in a 30" wide x 15" deep utility cabinet for a broom, dustpan, Swifter, etc. Here it is! Layout #1 . Layout #1 Zone Map ....See MoreKitchen Layout Help - Help us bring this 90s Kitchen up to date!
Comments (7)Dear Kiwi13, You have an architectural floor plan. Contact the architect or builder (if this was a spec home) and ask them which direction the ceiling framing runs in the Family Room and Living Room. In most cases the first floor ceiling framing will be run in the direction of the shortest span. In English your first floor ceiling framing probably runs from front to the back of your home.Meaning you should be able to remove either wall once you confirm the ceiling framing direction. If you are like the majority of home owners and not going to keep a formal living room, because you just never use it. You may want to consider reconfiguring that whole area of your new home. So you can get the family room and kitchen you truly want and expect, and that new, different, easier, better life you hope this new home will deliver for you. Tons of possibilities if you reconfigure the family room, kitchen/breakfast room, and living room area, you may not want to take out a wall as much as move one. Keep a family room and kitchen which you want. And add an informal dining room (breakfast area is a little tight), office, study, library whatever you need? The kitchen you have now I believe is just too small for the size of this home and awkward. Like it doesn't belong to this home. I can’t imagine that the realtors wouldn’t help you answer this simple question, especially if this is all it will take to sell this home. Hope this has been helpful. Joe Brandao Kitchen Design Company...See Morekitchen layout help - preliminary layout for discussion
Comments (14)@mama goose_gw zn6OH, thank you very much for the additional information! Thankfully my husband works for an HVAC (and plumbing/electrical) company so he will be in charge of the hood. We haven't gotten that far in the planning process but it'll be good to know to plan for it to overhang by 6". On the oven note, I'm really unsure how that will play out. I like the idea of having a range where everything is all together in my work zone. It just depends on what we can find that suits our needs and budget. If it ends up as a range, we can still plan on the microwave being there in some kind of cabinet configuration. @3onthetree, you've raised some excellent questions. The start of the new stairs will be inside the new addition. The middle section will go over what is currently just an open niche in our bedroom (which we will enclose as a small storage closet). A few of the stairs will locate in what is currently some built-in storage over the basement stairs, accessed from the storage niche in our bedroom. The location of the starting point of the stairs will be a balancing act between keeping enough head height where the support beam will run across the stairs and the distance the stairs extend out into the usable attic floor space. We need to maintain head clearance under the beam but we also want to maintain as much usable attic floor space as possible so we have as much floor space to work with as possible. We do plan to eventually put in a bedroom and a bathroom in the attic; we have consulted the IRC 2018 (which is what our local jurisdiction requires) to ensure that we're meeting the required minimum room areas and ceiling heights. As for the roof - I need to preface this with the fact that I'm not an architect - but this is the roof design that I've come up with so far. I'm going to pick my boss's brain (she's a licensed architect) to see if she thinks there are any better ways to design this. But it's what I've got so far as a starting point. Exterior modeling is not my forte so again, this is rudimentary. I would like to design some kind of "eyebrow" over the exterior door that will shelter from rain, even if slightly. Just haven't gotten that far yet. And yes, we're expecting we will need a laminated beam to run across where the exterior wall will be removed. We will be hiring a structural engineer to assist with analyzing everything and also to help determine what we need to do for our attic floor joists. We know that we will need to sister in bigger boards to beef everything up to support the finished space - just need to find out what will actually be required. To your earlier point (the stair design), once we've got an engineer on board and determine the size, height, and location of the structural beam, I can nail down exactly where the stairs should start. In regards to circulation, what is really funny is that you sketched in an opening exactly where one used to be in the original design of our home! Before we purchased our home, it was remodeled by a contractor who walled in an existing doorway into that hallway in order to make the kitchen more functional. I can't imagine just how tiny that original kitchen must have been with another doorway there! But, back to your point, with the size of our house, I really don't want to sacrifice usable space for additional circulation. I go on walks daily with the purpose to get extra steps in my life. A few in my house isn't going to hurt anything and those with far larger homes walk many more steps than we will. Not an issue for us but I really appreciate you steering me to think about the design from different perspectives! In regards to sizing things proportionately to the home, we have had LOTS of these kinds of discussions over the years. "Cozy" is a nice way to describe our house :) When first putting pen to paper, I was actually looking at a smaller addition. And then the contractor we spoke with said we might as well go a little bit bigger because there are so many costs associated with just getting people on the job that a few more feet in this size of addition/remodel won't make a huge cost difference, beyond just paying for the normal SF costs. Also, while I don't feel the need to deep dive into all of the personal aspects of our decision-making on here, we did spend a few years of our lives mulling over whether we wanted to stay in our home or get into a bigger, more expensive house. We "shopped" a lot during that timeframe. And, we ultimately decided to stay in our smaller home for a variety of reasons. Our personal attitude is a bit of a "YOLO" approach to our home; we have decided to make it the way we want it as we're planning to stay here for years. We feel like it's the right decision for us. So unless the bids come in astronomically high and just don't make sense, we're going to proceed with the project. A bonus for us is the fact that my husband is very experienced in MEP (and licensed on the HVAC side of it) so he can take care of a chunk of some of the expensive components of this kind of project himself, which will help bring down our project costs. What he can't complete, we will hire out through his employer, which will be at a discounted rate. So, that's how we ended up where we're at, in a nutshell. I really appreciate you asking questions that help us think through different aspects of our project. Thank you very much!...See More850ft2 Historic Home - Kitchen Layout Help!
Comments (15)Gave this a whirl. The "plans" that were shown to you are giving a false impression of what you can do here. There was no ref in that plan and the room is not big enough across to fit an island with 3 people seated across ( 132 - 84 " island - walk space in front of bedroom door 36" = 12" left for the other walkways and those cabinets showing on the wall shared with the teen bedroom! For that mudroom area - move the door to the teen bedroom all the way to one side or the other - it is interrupting the wall which will affect the storage. Plan on a pantry in there or the laundry for kitchen overflow. The kitchen window isn't centered - not sure if you can move it to help make a better layout Here is my attempt at something that might work You could swap the ref and the stove, but then the tv couldn't go there. Get some graph paper and drawer the room to scale. Cut out pieces for furniture, appliances etc to scale and see what you can come up with. Good luck!...See MoreLisa Dipiro
last yearrebunky
last year
Neha Mehta
last yearlast modified: last yearrebunky
last yearlast modified: last year
emilyam819
last yearNeha Mehta
last year PRO
PROFlo Mangan
last year- PRO
Flo Mangan
last year - PRO
Flo Mangan
last year Buehl
last year
RedRyder
last year
Jennifer Hogan
last yearJennifer Hogan
last yearrebunky
last yearBuehl
last yearlast modified: last yearBuehl
last yearlast modified: last yearJennifer Hogan
last yearNeha Mehta
last yearBuehl
last yearlast modified: last year- PRO
Flo Mangan
last year Jennifer Hogan
last year- PRO
Flo Mangan
last year Neha Mehta
last yearlast modified: last yearBuehl
last yearBuehl
last yearBuehl
last yearBuehl
last yearlast modified: last year- PRO
Flo Mangan
last year mcarroll16
last yearmarylut
last yearkl23
last year
mama goose_gw zn6OH
last yearBuehl
last yearlast modified: last yearBuehl
last yearmarylut
last yearfelizlady
last yearBuehl
last yearrebunky
last yearlast modified: last yearmarylut
last yearNeha Mehta
last yearlast modified: last yearNeha Mehta
last yearBuehl
last yearlast modified: last yearNeha Mehta
last yearrebunky
last yearemilyam819
last yearmarylut
last yearNeha Mehta
last yearkl23
last year


Related Stories

MOST POPULAR7 Ways to Design Your Kitchen to Help You Lose Weight
In his new book, Slim by Design, eating-behavior expert Brian Wansink shows us how to get our kitchens working better
Full Story
KITCHEN DESIGNHere's Help for Your Next Appliance Shopping Trip
It may be time to think about your appliances in a new way. These guides can help you set up your kitchen for how you like to cook
Full Story
ARCHITECTUREHouse-Hunting Help: If You Could Pick Your Home Style ...
Love an open layout? Steer clear of Victorians. Hate stairs? Sidle up to a ranch. Whatever home you're looking for, this guide can help
Full Story
KITCHEN DESIGNKey Measurements to Help You Design Your Kitchen
Get the ideal kitchen setup by understanding spatial relationships, building dimensions and work zones
Full Story
BATHROOM WORKBOOKStandard Fixture Dimensions and Measurements for a Primary Bath
Create a luxe bathroom that functions well with these key measurements and layout tips
Full Story
KITCHEN DESIGNDesign Dilemma: My Kitchen Needs Help!
See how you can update a kitchen with new countertops, light fixtures, paint and hardware
Full Story
SMALL KITCHENSSmaller Appliances and a New Layout Open Up an 80-Square-Foot Kitchen
Scandinavian style also helps keep things light, bright and airy in this compact space in New York City
Full Story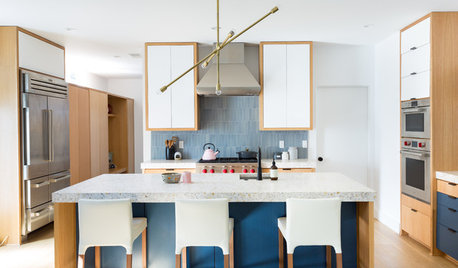
STANDARD MEASUREMENTSKey Measurements to Help You Design Your Home
Architect Steven Randel has taken the measure of each room of the house and its contents. You’ll find everything here
Full Story
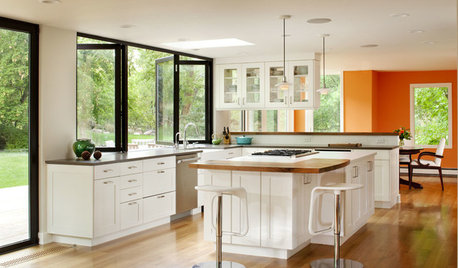
KITCHEN DESIGNDetermine the Right Appliance Layout for Your Kitchen
Kitchen work triangle got you running around in circles? Boiling over about where to put the range? This guide is for you
Full Story


rebunky