


Kitchen Complications and Design Details
Daniell e
2 years ago

Featured Answer
Sort by:Oldest
Comments (19)

Daniell e
2 years agoRelated Discussions
Backsplash Question/Help Needed...Complicated?
Comments (11)Thanks for the ideas Kas...and yes, I do tend toward "matchy-matchy"! I try to break away from it to do something "different" from time to time, but I it's difficult for me! I just talked to our KD and it turns out she did NOT recommend the full height...she also recommended only 4"-6" inches...our contractor misunderstood...she's going to call him and she wants me to tell him too so he doesn't mess up the electrical for that wall. Since I'm so undecided, she suggested that I get the 4"-6" backsplash but not cement it down. Then, live with it for awhile to see how I like it. If I decide I like it she'll get someone to cement it down, if I don't then it's easy to take down and maybe use for something else. Since it's such a small place, the granite backsplash will be less than 1 sq ft! Hmmm...as I study the sink elevation picture some more, I think I see where some of the confusion lies...here's a picture of my windows....the countertop will go straight in and be flush with the window itself... Yes, Raehelen I made the windows flush w/the counter! I fell in love with Fothia's window/sink and have used her picture as my inspiration ever since! In my case, I had to raise the window since it was originally only 22" off the floor! Here's what the window looks like right now... If you look closely, you can see the mark where the upper cabinets will end on the upper left wall....See MoreMost complicated under counter plugmold in the world? (pics!)
Comments (21)akchicago: I did look at the pre-made angled plugmold, but a few reasons prevented me from using it. 1. very expensive 2. did not want the brushed nickel finish, prefer the anodized aluminum look to match my tambour doors and toe kick. 3. I had two miter cuts to deal with and needed blank raceway over the sink, so really using the pre-made product didn't give me the options to fully integrate it since it is not meant to be cut and does not come with other parts needed. andreak100: Regarding the LED strips, I used Philips Color Kinetics eW Profile Powercore LED strips. I used several different length sticks to make two contiguous runs separated by a small connecting cable to make a 45-degree turn. These were purchased from Farralane lighting, & audio inc., online, which had a pretty good price if you register for the website. I purchased the "Gray" housing which is metal and really looks almost like anodized silver aluminum (but the plastic parts are gray). The LEDs are covered by a diffusing lens, which I think helps spread the light around uniformly. Note that they mount toward the front edge of the cabinet, not in the back, and they light both the coutntertop and backsplash, pointing away from the user. I liked this better than some LED options that seem to point only down or only back. These come in three different color temperatures, I elected the middle option of 3000K, and I think they look nice color wise, but I have not seen the other options to know how they compare. These LED bars use 120v, and because of this required no hidden transformer. There is an in-line switch and wiring box option that I used to clip directly on to the end of the LED bars. Very integrated looking and you can turn them off and on by flipping the switch right there under the cabinets. Note that I did ALSO install an in-line 120v switch in the lower cabinets with the intent of using a dimmer with these, since they are dim-able. The idea was to keep the dimmer set at the desired light level and turn it off and on daily using the under cabinet switch. However, I went through a few dimmers trying to find one that worked well with it (and eliminated buzzing), but was never very happy with that. Therefore, I removed the dimmer and just put a switch in-line (or I could have hard wired them to be always on I suppose but I didn't have the right coverplate). Overall, I am very happy with the LEDs. I am also installing one of these in the Appliance Kiosk underneath the bottom shelf to light the work surface (the toaster oven is mounted above the counter and blocks the overhead lighting), and the LEDs will turn on with the same switch as the overhead recessed light. I'll post more about the Appliance Kiosk soon!...See MoreHow much/complicated do you think this is?
Comments (10)Yes, this was obviously built that way on purpose--house was designed with a round kitchen, but a curved bar like that could be put into a lot of great room style kitchens, and the rest could be retrofitted into certain places. I agree with Steff about the approximate size. I also agree that the cabinets themselves don't look round. Even if they were, if it were only the fronts, rather than front and back, it wouldn't be too big a deal if you're starting with the premise of custom. Curves are made with MDF and veneers. Concave fronts can be achieved with standard hardware. I don't think you can do anything this sleek for your budget, however, unless you can DIY a lot of it--at least detailed plans. Creating the curved wall takes patience and a lot of care. Adding veneer if you have a proper wall isn't so bad. I think a good home craftsman or finish carpenter should be able to do it for a reasonable price/amount of work. If you can find stock cabinets that you can make work with this, you could then work with the installer to get the angles right, and maybe stay somewhere near the budget. A lot of it is how determined you are. I don't see the difference between the waste for a curved counter and for a wide counter. If whatever you have is wider than half a slab, and you don't have window sills or shelves or laminated edges or something, there's just as much waste. Fabricating the counters shouldn't be a big deal for a good fabricator with the proper tools. I've had granite done in a much more complicated pattern. Really, I think you could figure out how to get a look inspired by at least....See MoreAm I over complicating a remodel contract?
Comments (5)I understand your dilemma as I drafted and negotiated contracts. But one has to use a rule of reason when dealing with smaller entitles. You want to protect yourself if things go south without scaring the other party away by presenting them with a document that would be used to construct the Hoover Dam :--) My goal was to make sure that any third party reading the contract would have a clear understanding of what the parties agreed to - therefore as posted you want to completely spell out the scope of the work and the materials to be used. In my remodeling contract, this was achieved because my designer had provided very plans with specifications. If things need to be decided down the road - i.e. exact color of stain or paint - that was specified and all the parties initialed the approved door (for example). I feel confident that if something wasn't done, a third party coming in could look at the plans and the contract and have a reasonable idea of what the intent of the parties was. I also threw in the language necessary to protect myself such as requiring that I be named as additional insured; I was provided with copies of insurance (liability and workman's comp) and a copy of valid contractor's licenses including plumber and electrical subcontractor licenses. I had a clause about release of mechanics liens and of course a payment schedule. I also added the bare minimum of boilerplate regarding indemnity etc. I know that when this has been discussed in terms of contracts, there has been advice that specific guidelines be addressed - i.e. that tile be installed in accordance with specific industry guidelines. I didn't have this kind of language because I was relying on the expertise of my designer who had worked with this GC on multiple projects and I had also taken a look at projects he had completed to get a sense of the quality of his work. Perhaps I was taking a chance but again, I was cognizant of what would be achieved by that. Knock on wood things seem to be going along well as everything looks great and I am relying on my designer who is really acting as my project manager. I suspect she is much more likely than I am to spot shoddy work unless it is really egregious since construction is completely out of my field of expertise. In retrospect the only issue so far - knock on wood - is how long it is taking and I suspect that is just the nature of a complete gut remodel - especially in a high rise condo which has restrictions on work hours and in which everything has to be brought up and down in one elevator....See Moreptreckel
2 years ago
Missi (4b IA)
2 years agoDaniell e
2 years agoMrs Pete
2 years agochispa
2 years agoDaniell e
2 years agoDaniell e
2 years agoDaniell e
2 years agoDaniell e
2 years ago
Sofia S.
last yearDaniell e
last yearSofia S.
last year
Ziggy
last yearDaniell e
last yearDaniell e
last yearDaniell e
last yearZiggy
last year


Related Stories
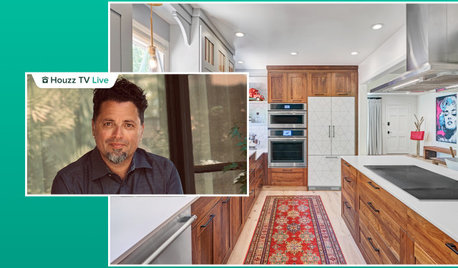
HOUZZ TV LIVEA Designer Highlights His Kitchen’s Stylish Details in 2 Minutes
In this short video, Nar Bustamante shares how two-tone cabinetry and other features create a winning design
Full Story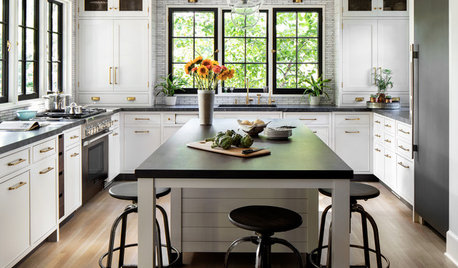
KITCHEN DESIGNKitchen of the Week: A Designer’s Dream Kitchen Becomes Reality
See what 10 years of professional design planning creates. Hint: smart storage, lots of light and beautiful materials
Full Story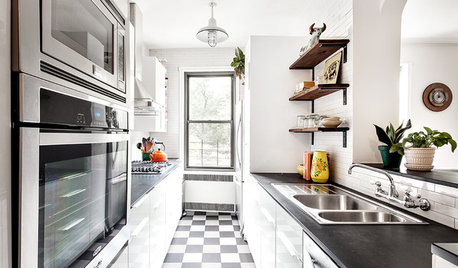
KITCHEN DESIGNDetails That Count: 11 Designer Secrets to Work Into Your Kitchen
See a pro’s suggestions for rollout pantries, tray storage, cabinet depth, corner sinks and more
Full Story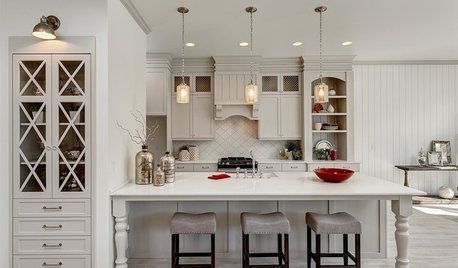
KITCHEN DESIGN12 Designer Details for Your Kitchen Cabinets and Island
Take your kitchen to the next level with these special touches
Full Story
KITCHEN DESIGNPersonal Style: 50 Clever Real-Life Kitchen Design Details
Get ideas from savvy homeowners who have a knack for creating kitchens celebrating personal style
Full Story
HOUZZ TV LIVEA Houzz Editor Highlights 4 Unexpected Kitchen Design Details
In this video, Mitchell Parker talks about shiplap-style cabinet fronts, pressed-tin ceilings and other kitchen details
Full Story
KITCHEN DESIGNDetails That Count: 17 Designer Tips for a Great Kitchen
Get ideas for camouflaging your outlets, adding task lighting and avoiding common kitchen annoyances
Full Story
HOUZZ TV LIVEDesigner’s Family-Friendly Kitchen and Great Room
In this video, Amy Elbaum shows the storage and style details that create durable and fashionable spaces in her home
Full Story
KITCHEN OF THE WEEKKitchen of the Week: Good Flow for a Well-Detailed Chicago Kitchen
A smart floor plan and a timeless look create an inviting kitchen in a narrow space for a newly married couple
Full Story
KITCHEN DESIGN11 Must-Haves in a Designer’s Dream Kitchen
Custom cabinets, a slab backsplash, drawer dishwashers — what’s on your wish list?
Full Story
Patricia Colwell Consulting