


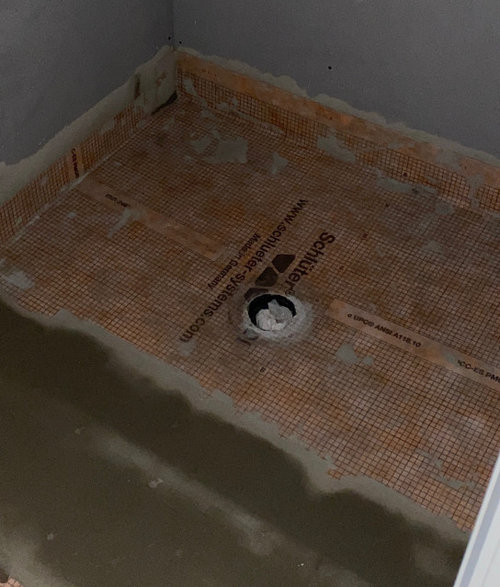
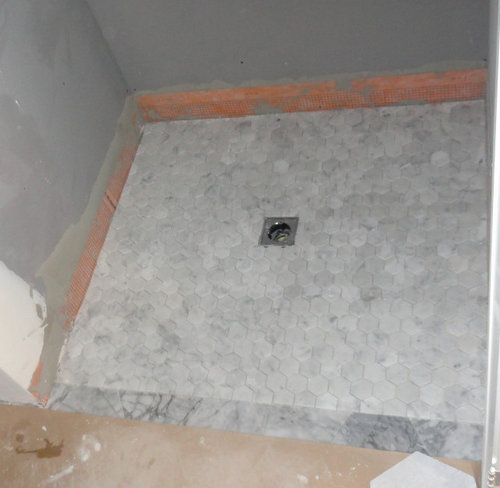
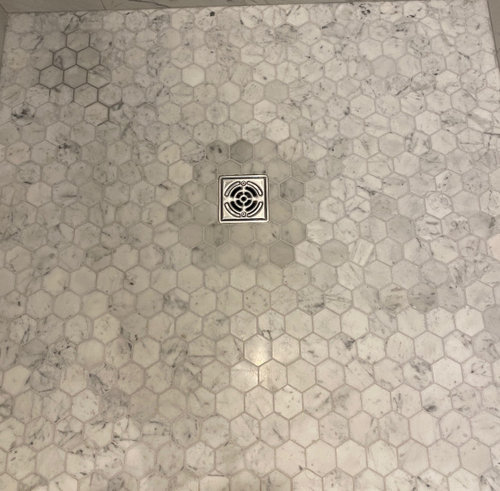
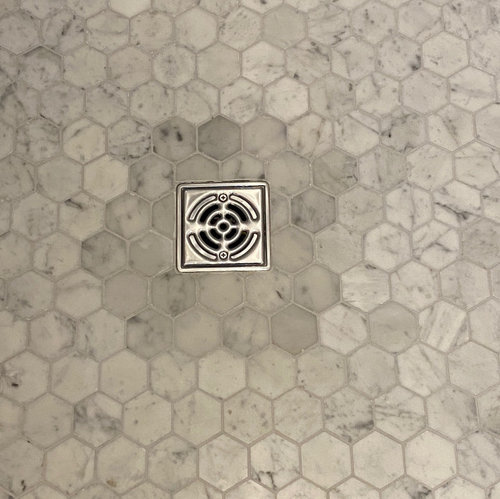
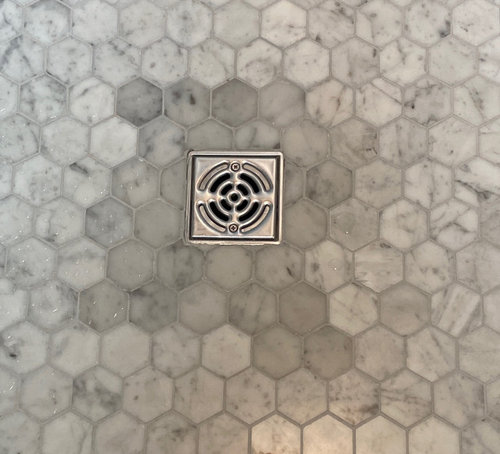
Problem with Carrara marble shower floor tile installation
dmmeurer
2 years ago
Featured Answer
Sort by:Oldest
Comments (30)

socalgal_gw Zone USDA 10b Sunset 24
2 years agolast modified: 2 years agodmmeurer thanked socalgal_gw Zone USDA 10b Sunset 24Related Discussions
Tile Experts: Spectralock with Carrara Basketweave Shower Floor
Comments (6)Thanks Shaughnn and Bill. I realize that I have to reseal the marble periodically, and thus, would reseal the grout simultaneously by default. The walls of the shower are porcelain subway tile. Does it make sense to use the epoxy on the walls and regular grout (my contractor prefers Custom Polyblend) for the floor and the back of the niches (which are marble basketweave as well)? Are there any concerns about regular grout sticking to the marble tiles? I have read that it is not recommended to get sealant on porcelain tile--it leaves a haze. I would prefer not to have to worry about the walls much with regard to mold growth, etc, and sealing the grout regularly without getting sealant on the tiles seems fairly labor intensive. Hence our leaning towards the epoxy grout. If we decide to go the epoxy route in the entire shower, how do we best protect the marble tile so the grout doesn't stick to it (i.e., presealing)? If we presealed the marble, would we also need to seal afterwards? Finally, do we need to do anything to protect the porcelain tile from the epoxy? DIYnewbie SF: My primary concern is that the Spectralock is waterproof (I assume) and thus would prevent any moisture that penetrates the marble tiles adjacent to it from evaporating resulting in mold growth underneath the marble. With porcelain tile, I don't think this is a concern since the tile is less porous than stone. Thanks to all for your help....See MoreCarrara Marble (Tile Shop) vs. Grecian Marble (Home Depot)
Comments (10)We used quite a bit of the grecian marble (incorrectly spelled greecian on the Home Depot website if you are searching for it). We used 12x12s that we cut into 6x12 bricks, 3x6 that we used in one bath as a herringbone pattern and one bath installed in a subway pattern, 6x6, chair rail and the 1x1 hex on the floor. In one shower we installed the Homedepot river rock/pebble mesh mosaic on the floor. We installed the tile in Feb/March so its been up for almost a year and it looks great. There is, however, a great variation in color. It is not a pure white. Some tiles are almost all gray and some have quite a bit of brown in them. Our installer was fantastic at pulling the out and arranging them so that the colors are scattered. We like the color disparity and movement but that's personal preference. Just don't expect a pure white. We did find several boxes that contained noticably thinner tiles (mostly with the 3x6 tiles). We simply packed these back up (save the little boxes it comes in)and returned them to Home Depot. This is a stocked item at our HD so it was easy to get if we needed more and easy to return. The hex mosaic tile was an online only item and we had a HUGE problem getting it delivered. It was through a freight company and they kept promising it and it wouldn't arrive. This could be just an issue in our area (Cincinnati) but it held us up for about a week. (It arrived two weeks later than promised). If I can figure out how I will post pictures as I think the bathrooms turned out great! No extra maintenance. Just sealed it. We were cautioned by the installer about rust which is impossible to remove from marble (often things like shaving cream cans are still metal and can rust). I'm sure newhomeowner is finished with the project but thought I'd throw in my 2 cents for anyone considering the grecian marble....See Morecarrara hex tiles on shower floor won't dry out
Comments (91)I feel for you, Marjie. It sounds like you have a leak that you need to address. But with only one full bath in the house you cannot afford the time for the whole shower pan construction. I bought my house in February, and they started the construction right away. I am still waiting for a few final details to be done, not to mention the correction for the shower problem. But at least we had a basement to live in while it was going on (complete with full bath!). Btw, our tub downstairs is that all-in-one construction (fiberglass? acrylic?), which I know isn't the dream shower you were probably thinking of, but one could probably be installed in a day or two without any tile work since it goes up the walls. It has nifty ledges on it. I'm curious what our pros on here think of that type of solution. You could still have a beautiful tile floor which wouldn't have the same waterproofing concerns. I spent a lot of money of my master bath, and I love my design, but the aggravation has not been worth it. And there is still no consensus on what is wrong, or the proper fix. Oh, and another thing. I prefer my new $36 shower head in the basement to the $500 one in the master bath that is too hard for me to turn the settings for the jets because my hands are too small. It wasn't like I got to see it before he installed it. This one does everything my expensive one does except that it doesn't have the slide bar: http://www.amazon.com/gp/product/B00JV5HO3G?psc=1&redirect=true&ref_=oh_aui_detailpage_o05_s00 Actually, it does more. You can run the rain shower head and the hand held at the same time....See MoreHELP Subway tile shower, marble hex floor but what for shower floor?
Comments (2)hello Jillianfl. Top photo is the one I used to remodle my last bathroom. I loved it and got lots of compliments on it. I'm now renovating a new home, and I have the same concerns about the shower flooring. Did you end up getting some advice? What did you end up going with? Thanks in advance!...See Moredmmeurer
2 years agodmmeurer
2 years agodmmeurer
2 years agodmmeurer
2 years agodmmeurer
2 years agodmmeurer
2 years agodmmeurer
2 years agocatbuilder
2 years agodmmeurer
2 years agodmmeurer
2 years agocatbuilder
2 years ago
dani_m08
2 years agodmmeurer
2 years agodmmeurer
2 years agocatbuilder
2 years agodmmeurer
2 years agodmmeurer
2 years ago
Sen Wen
7 months agolast modified: 7 months ago PRO
PROMint tile Minneapolis
7 months agolast modified: 7 months agoJake The Wonderdog
7 months agolast modified: 7 months ago


Related Stories
GREAT HOME PROJECTSHow to Install a New Tile Floor
Is it time to replace your tile floor? Here’s how to get it done, which pros to call and what it will cost
Full Story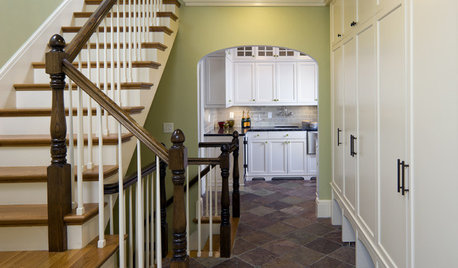
TILE6 Questions to Answer Before You Install Tile Flooring
Considering these things before tackling your floors can get you a better result
Full Story
FLOORSHow to Get a Tile Floor Installed
Inventive options and durability make tile a good choice for floors. Here’s what to expect
Full Story
REMODELING GUIDESContractor Tips: How to Install Tile
Before you pick up a single tile, pull from these tips for expert results
Full Story
KITCHEN BACKSPLASHESHow to Install a Tile Backsplash
If you've got a steady hand, a few easy-to-find supplies and patience, you can install a tile backsplash in a kitchen or bathroom
Full Story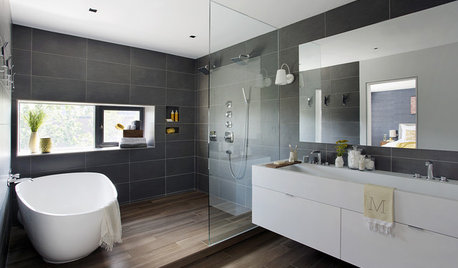
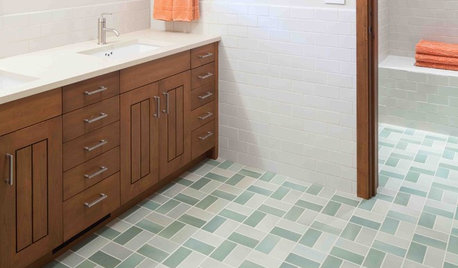
SHOWERSYour Guide to Shower Floor Materials
Discover the pros and cons of marble, travertine, porcelain and more
Full Story
BATHROOM DESIGNWhat to Use for the Shower Floor
Feeling Good Underfoot: Shower Tiles, Mosaics, Teak Slats and Pebbles
Full Story
REMODELING GUIDESYour Floor: How to Find Right Stone Tile
Get the Pros and Cons of Slate, Travertine, Sandstone, Marble and Granite
Full Story
REMODELING GUIDESTop 10 Tips for Choosing Shower Tile
Slip resistance, curves and even the mineral content of your water all affect which tile is best for your shower
Full Story
BATHROOM DESIGNDesigner Trick: Take Your Shower Tile to the Ceiling
Tile the whole wall in your shower to give your bath a light and lofty feel
Full StorySponsored
Franklin County's Preferred Architectural Firm | Best of Houzz Winner


catbuilder