


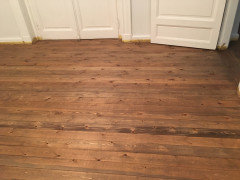
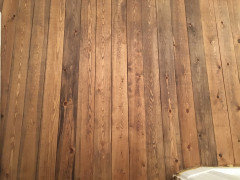
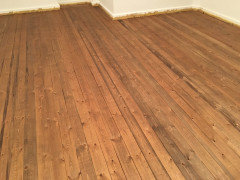
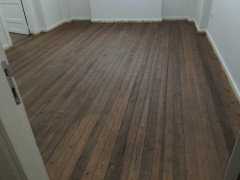
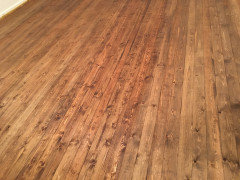
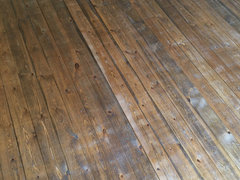
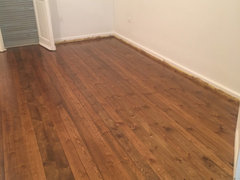
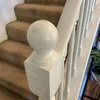
Water popping "time limit"
C A
2 years ago
Featured Answer
Sort by:Oldest
Comments (68)

C A
2 years agoRelated Discussions
pop up mister pops up but no water comes out??
Comments (1)Either your pump is not pushing any water, (probably because it lost its prime) or you have a broken line somewhere. If its a broken line, let it run awhile. You will get a very wet spot. That's where the break is....See MoreEven Watering Pop Up Spray Head for 4' Radius?
Comments (2)Water pressure? I am not sure. I would have to say really good though, Around 1,300 Gallons per hour from a standard 3/4" hose? I can run 8-10 Pop Up sprinklers on one line with no issues in a 1/2" supply. I tried those Rectangle spray heads, but the shape of my bed will not be compatible with those kinds of spray patterns. Maybe I will post a picture tomorrow? I was hoping there was maybe a head with a very small "cut" where the water is dispersed, most heads I see have a 1/8" [or so] opening, I think something smaller would [mist] the water more....See MoreDo water based aniline dyes "water pop" the floor?
Comments (61)Water based polyurethanes can be put down over raw wood. Period. That's what they are FOR. To STOP tannin pull (and nothing else) you can use a WOOD sealant. Shellac is a different fish...and it LOVES to turn orange...bright orange. Why would you keep trying that one?? Green is not part of pine's colour range. It is part of WHITE OAK'S colour range...which is part of where you are getting confused about water based over WHITE OAK... You have YELLOW WOOD. It is pale today. You can put down STRAIGHT water based (as we've been telling you all along). That water base will cause TANNIN pull. It will INCREASE the gold. You said you don't mind gold. So what's the issue? No one...and I mean NO ONE can tell you what will happen with YOUR pine, in YOUR country, in YOUR house, with YOUR situation in 10 years. You have a choice...put down something (like the Varathane Clear coat) or continue to have 30% use of your home because your floors are in a raw state. It's your choice. I wish you well but you are over thinking this....See MoreCopper pipes making popping/squeezing noises while hot water running
Comments (4)@Jake The Wonderdog Thanks. I didn't have the noises at all with hot water running at my previous place, but I did notice during a remodel that the pipes were floating instead of running thru studs. However that was only at one wall and I don't know the rest of the place. Any ideas how to get rid of the noises ?...See MoreC A
2 years ago
millworkman
2 years agoC A
2 years agoC A
2 years agoC A
2 years agoC A
2 years agoC A
2 years agoC A
2 years agoC A
2 years agoC A
2 years agolast modified: 2 years ago PRO
PROG & S Floor Service
2 years agolast modified: 2 years agoC A
2 years ago- PRO
G & S Floor Service
2 years ago C A
2 years ago- PRO
G & S Floor Service
2 years ago C A
2 years ago- PRO
G & S Floor Service
2 years ago C A
2 years ago- PRO
G & S Floor Service
2 years agolast modified: 2 years ago C A
2 years ago- PRO
G & S Floor Service
2 years ago C A
2 years ago- PRO
G & S Floor Service
2 years ago C A
2 years agoC A
2 years agoC A
2 years ago- PRO
G & S Floor Service
2 years ago C A
2 years agoC A
2 years agoC A
2 years agoC A
2 years agoC A
2 years agoC A
2 years ago- PRO
G & S Floor Service
2 years ago C A
2 years ago- PRO
G & S Floor Service
2 years ago C A
2 years ago- PRO
G & S Floor Service
2 years ago C A
2 years ago


Related Stories
GARDENING GUIDESGreat Design Plant: Anemone Canadensis Adds Pizzazz to Water’s Edges
Plant Canadian anemone along pond, lake or stream edges for a splash of white flowers in late spring
Full Story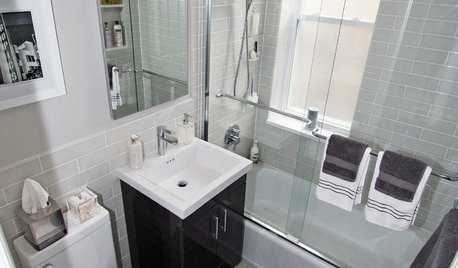
BATHROOM DESIGNWater Damage Spawns a Space-Saving Bathroom Remodel
A game of inches saved this small New York City bathroom from becoming too cramped and limited
Full Story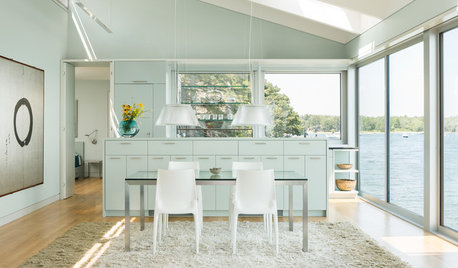
HOUZZ TOURSHouzz Tour: Battling the Tides Results in a Wondrous House on the Water
A complex construction effort pays off big-time with unobstructed views of Blue Hill Bay in Maine
Full Story
GARDENING GUIDES7 Ecofriendly Gardening Ideas That Also Cut Chore Time
Spend less time weeding, less money watering and more moments just sitting back and enjoying your healthy garden
Full Story
LIFETime Travel to Houzzers' Childhood Homes, Part 3
See postwar homes built by family members, rural farmsteads, cold-water flats and much more
Full Story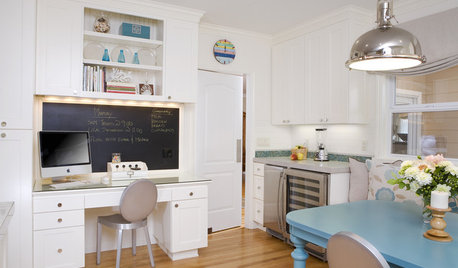
HOME TECHOpen Workspaces Let You Watch Over Kids' Online Time
Keep your children safe while they're surfing the Internet with desks and computers in accessible areas of the home
Full Story
GREEN DECORATINGEasy Green: Big and Small Ways to Be More Water-Wise at Home
These 20 tips can help us all make the best use of a precious resource. How do you save water in summer?
Full Story
PATIO OF THE WEEKWater and Fire Mingle in a Canadian Front Yard
If the illuminated moat winding through this Ontario patio doesn't dazzle you, the 8-foot-wide fireplace will
Full Story
GREAT HOME PROJECTSHow to Switch to a Tankless Water Heater
New project for a new year: Swap your conventional heater for an energy-saving model — and don’t be fooled by misinformation
Full Story
ARCHITECTUREWant to Live by the Water? What You Need to Know
Waterside homes can have amazing charm, but you'll have to weather design restrictions, codes and surveys
Full StorySponsored
Central Ohio's Trusted Home Remodeler Specializing in Kitchens & Baths

millworkman