


Which Instant Pot size for me?
bpath
2 years ago
Featured Answer
Comments (15)
Related Discussions
Do You Have an Instant Pot?
Comments (37)I have an instant pot and I use it at least twice per week. The food that comes out of the pot is excellent. I does save time on a lot of things. I also just find it really easy and non-stressful to cook in the instant pot. There's no checking on stuff, no basting, no stirring, no worries if you're not ready to eat as soon as the food is cooked or you get busy doing something else and forget about dinner (the pot will just keep the food warm for you, without overcooking), etc. I do not babysit the instant pot. When I first got the instant pot, I didn't quite know what to make of it and I didn't really see how it would be that helpful. But, after I started cooking different things in it, I really started to appreciate it. It just makes things easy. Of course, it's not for everything you might want to cook (nothing cooks everything). But, it does save time and effort on a lot of things and, for some things, it really does make them better. I don't find it hard to clean. A turkey breast takes about an hour, total, including the time for the pot to reach pressure. It takes about 15 additional minutes if you want to let the pressure release on its own vs manually releasing the pressure. The turkey breasts that come out of the pot are moist and flavorful, the best I've ever had. All I do is put a turkey breast into the instant pot, add about 1/2 cup of water, then turn it on and walk away. There's no checking, no basting, no worries that it'll get overcooked, no worries that it'll dry out. I just put it in and ignore it completely. If you eat skin, you should know that the skin does not brown in the instant pot. I don't eat the skin, so it's not a problem for me and I just take the skin off. My instant pot roasts are tender and also flavorful. It seriously makes the best pot roasts I've ever had. I sear the roast before cooking, which probably takes about 15 minutes. Then, I pressure cook for 35 minutes, open the pot and add potatoes, then pressure cook an additional 10 minutes. I like to let the pressure release naturally. Then, I take the roast and potatoes out (when I'm ready) and I make gravy right in the pot. It probably all takes about 1.5 hours from start to finish, but my time in the kitchen is minimal because I do not watch the pot. I just ignore it and do other things. Afterwards, there's only the one pot to clean (plus serving dishes). Artichokes take about 25 minutes, total (including the time for the pot to reach the appropriate pressure) and my house doesn't get all steamy and smell like artichokes cooking. When I want chicken breasts to shred, I can have them in about 20 minutes, or less (this includes time for the pot to reach pressure). My best chicken chili comes out of the instant pot, made with dried beans, and the whole thing might take about an hour because I cook the chicken breasts in the pot first, then the beans, then combine (with the rest of the ingredients) and cook for a few more minutes. I have actually been thinking seriously about getting a second instant pot so I can have both of them going at the same time! :-)...See MoreSo good, there wasn't even a picture! Instant Pot cheesecake!
Comments (18)Jerzeegirl, I'd jury-rig a sling for the INSIDE of that 6 x 3 pan. For example, make a wide sling out of foil and put it inside the 6x3 pan so it overlaps and flaps over the pan. Then, line the pan with parchment over the foil sling and make the crust and press it into the parchment on the bottom, and then make the cheesecake batter and pour that in, too. You'll have to run a knife around the edge in order to help get the cheesecake out of the pan. If you think the crust will only be on the bottom and won't go up the sides of the pan, then you can also cut more parchment into a nice long strip that's 3 inches tall, and put it around the sides of the pan so your batter will stay inside the parchment and not be pressed up against the foil sling. (or you can run a knife around the edge of the pan when it's done) With this foil sling, especially if it's wide for stability, you can just pull the cheesecake out from the pan you have, then peel away the parchment that's on the side--you'll still have the parchment circle on the bottom, but the cheesecake will be extricated from the pan. Using the trivet that came with the IP (make sure the trivet handles are UP!) is an easy way to lower the cheesecake into the IP, and when done, to carefully remove the cheesecake from the IP--just be sure the trivet handles are cool enough to touch. Be careful, though, because the cheesecake pan can slide! I hope I've explained it ok. If a visual would be helpful, google "youtube foil sling for instant pot" to get you started with the idea of things, but you'd have to make it suit your needs as I've tried to describe above. Gosh, I used so many words - I hope I didn't confuse you!...See MoreInstant Pot Question
Comments (39)From what I read on the Instant Pot community FB site, you shouldn't have opened it until it released the pressure itself - NPR / natural release. That seems to be especially important for meat. It continues to cook while it is releasing the pressure. on things like pasta, you do a QR / quick release - often in several quick, short releases. pasta that stays under pressure once it beeps, will get mushy. I've been reading on several IP FB sites this past month and there is a wealth of info on them on how (and what) to cook in the IP. I've read on there of numerous users who have cooked a small chicken whole in their pot. It depends on the size of the chicken and the pot. I bought a 3 qt and some have cooked a whole chicken in that size! That's not something I'll ever do. I'd only do 2-4 chicken breasts and most of that would be cut into strips to freeze. There's a recipe for I think it's called Mississippi pot roast that many just rave about and so I'll try that - maybe with a very tiny piece of roast. More so than meat (I don't eat that much meat), I got one for making yogurt and possibly cottage cheese. Many say they use the plain yogurt sometimes in place of sour cream. I also want to be able to cook beans without soaking them and make my own refried beans (no more canned beans). For those who make bread, you can proof it in the IP if it has the yogurt button. I think the LUX is the one that doesn't have it. It can still be used to make yogurt, but not to proof bread. hard boiled eggs usually take 5 min cook time and 5 min of release time and then 5 min in cold water. From what I read, the shells easily slip off of the egg. you can go to the site and read. I think you need to 'join' (which is no big deal to do) in order to ask questions or comment on posts. I had to join on other sites just to read the posts. They also post links to many of the better recipe websites. I'll post a few in a bit if I can find them. It's a fast moving site but most questions are asked frequently by those who have just received their new IP (and answered by those who are seasoned in using it) . You can just scan down the pages and look for things you might want to cook. I skip over a lot of them because they aren't things I'd ever make for myself. In the past week they had a lot of posts on making dog food in the IP - that's something I am interested in for my furgirl. tomato products can easily cause a burn notice as can sugary sauces / liquids. and if you're making something like spaghetti, there's an order to how you layer them in the pot for pressure cooking. Always water on bottom, then any meat (on the trivet), pasta is spread out over that with the sauce poured over that. they often say to then add the water around the edge of the inner post / food so that it reaches the bottom of the pot (which is why I listed it first - it needs to be on bottom in order to heat and create the steam). And do NOT stir it or mix them together. here's one sample on cooking chicken that I copied out (making pages of notes for myself) - Moist, Sliceable chicken breast using a 6 QUART Instant Pot 1 minute per oz This recipe is for a 9 oz breast..Manual 9 minutes with a 10 minute NPR 4 to 6 ounce breasts..1 minute per ounce with a 5 minute NPR 7 to 11 ounces breasts.. 1 minute per ounce with a 10 minute NPR Ingredients Fresh or frozen 9 ounce chicken breast 1 cup of water Steps Add 1 cup of water to your pot Put your trivet in with the breast on top. You'll need to know the weight of the breast Close and seal your pot Set your pot to manual 9 minutes Allow for a 10 minute NPR sites often posted as good and safe recipes are Amy and Jacky, this old gal and pressureluck. and I think all 3 of those have videos for newbies on how to use the IP - things to know before you start cooking. I'll be watching those in the next few days before I even run the water test. there are many more recipe sites listed on it also, I just don't remember them all. it's also a great source for when things go wrong - like the burn notice, steam coming out from under the lid, it won't come to pressure, etc....See MoreHuge Instant Pot Cheesecake Failure
Comments (34)I think in the past year I have made 6 to 7 cheesecakes and never had a failure. As for the water drops on top, you can cover the pan with some foil. Here is my basic recipe. CheesecakeThis recipe looks long but it’s really 3 simple steps: make the crust, make the filling and make the topping. The instructions are just detailed so that even a first-timer can have a perfect result. Crust:1 cup graham, chocolate or vanilla waferscrumbs 2 tsp sugar 3 Tbsp melted butter Filling:2 8-oz pkg cream cheese, (low-fat works, too) 3/4 cup sugar (sugar substitutes work, too) 2 eggs (warm 5 minutes in a bowl of warmwater) 1/2 tsp vanilla 1/8 tsp salt (1-2 tsp grated lemon zest - optional) Topping:1 cup sour cream or plain yogurt 2 Tbsp sugar 1/2 tsp vanilla. The recipe and cook times are for a 7” cheesecake pan. Adjusted times for other pans are included below. It is not necessary to line the side of the pan with parchment paper. It buckles and mars the edge. My favourite is the Fat Daddio 7” push pan but any pan will do. No need to cover it with foil before cooking, either. This is a very simple recipe. **Important: Warm the cream cheese. Trust me on this. I've been making these for 45years. It's MUCH easier to blend if it's warmer than room temperature and it only takes a few minutes. Put the wrapped cream cheese in a ziplock bag, but don't seal it. Push it into a sink or bowl full of hot tap water to force the air out and THEN seal it. Weight it down with a plate for about 15 minutes. It will be very soft and easy to blend.Lining the bottom with parchment is optional. Spray it with baking spray if you prefer. And don't press the crust in too firmly. It will be easier to serve if you use a gentle touch. CRUST: Mix ingredients with a fork and gently press it in the bottom of the pan and up the sides a bit if you like. Put it in the freezer or if you prefer, bake it at 350 for 9 minutes, then cool completely. FILLING: Mix all ingredients except the eggs until completely smooth. Add the eggs and beat until just incorporated. (Don't fret too much about overbeating. This recipe is practically bulletproof.) Pour the filling into the crust.Put 1 1/2 cups water and the trivet into the IP. Place the cheesecake on the trivet, close the lid and set the valve to Sealing. Hit Pressure Cook (or Manual) and use the + and – buttons to get to 26 minutes for a 7-inch pan. This will produce a perfect, creamy filling. If you prefer a denser texture, cook it for 28 minutes.- - -PAN SIZE AND COOK TIMES:6-inch pan --- 29 minutes (31 for dense texture)7-inch pan --- 26 minutes (28 for dense texture)8-inch pan --- 24 minutes (26 for dense texture) **see below Individual ramekins or mason jars --- 10 minutes For 1 1/2 times the recipe:7–inch pan --- 29 minutes (32 for a dense texture)8-inch pan --- 27 minutes (30 for a dense texture)For 2 times the recipe:8-inch pan --- 33 minutes (35 for a dense texture)- - -When it beeps that it's done, leave it for a 15-minutes Natural Release. Then flip the valve to Venting for a Quick Release. When the pin drops, take out the cheesecake.It will appear "jiggly." That's GOOD. It will firm up as it cools. It may have some condensation on the surface. If so, gently blot it with a paper towel.Leave it to cool on the counter for an hour. It will settle down and flatten out. Then cover the cheesecake and refrigerate it in the pan for at least 4 hours, preferably overnight. In my opinion,this is the hardest part of the whole recipe... the waiting...See More
bpath
2 years agolast modified: 2 years agobpath
2 years agobpath
2 years agobpath
2 years ago
maddielee
2 years agobpath
2 years agobpath
2 years agobpath
2 years ago
teeda
2 years ago
Related Stories
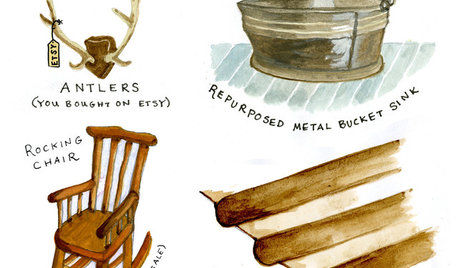
RUSTIC STYLE12 Must-Haves for an Instantly Rustic Home
No need to wait around for just the right hand-me-downs and woodsy finds — with these pieces, you can fake it till you make it
Full Story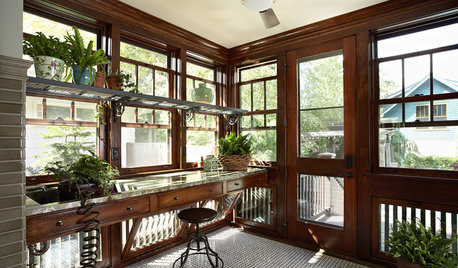
STUDIOS AND WORKSHOPSRoom of the Day: Potting and Puttering in Toasty Warmth
Minnesota winters are no match for this heated potting room, mudroom and changing room, which even has a dog shower
Full Story
REMODELING GUIDES7 Instant Backyard Getaways
Could one of these prefab studios be the extra ‘me’ space you need?
Full Story
COLORWelcome Yellow Around Your Home for an Instant Lift
Keep on the sunny side with shades of yellow from buttery and soft to dynamic and bright
Full Story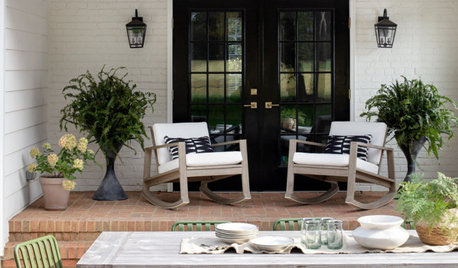
SUMMER GARDENINGHow to Water and Refresh Your Potted Plants Over the Summer
Keep container gardens looking lush by cooling them down when temperatures rise and by giving them a seasonal spruce-up
Full Story
OUTBUILDINGSA Storybook Potting Shed Rises From a Dirt Lot
Breathtaking views and specialty materials create a memorable structure on a working avocado farm
Full Story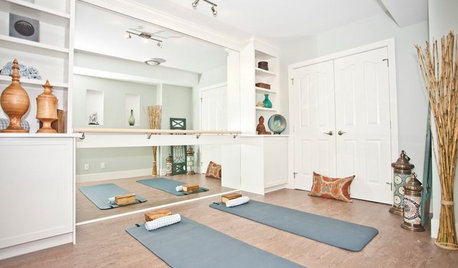
FUN HOUZZHouzz Quiz: How to Find Your ‘Me Time’ Place
Looking for the best place in your house to soothe away your stress? We’re here to help
Full Story
KITCHEN DESIGNOpen vs. Closed Kitchens — Which Style Works Best for You?
Get the kitchen layout that's right for you with this advice from 3 experts
Full StoryKITCHEN DESIGN12 Great Kitchen Styles — Which One’s for You?
Sometimes you can be surprised by the kitchen style that really calls to you. The proof is in the pictures
Full Story
KITCHEN DESIGNHouzz Quiz: Which Kitchen Backsplash Material Is Right for You?
With so many options available, see if we can help you narrow down the selection
Full Story

teeda