


Did you have your cabinets professionally painted?
goodman_n
3 years ago
last modified: 3 years ago
Featured Answer
Comments (9)

goodman_n
3 years agoRelated Discussions
How many of you have your gardends designed professionally?
Comments (22)Buford, that is quite a transformation! I think you definitely got your money's worth! And Steve, that's funny.....but I can see a number of front yards in our neighbourhood with just that scenario. Maybe not with roses, but other plants. I have thought of the idea of a landscape designer to have a look at our place. It's a difficult location, it's on a slope, and the grade is steep in some places. But what has stopped me so far? 1. My yard is a sanctuary where I keep myself involved and busy. I always have to have a project active at all times. For example, I just completed an arbour early this year. Installed flagstone paving. Put in a shed. Cleared some climbers. Got rid of topiary dwarf cedars. Etc. Next projects - putting in paving behind the garage, installing water reservoirs, reroof the green house. Those are the things I enjoy and those are the projects that keep me going. I simply can't fathom the idea of having someone else take the pleasure of the thinking and conceiving and labour for me. It's like a child paying someone else big bucks to snatch the candies out of his/her very own hands! 2. My yard is a laboratory of continuous experimentation. I am a restless gardener. I find myself constantly doing "something" to the yard - including ripping up something and implementing somethng new in it's place. I can't imagine paying thousands of dollars to have someone else design and landscape the property - because I know that in the years to come, I will find myself systematically dimantling the very work that I paid big bucks for. 3. I am a plantaholic - a plant hoarder. My backyard is more of an arboretum than a garden. I will probably go into deep depression if any landscape designer should come up with a scheme that is going to mean losing some of the plants. On the other hand, I have many friends who simply are not into the kind of gardening stuff that I do. For them, the somewhat haphazard style of our property is simply not their cup of tea. They want something that looks good, without having to take the time out of their busy schedule to either design or implement landscape plans. Almost all who have used landscape designers and landscape contractors have been happy with the result. The only thing they uniformly find hard to swallow is the cost involved in getting a landscape scheme designed and implemented. And lets give kudos to the landscape designers - good designers can make a huge difference to the final outcome. Think of all the factors that they have to consider - color, texture, line, form and scales, and the principles of unity, balance, transition, rhythm, proportion, etc. And then they have to unify function with style. I have been reading Robin Willams' books on garden design, but I still have difficulty looking 10 feet beyond my immediate surrounding - let alone come up with a master scheme for the whole yard!...See MoreHave any of you had your couches professionally cleaned?
Comments (8)Lindac- I'll check to see if we have a Service Master here. Mboston- I just sold my microfiber set- it cleaned up like a dream. Everything just wiped right off. To add to the spots, 2yr old DD is sick and vomited on a cushion this morning so any advice to get rid of that smell would be greatly appreciated. I cleaned up the cushion with a damp towel and it isn't bringing out any more dirt, but I can still smell it. I thought of using febreeze but i'm afraid it will make it worse....See MoreAnyone professionally have oak finished cabinets painted white
Comments (20)Here is how I would expect a pro to spray paint kitchen cabinets. A brush painted job would differ slightly in that you wouldn't hang the doors to paint. You'd place them on a work table or easel instead. It's time intensive work, and should take 7-14 days to accomplish completely and cost between 3K-7K depending on kitchen size and amount of detail in cabinets. Remove doors and drawer fronts. Remove hinges and hardware. Clean with TSP (tri-sodium phosphate) Rinse and let dry. Scrape any loose finish. Fill any damaged spots or hardware holes that won't be reused. Sand fill smooth. Scuff sand the rest. Tack off dust. Hang in dust free paint booth with wires through hardware points. Tack off dust again. Spray with alkyd based primer. Scuff sand again. Tack off dust. Spray with second coat of primer. Spray with first finish coat of latex enamel. Spray with second coat of latex. If glazing is to occur, that is next. Spray with conversion varnish. (If being brush painted, this step is typically skipped.) Add more molding or decorative details to boxes, filling nail holes and sanding smooth. Repeat prep process with face frames and exposed cabinet sides using plastic to create a spray booth on site. If interiors are to be done, they are done before face frames and sides. Interiors are difficult, and add both time and expense to the job. Allow everything to fully cure. Clean hinges and hardware and clear coat if you're keeping the old hardware. Install new (or old) hinges and hardware. Re-install doors and drawers and adjust for proper clearances. If you are receiving a job without this amount of effort, then you are not receiving a quality professional job....See Morebuehl, did you have a tutorial on your refrigerator cabinet?
Comments (5)Not Buehl, but I can probably walk you through creating a basic fridge surround if that's what you are asking here. Do you have an extra deep over the fridge cabinet (what size is it?) and 3/4" thick 30" deep x your cabinet's top alignment height side panels plus some scribe molding, and a touch up kit? The place to start is your fridge's utlity connections. You want a recessed box for the water supply and the power supply. If you are on an outside wall where you can't afford to compromise the insulation, you can always inset the box into the adjacent base cabinet in the run. This will keep the plug and water line from interfering with pushing the fridge all the way back into it's cubby. The next place to start is with your fridge's specs. Some fridges are 35 3/4" wide and meant to go into a 36" space. Some require more space. Check the clearance required at the top as well. Some brands need more than others. If your fridge is one that needs a larger opening than 36", you will have to attach fillers to the 36" cabinet box until you have the recommended width. Start with the first tall 30" deep panel next to the base cabinet. Attach the panel to the adjacent base and wall cabinets. If you are using a counter depth fridge, the panel only needs to be 24" deep. Ideally, the panel should cover the entire box of the fridge, but as some are deeper than others, check your fridge's specs. 30" is a good "standard" depth that pretty much covers most fridges sold today. You will now need to install blocking at the top back to push out the over the fridge cabinet to the actual depth of the refrigerator. The bottom alignment height of the cabinet should be 72", so that is where you take a 2"x6" on edge and pre-drill for lag bolts to screw into the studs to extend the depth of the studs. After you have the studs extended, cover them with 1/2" plywood. You want the overall depth of the blocking plus the cabinet box to equal to the depth of the side panel, and if you custom cut the side panel to match your fridge, you may have to do some fiddling with the blocking here. The overall plywood covered blocking should equal the width of the fridge cabinet. I have had some installer use the build up area where the blocking is located to install the recessed power and water supply. It's often better to do that than to impinge on the storage in the adjacent cabinet. It all depends on how you have to run the electricity and water. Now you're on to the other side of the enclosure. Take the second panel and attach it to the blocking. If you have a second cabinet on the other side of the recess, then attach the panel to the base and wall cabinets there. If you don't have cabinets there to stabilize the panel, then you may want to install a bit of very small blocking into the interior at the rear wall to give you something to nail the side panel to. OK, now you've got your cubby. Using a jack or several grunt labororers, lift up the fridge cabinet and attach it to the blocking at the rear. If you've done your job right and made sure everything is plumb (that's a BIG deal for a cubby) then it should just slip between the side panels perfectly and be level without any shims or tweaking. Then attach it to the side panels just like you would attach wall cabinet to wall cabinet (behind the hinge plate to disguise it), making sure to use short enough screws so as not to screw through the panels. Cover the front cut edge of the panel with scribe molding as well as where the panel joins the wall between the base and wall cabinets. Some people will use scribe molding at the floor level against the floor and others will use 1/4" round or baseboard molding. It's an aesthetic choice, but you want to cover the panel/floor transition. Install the crown molding. There will be an approximate 2" gap between the bottom of the cabinet and the top of the fridge (because standard fridge height is 70)-71") and you can attach light rail molding to the cabinet or a horizontal filler on a piano hinge that you can flip up in order to store some cookie sheets or something on top of the fridge. Use the touch up kit's fill stick to fill any of the pin nails, and then you're ready to plug in the fridge and attach the water line and roll it back into it's cubby....See More101stretired
3 years agoHelen
3 years agolast modified: 3 years agogoodman_n
3 years agogoodman_n
3 years ago
Jessica
3 years agoHelen
3 years agolast modified: 3 years ago
E Ktz
2 years ago
Related Stories

MOST POPULARFrom the Pros: How to Paint Kitchen Cabinets
Want a major new look for your kitchen or bathroom cabinets on a DIY budget? Don't pick up a paintbrush until you read this
Full Story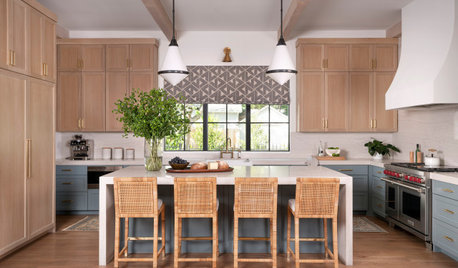
KITCHEN CABINETSPainted vs. Stained Kitchen Cabinets
Wondering whether to go for natural wood or a painted finish for your cabinets? These pros and cons can help
Full StoryKITCHEN CABINETSKitchen Cabinet Color: Should You Paint or Stain?
Learn about durability, looks, cost and more for wooden cabinet finishes to make the right choice for your kitchen
Full Story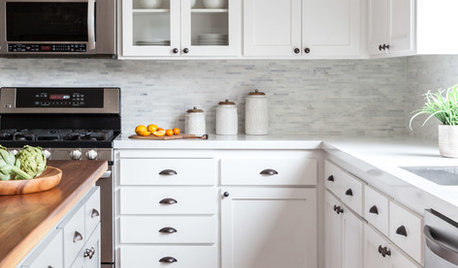
KITCHEN CABINETSHow to Update Your Kitchen Cabinets With Paint
A pro gives advice on when and how to paint your cabinets. Get the step-by-step
Full Story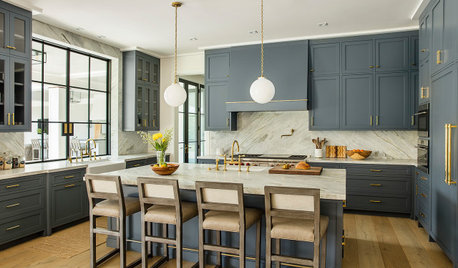
KITCHEN CABINETSNew This Week: 6 Blue Paints for Stylish Kitchen Cabinets
See how undertones in blue cabinets create diverse styles and moods, from playful and fun to daring and dramatic
Full Story
COLORFUL KITCHENSCabinet Paint Colors That Are Anything but Neutral
Craving some color for your kitchen? Consider these bright choices for your cabinetry
Full Story
PAINTINGWhat to Know About Milk Paint and Chalk Paint — and How to Use Them
Learn the pros, cons, cost and more for these two easy-to-use paints that are great for giving furniture a vintage look
Full Story
MOST POPULAR8 Great Kitchen Cabinet Color Palettes
Make your kitchen uniquely yours with painted cabinetry. Here's how (and what) to paint them
Full StoryWHITE KITCHENSWhite Cabinets Remain at the Top of Kitchen Wish Lists
Find out the most popular countertop, flooring, cabinet, backsplash and paint picks among homeowners who are renovating
Full Story
PAINTINGShare Your Biggest Paint Color Mistake
Did a shade that looked perfect in the store turn out to be less than perfect on your walls? Let’s swap stories!
Full Story


101stretired