


ikea install issue - need extra wide side panels -or better ideas?
mh smith
3 years ago
Featured Answer
Comments (8)
Related Discussions
Ikea flooring issues ... help!
Comments (6)We are having the exact same issues. We had previously laid the exact same IKEA laminate, Tundra for a friend in her kitchen when we visited her in California with no issues whatsoever. It went down great with very little issues. That is one of the reason we picked Tundra for the basement project. We also had previously laid hard wood floors and laminate in our current home as well and it looks great. Our basement is approximately 25 x 38 feet. We have the dri-core already down over the concrete. Our home was built about 10 years ago and the basement is dry. We purchased the laminate in March 2009 from IKEA. We purchased the form and a laminate laying kit from IKEA too. We started installing the Tundra laminate May 2010. The flooring bundles were in the basement the whole time so we don�t think there was a climate acclimation issue. When we started installing the laminate, we had problems right away. Laminate did not seem to click in easily at all. When you clicked in one side of the laminate, the other end would pop out. Or you might get to two or three rows and a gap would appear. You would have to go back and try and tap it in. It was so time consuming and hard to deal with. No new box seemed to be any easier to install than the last box. We finally gave up about half way through the basement when 5 or 6 rows back a larger gap appeared. We did stagger about half a board so that no seems were close. We also used the spacers around the boarders from the IKEA laminate kit. We are at a loss as to what might be the issue. Any help would be greatly appreciated. PS We are about ready to pull our hair out!!!!!!!! IKEA offered to take back the boxes that are not open but that would mean $900 loss. Help! Can you glue it down what?...See MoreIKEA Kitchen Plan - Update w/better pics
Comments (8)Practigal makes a good point! If I did that I could stay within the same 36 inch footprint and probably not have to notch for the sink - it could just be a little off center of the right side door. I don't really like that idea though - not so much for due to the mounting of the trash slides as Salex mentioned (the one I am using mounts on the base only), but because I see how dirty my trash cabinet seems to get, especially when the trash isn't emptied when it should be! And I was planning to use the cabinet under the preps sink for things like colanders and maybe even cutting boards. But is something to consider! Herbflavor mentioned the microwave location. If it were not for the group here, I probably would have stayed with an over the range microwave like the one we have in the current kitchen (and it is vented to the outside). Instead, I felt "required" to get a "real" hood for over the range. We did buy one off a display so we already have it. But then I did struggle with where to put the microwave. I went back and forth for a while about whether I should try to use a tall cabinet on the end of that run where the microwave is shown and somehow build the microwave into that cabinet. But it seemed like a lot of work and not much usable space gained. Raising it off the counter on a shelf would leave an unusable area underneath and/or reduce the accessible space in the wall cabinet above it. I do have a lot of counter space where it is located now that probably will not be needed for anything else. And having it on the counter will make it easier to replace with another model (size) later on if it fails. And to be frank, we don't use the microwave much at that house since we cook outdoors a lot. If it were just us in the house (no renters), I would actually be happy with it being in the pantry. As a matter of fact, I think I will make sure there is an outlet there in case we ever want to put it there! In any case, I would be interested to hear feedback on the microwave from others. Or feedback on whether a tall cabinet might be better for that spot. We could use a 24" cabinet, but I would want double doors on top which I think would be a PITA - the 24" single door would have such a wide swing! Salex/herbflavor, yes the DW is to the left of the sink. I plan to put my dishes in the cabinet above and silverware in the 18 inch drawer bank to the left of the DW. And the trash pullout under the sink will be on the right side - bummer there is no left drain sink option but we are using a the rear drain Silgranit super single and have determined the garbage disposal and trash pullout will both fit. The DW cannot go on the right due to the shallow depth counter there. Its on the right in the current house, and when it's open, no one can go in/out of the entry door! Even closed, it creates an obstruction as you enter the door....See Morehelp me with these IKEA deco strips - unusual idea for install
Comments (11)I hear you. I'm a visual person which is why I was trying to find a photo, and I finally found something similar from an Inspired Kitchen photo. It appears they have done similar in this photo, but it's not close up enough to tell exactly what was used. It does look as if they just extended the cover panels above and placed trim in between. The panels are sized to extend 2.5 inches beyond the bottom of cabinet, and the trim is 2.5 inches. These look to be taller than 2.5 inches, but possible they used 30" IKEA cabinets and cut the tall panels to fit whatever trim piece this is. I suppose I could just try it out and see what it looks like above one cabinet row without actually screwing the panel in. I just wondered what anyone thought about the look. I'm looking for a very simple and plain idea for trim because of the shaker style doors....See MoreNeed help: Window treatment for extra wide picture window.
Comments (12)Thank you all! My most urgent needs are night privacy and cool temp insulation. I'm leaning towards drapes on the sides to soften the space and a blind in the middle to lower at night. As for all the wood, I agree, it's too much and I've been considering painting the built-ins. I'm just worried I won't like it afterwards and can't unpaint it. It's been a tough room to deal with altogether. I appreciate all the advice!! Please keep it coming!...See More
Anna (6B/7A in MD)
3 years ago
mh smith
3 years agowiscokid
3 years agomh smith
3 years ago

Related Stories

BATHROOM DESIGNShould You Install a Urinal at Home?
Wall-mounted pit stops are handy in more than just man caves — and they can look better than you might think
Full Story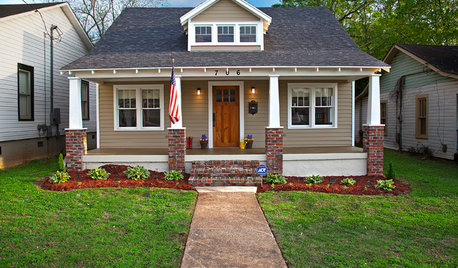
MATERIALSThe Most Popular Roofing Material is Affordable and Easy to Install
Asphalt shingles, the most widely used roof material in the U.S. are reliable and efficient, and may be right for you
Full Story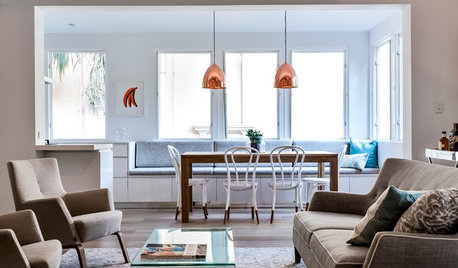
DINING ROOMSNo Room for a Dining Area? Install a Banquette
With built-in banquette seating, you can squeeze in a place to dine, even in a small space
Full Story
FENCES AND GATESHow to Install a Wood Fence
Gain privacy and separate areas with one of the most economical fencing choices: stained, painted or untreated wood
Full Story
KITCHEN BACKSPLASHESHow to Install a Tile Backsplash
If you've got a steady hand, a few easy-to-find supplies and patience, you can install a tile backsplash in a kitchen or bathroom
Full Story
PETSHow to Install a Dog-Washing Station
Find out the options for pet showers and bathing tubs — plus whom to hire and what it might cost
Full Story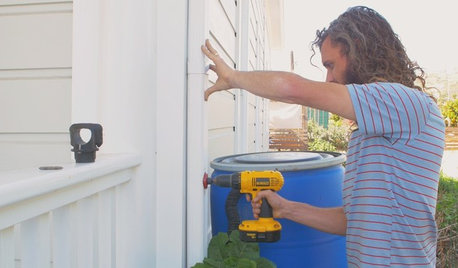
HOUZZ TVHouzz TV: How to Install a Rain Barrel
This DIY tutorial shows how easy it can be to capture rainwater from your roof to use in your garden later
Full Story
LIGHTINGReady to Install a Chandelier? Here's How to Get It Done
Go for a dramatic look or define a space in an open plan with a light fixture that’s a star
Full Story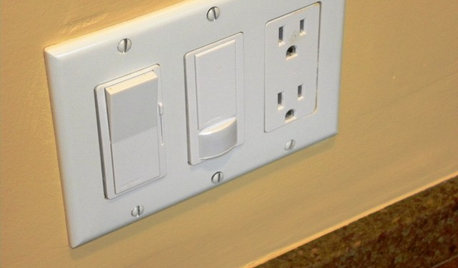
GREAT HOME PROJECTSHow to Install a Dimmer Switch
New project for a new year: Take control of your lighting to set the right mood for entertaining, dining and work
Full Story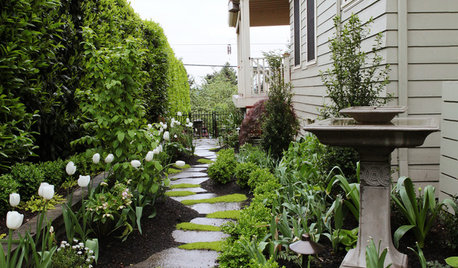
MOST POPULAR25 Ideas to Perk Up Your Side Yard
Turn this often overlooked area into an enticing and useful outdoor space
Full Story

Joseph Corlett, LLC