


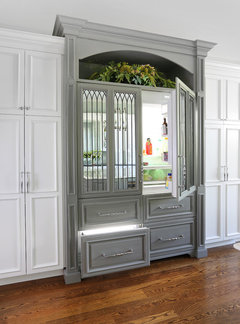
Can somebody begin to explain how 8 glass cabinet doors cost $13,000
Emily Franklin
3 years ago

Featured Answer
Sort by:Oldest
Comments (16)

herbflavor
3 years ago PRO
PROJoseph Corlett, LLC
3 years agoRelated Discussions
Can someone explain the JD craze to me??
Comments (139)Well guys, We still live in the house we bought to in 2014 in order to move Donna's aging mom who was (at that time) showing symptoms of dementia. The dementia progressively took its toll on her mind, and then in October of 2016, she was diagnosed with stage 4 bladder cancer. She lived until early February 2017 and died here at home with us, as she wished and she had made us promise not to let her die in a hospital or nursing home. She died surrounded by family and a hospice nurse was present. I only relate this story because Donna's mom's health situation was the reason we bought a house big enough for all of us to live in, under one roof.........and the subsequential multiple projects and renovations.........were the reasons I dropped off of the forum. As soon as we moved into the house, I had a long list of things that HAD to be done, and a long list of lesser things we WANTED to do......so my time on the forum just could not be justified.....I simply had too much to do. The first things to be done were to come up with safety measures to help prevent an elderly woman with dementia from injury by being proactive about preventing her from "escaping" the house. I had to equip all exit doors with a deadbolt lock keyed inside and out (all keyed alike) and we had to come up with a nearby "hiding place" close to each lock location for spare keys in case of emergency. This house has a full basement with stairs, and we did not want her mom to have access to the stairs, so I included the same deadbolt on that door too. The sliding door to the second floor deck was a challenge in that it had a key lock on the outside ONLY with just a paddle lock lever on the inside. I had to come up with a way to make that door lockable with a key from the inside. My solution was to remove the lock assembly from the door and "reverse" location of the paddle lever plate and the key tumbler plate, so that the key tumbler would be on the inside. I stripped out the guts relating to the paddle lever and covered the hole where the paddle shaft came through with a small brass plate.....heavily epoxied in place from the backside (inside the door). All you can see from outside is a small hole blanked off with brass. The deck is on the second story on the backside of the house with stairs leading down the the pool, which is enclosed inside a fence, so we never use the sliding door as a "key entry" point anyhow. Then there is the attic storage space epic adventure. The attic space when we bought the house, was almost non-existent. There was a total of 4 sheets of 4' X 8' plywood (128 sq. ft.) on the joists at the top of an extremely rickety pull down wooden stairs. Stairs were the first to go. Replaced with a sturdy aluminum pull down folding stairs. Then I hauled 22 4' X 8' sheets of 3/4 OSB into the attic space.(each sheet was cut in half lengthwise to fit through attic stairs opening). We now have about 800 sq. ft. of usable attic storage space. I built 2 inverted trusses (strong backs) to attach to the joists on the sections spanning the 12' kitchen and the 18' den. These trusses ensure that the load imposed by the extra OSB and stored material are ultimately borne by the load bearing walls at the hallway, den, and both walls of the kitchen. The addition of the trusses assures that the ceiling joists do not assume a sway back shape over time resulting in cracked ceiling gypsum board. I assembled the trusses in the attic and fabricated them to have about 1/2" "preload bow" on the 18' truss and 3/8" preload bow on the 12' truss. This was to ensure that the trusses were actually carrying some load right from the start. After I got the trusses built and fastened onto each joist they served with metal strapping, I built a 30' long, 2 tier shelf system into the truss structures. Shelves are 24" wide and the bottom shelf is 20" off the floor, while the second shelf is 46" off the floor, so you have the attic floor under the shelves, and the 2 shelves themselves for storage, That yields 180 sq. ft. of space, plus the remaining 720 or so sq. ft. of attic at various head space. The tallest overhead clearance is about 6'2" at the rafter collar ties (and I added collar ties so that every rafter has a tie, instead of every third rafter as the house was built). There were 4 rafters that had "split" open due to improper orientation by the rough carpenters. They had placed rafters with knots situated on the lower chord of the rafter (tension side), which is a no-no. These rafters had to be jacked back into place and reinforcement panels of 3/4" plywood "scabbed" onto each side, glued and screwed. The original scheme had the ventilation exhaust fans from both bathrooms simply dumping into the attic space, another no-no. I extended the exhaust hoses over to the gable area of the house and busted through the brick and installed 2 bona fide exhaust hoods with insect screens. On the longest hose, which was a 4" hose....I built a booster fan box in the middle of that run and wired it so that it turns on when the original fan turns on. I felt that a 16' run of 4" hose would probably need all the fan power it could get to keep from simply "stalling out". The other hose was 6" and only 8' long, so I felt it was adequate with no additional help needed. I could go on and on about other projects, but these were some of my most major undertakings, Now, about my employment. I no longer work as a forklift mechanic in the shop. In midsummer 2015, I took over running the parts department when our longstanding partsman retired. This was challenging in that it put me to the task of acquiring and dispensing the parts instead of installing them on vehicles. It has also been challenging in that I was the first partsman in our history to actually have the capability of searching the Volvo and Daimler websites to look up parts. It was in the summer of 2015 that the company finally got onboard with software to enable this. Prior to that advent, our method of ordering parts involve looking the parts up in hard copy paper parts manuals, or talking to a vendor/dealer on the phone and trying to describe what you wanted, it was sometimes a crap shoot whether you would get the right parts or not. The outgoing partsman never had to use the computer to look up and order parts, and when it was introduced, he refused to do it saying that his time was too short to need it, so he told me to get all the training and he would just watch. LOL He and I worked side by side for 3 months while he showed me most of the ropes before he retired in October 2015. That is a summary of what I have been up to. I know this was completely off topic, but since the request was posed here, I felt OK in responding here....See MoreWhere to begin--(long)?
Comments (9)Let's see...where did I begin. First I decided where the walls would be. If you're not moving any walls you know that. Draw that out on a piece of graph paper (or do it in excel) and start playing with the space. I'd write down your "must haves". Toilet is one :) Now do you want that in a cubby with a door or is a half wall ok? Do you want a shower? If so, what size? Two sinks or one? Next to each other or across the room? Are there two people in the room at the same time? How does that flow? Start finding where the put the pieces and then work with that space. I knew I needed 3' wide for the toilet area. So I started with that since it's not a negotiating area. I used what was left for the shower. I also needed a tub, but didn't have the space, so I took the 50" square space let and tried to figure it out...I found a 40" round tub that fit the bill perfectly. I did know I wanted a shower that was tiled as well as the floor, but didn't want a bunch of "fancy" tile trims so I then had to think about the tile and the finishes. I ended using contrasting trims in my design (ie the baseboards are a different color of stone, but still stone, just cut down). I'd start with the list of "must haves" in each room, then start playing on paper with the "would like" and "gosh to dream" stuff. A good chunk of my budget was for the cabinets (master bath for instance was something like $10,000) then the shower glass....$6000 and then the tile came in around $3000 maybe? Oh countertops...I wanted marble...you see how it all starts adding up :) But really the cabinets were the biggest chunk. Then shower glass...so what do you want in shower glass????? It's shocking how expensive it can get! ANyhoo, start there :) See what ends up on your list, and then work on how to work it all in...THEN start the design part!...See MoreCabinet Costs
Comments (22)Starmark may have improved over the years, but I would like to add to the conversation my experiences with these cabinets. We put cherry Starmark into a kitchen in 1993. Many cabinets arrived damaged and the company was very slow to provide new cabinets. In fact, they provided only new doors (sans hinges), and the installer had to install the hinges, which were those barrel type that cut into the door, and then install the door. Needless to say, it just never looked as good as the factory installed ones. We had problems with all the hinges from day one. We were constantly taking out the screws and filling the holes so the doors would not fall off. The face frame on the corner cabinet cracked badly. The finish wore off some of the doors within 3 years and I had to tough them up with polyurethane. These cabinets had a "lifetime guarantee." However, because our original retailer went out of business, Starmark refused to honor the guarantee. Your mileage may vary, but I refused to even look at them again....See MorePaneled DW when cabs are 5/8'' overlay doors
Comments (13)I'll link the specs for that dishwasher at the end - You'll be happy that you got a Miele :) Not only are they quiet and reliable... but they're shallow enough you don't have to worry about the depth. Just make sure that when they install the cabinets, that they don't leave 24" for the dishwasher - which is what most installers automatically do. The Mieles only need 23 5/8". I really think that using a 1/4" thick finished panel which is about 23 1/2" wide and about 30" high (those measurements will depend on the rest of your cabinets) and then installing the false door (which is smaller than the panel the same amount that the other doors are) on top of the panel will work. Actually, rather than a 1/4" thick panel - you may need a thicker panel - I'm not sure how it will line up with the front face frame of the cabinets next to it. Also, you do need some meat to the panel when you screw the dishwasher bracket onto it. It might need to be 1/2" or 3/4" thick (I'm thinking 3/4") Do your doors completely sit on top of the faceframes? Or are they 3/8 lip - where part of the door sits inside the opening? If they are partially inset, that will be a little different - but still definately doable. I'm thinking that your KD will do all this - but at least you'll know what questions to ask her if you talk to her about it again? Worst case - they install the cabinets, put the panel on, it looks funny, you tell her that it needs to be redone, and they do it. The Panel is something that can be taken off and put back on without affecting anything else. I hope that was all as clear as mud! =) Here is a link that might be useful: Miele Inspira...See Morelatifolia
3 years ago PRO
PROHALLETT & Co.
3 years ago- PRO
Patricia Colwell Consulting
3 years ago 
littlebug zone 5 Missouri
3 years agolast modified: 3 years agocyc2001
3 years ago
elunia
3 years ago
Kate
3 years agoLittle Bug
3 years agocyc2001
3 years ago PRO
PROThe Kitchen Place
3 years agoShannon_WI
3 years agolast modified: 3 years ago
wednesday morning
3 years ago


Related Stories
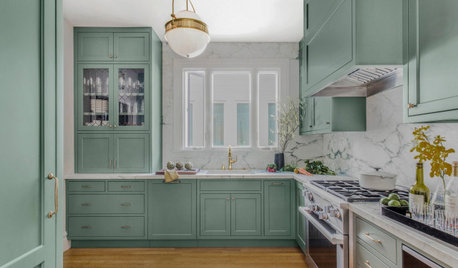
KITCHEN CABINETSNew This Week: 8 Kitchens With Gorgeous Green Cabinets
See how shades of green can rejuvenate a kitchen
Full Story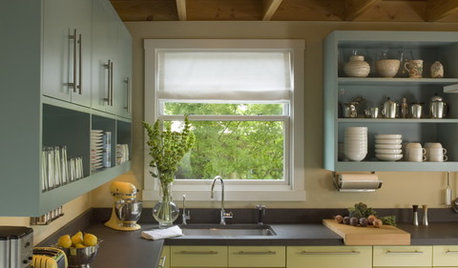
MOST POPULAR8 Great Kitchen Cabinet Color Palettes
Make your kitchen uniquely yours with painted cabinetry. Here's how (and what) to paint them
Full Story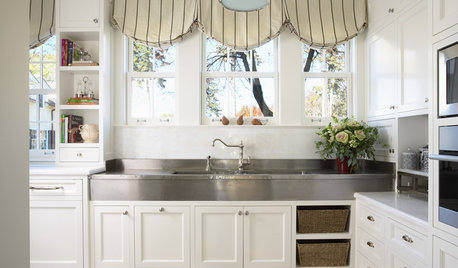
KITCHEN DESIGN8 Top Hardware Styles for Shaker Kitchen Cabinets
Simple Shaker style opens itself to a wide range of knobs and pulls. See which is right for your own kitchen
Full Story
HOUZZ TOURS13 Character-Filled Homes Between 1,000 and 1,500 Square Feet
See how homeowners have channeled their creativity into homes that are bright, inviting and one of a kind
Full Story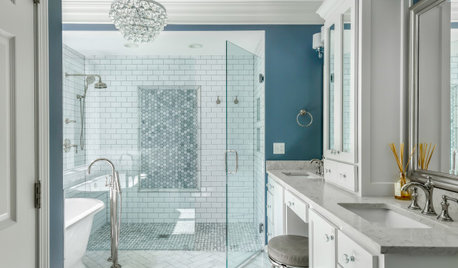
HOUSEKEEPINGHow to Clean a Glass Shower Door
See which tools and methods will keep those glass shower walls and doors sparkling clean
Full Story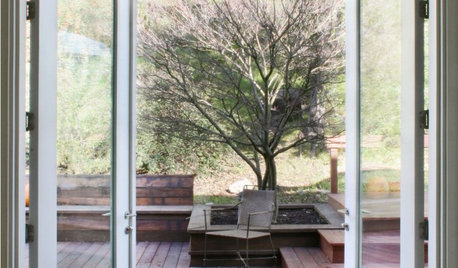
MOST POPULARFind the Right Glass Door for Your Patio
It’s more than just a patio door — it’s an architectural design element. Here’s help for finding the right one for your home and lifestyle
Full Story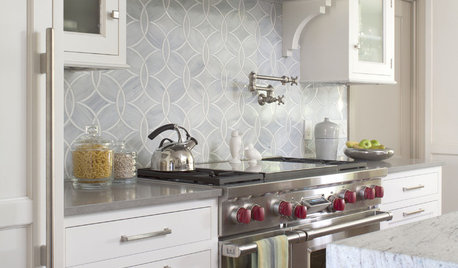
KITCHEN DESIGN8 Top Tile Types for Your Kitchen Backsplash
Backsplash designs don't have to be set in stone; glass, mirror and mosaic tiles can create kitchen beauty in a range of styles
Full Story
STORAGE15 Ways to Enhance Your Cabinets With Grilles
It looks decorative, but metal mesh on cabinet doors has a practical side too
Full Story
BEFORE AND AFTERSA ‘Brady Bunch’ Kitchen Overhaul for Less Than $25,000
Homeowners say goodbye to avocado-colored appliances and orange-brown cabinets and hello to a bright new way of cooking
Full Story
MOST POPULARYou Can Turn That Into a Bathroom Vanity?
Find inspiration in 13 unconventional bathroom vanities that are as functional as the real deal
Full StorySponsored
Columbus Area's Luxury Design Build Firm | 17x Best of Houzz Winner!
beesneeds