


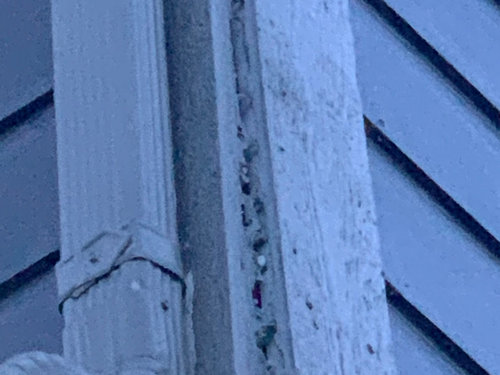
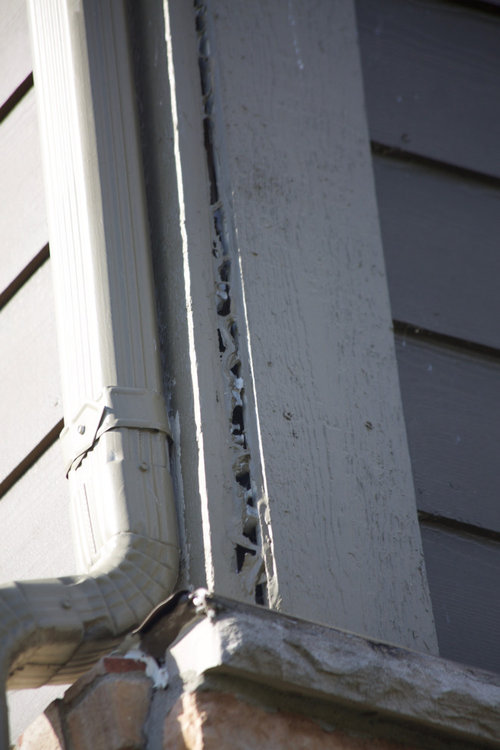
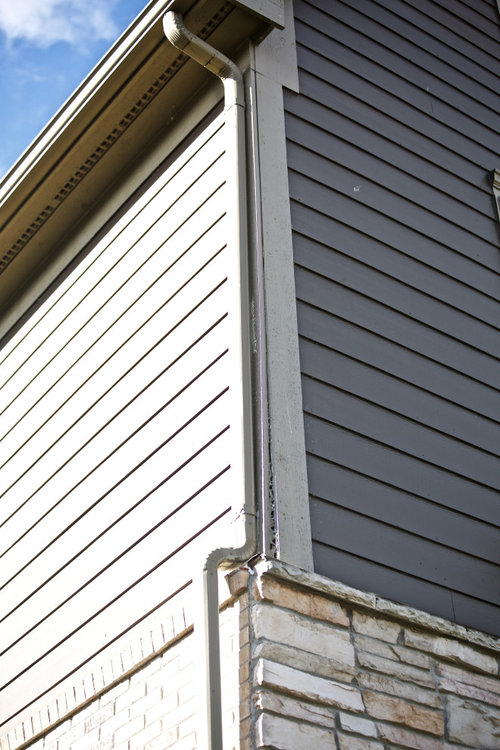
Structural Wood Trim coming apart
Ranjan Sen
3 years ago
last modified: 3 years ago
Featured Answer
Comments (9)
Related Discussions
lifespan of wooden rose supporting structures and HOAs
Comments (7)Wondering why you're thinking of reinforcing copper with rebar? Plain copper pipe seems cheaper than the copper tubing & is inherently strong. The tubing can be used for decorative elements or circling a pipe structure to tie it togeher - not really structural support. With the corrosion copper causes to baser metals like rebar, believe you're talking galvanic action & are right not to combine the two. If you slip plastic tubing over the rebar to isolate the surface from contacting the copper, you may be able to avoid the situation. Might be worth researching if you prefer that construction technique. Have seen hoses & plastic tubing threaded over rebar arches before installing to give a less rustic appearance & protect from rust. They can be sealed at the bottom & slipped into anchor holes. But the rebar & the tubing must be bone dry & done on a low humidity day to guard against sealing moisture in. If you're thinking of using the rebar just to help shape the copper & not for any structural reason, don't see why its eventual flaking to nothing inside the copper would matter. Farmers here use locust posts for fencing & char the bases that go below ground to preserve them. Enlarging a garden bed here, found a charred 10" diameter tree trunk buried a foot below ground. Took most of a day to dig & pull it out. Heard some of the trees here that were cleared off when this house was built were burned on site. It's against code to bury such partially burned wood, since it doesn't decompose. At any rate, that trunk looked as if it was petrified. Couldn't even get a chainsaw through it! So there's tradition behind this method. Only a couple wooden garden structures over the years, since I worried about upkeep & rot. Did erect a plain untreated tall 6x6 post for a condo birdhouse 20+ years ago. Triple-coated it on all surfaces with Thompson's stain & then mounted it on a metal fence post anchor. The birdhouse fell apart many years ago, but the post still stands. We had cedar outdoor furniture for years that we oiled annually to maintain. Without that protection, it would become rough & crack - not great for comfort. Still use the Thompson's tinted stain on the few wooden elements outside - the mailbox post, the finial for the copper ogee trellis, the handle of an iron hose reel - giving them another coat after washing down maybe every 7-10 years. It's certainly preserved them. Like the dark gray called Colonial Blue - can't see the "blue" in it, but it gives depth to the gray - because it fits in well with natural garden colors. Figure a copper cap on an upright post treated with the Thompson's tinted stain would last many years if installed with a fence anchor. (Use copper nails or screws to prevent that galvanic action.) We've used the tapered as well as the corkscrew types & they've remained sturdy. Last time we put up a bird feeder post mounted with an anchor, my husband put one of those vinyl sleeves over it & that's lasted nicely 15 years. Bears come by & shimmy the post to remove the feeder & it stays straight. I hose it down once a year & it still looks new. Two hefty wrought-iron arches put in 16 years ago lost their original powdercoat just last year. I preferred to just oil them (oil rubbed with a rag), but my DH decided to spray them with heavy-duty Rustoleum. We'll see how that stands up. Wrought iron garden furniture needs a wire brush & repaint every 4-5 years. I may just strip & oil them next time that job comes up. Two heavy 3-fold (that store flat & pull out to form 3 sides) 5' iron trellises that came oiled still look great 10 years later with no further treatment. My favorite for install & forget is the copper pipe. The verdigris that forms protects the metal. An identical circumference steel pipe marked for the depth desired, pounded in to create the holes with a level & pulled straight out allows the copper pipes to be slipped in firm footing. They're pricey to buy, but not difficult to make. Junk yards can be sources of used copper & other materials. Bought a bunch of those cheaply made painted metal tube arches that come in pieces for assembly with screws when found on clearance for $5 a pop. Wanted to play with arches set in a circle & figured that was a cheap way to get a 3-D model before laying out for a copper one. Left two up a couple years now & surprised they still look good apart from the screws starting to rust. Maybe I'll put them all back up, plant them & then replace them one at a time with copper while the climbing roses grow their roots. Really liked the fairy ring look. Hope this longwinded response helps you with the construction phase of your new garden! Here is a link that might be useful: Fence Anchors This post was edited by vasue on Tue, Mar 18, 14 at 15:09...See More? about structure/framing/sheathing
Comments (12)So, getting back to this particular spot, should we pull off the siding over the door to see what's there? If Tyvek won't act as vapor barrier, and it's not there anyway, what should be? Since it is likely wrapped into the "original" header that is 6" over the door, and the flashing is installed over the "actual" header at the top of the door (if there is any flashing at all - I can't tell from ground level), what should be done in between? I don't want the Tyvek that was cut too short (assumption) directing water *into* the top of the door frame/wall *above* the flashing. FWIW, I haven't seen any water staining on the wall above the door. As far as a vapor barrier on the inside, none of the house has it. We have 2x6 construction with fiberglas insulation and 1/2" drywall. I've been pulling out the FG around the downstairs windows (haven't done front door yet, and the steel firedoor to garage has flanges overlapping drywall so I have no idea what's there) and replacing with DAP low-expanding foam. I've got that in between the sliding glass door jambs and these stacked 2x6s now too. Should we pull out these 2x6's to add drywall and insulation in that space? Again, will this mean removing the door and reinstalling it (big job) or is this something we could do from the interior while leaving the door in place (maybe pulling off the siding to add sheathing there if there isn't any right now)? I *am* concerned about structural issues, but should this be considered a structural issue? Going into the 3rd year since the house was set on the foundation (June 2007), we have not had many settling cracks over the course of the 2nd year, just a few in corners in stairwell I think every house gets and a few diagonal door corner cracks, plus one new ceiling seam showing in laundry room. The floor-to-ceiling seam cracks and wall-to-wall ceiling cracks they fixed in late 07-early 08 are holding pretty well, a little paint line/bulge showing here and there but nothing major. Thanks...See MoreTrim wood screws
Comments (6)This seems like it would fall into the "colossal waste of time" category. Either nail it in temporarily with 4's, or hold off doing the trim until the walls are done. Are the loose, removable plugs going to look any better than no trim at all? In woodwork, a plugged screw hole is a last resort, when the structural properties of a screw are deemed necessary (like in stair rails where life and/or limb are at risk) and even then we hide them on the least conspicuous surface. Now, if you wanted to use perfectly-spaced polished screws and trim washers, you would be making a statement and introducing a new pattern, and if this were in keeping with the entirety of the design vision for the space, it could be justified as a decorative element within the whole scheme. But as a makeshift temporary measure, it will be incongruent and odd. Casey...See MoreProtecting finished wood floors while stripping trim moldings.
Comments (13)Gotta be careful with heat guns. I have one, and if the application I'm heating is attached to the house I use it on the low setting. Many a house has been burned down with a heat gun. There is the real potential it will blow a smoldering ember into a recessed area that eventually catches fire. I was talking about the quartz bulb infrared paint remover. Doesn't blow any potentially fire starting debris into nooks and crannies. I figured it might be an old apartment building. But I've seen old houses with that many layers of paint too. And always wondered when there was already too much paint on there, why even more was applied. It's not like it looks any better... Peel Away will get really expensive really fast. But, I cannot imagine heat stripping that much paint off of that much wood work. You'll need an assortment of different size scrapers and and arsenal of fresh blades. Because the first four layers of lead paint, the eight layers of non lead oil paint, and the 12 layers of latex paint will dull those blades fast. Before committing to peel away, try Citri Strip. It's a lot less expensive, and you can get it at Home Depot. From my experience it works pretty well....See More
Ranjan Sen
3 years ago
Related Stories
KITCHEN MAKEOVERSA Wall Comes Down in This Wood-and-White Kitchen
A dark, dated kitchen in Cleveland is transformed into a farmhouse kitchen that flows into the adjacent family room
Full Story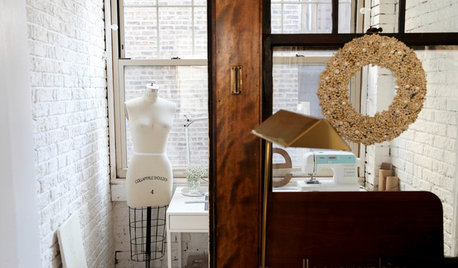
APARTMENTSMy Houzz: Wood-and-White Charm and a Dreamy Sewing Nook
A graphic designer’s 550-square-foot Chicago apartment features lots of natural light and gorgeous wood trim
Full Story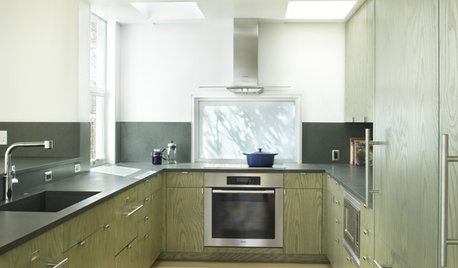
REMODELING GUIDESPro Finishing Secret: Aniline Dye for Wood
Deeper and richer than any stain, aniline dye gives wood stunningly deep color and a long-lasting finish
Full Story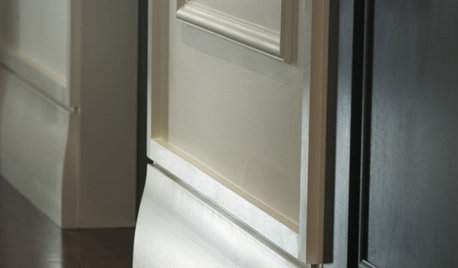
TRIMInterior Trim: 8 Must-Know Elements
Softening transitions and creating a finished look, interior trim for walls, windows and doors comes in many more options than you may know
Full Story
SMALL HOMESMicrounits Are Coming to NYC. See the Winning Design
Say goodbye to only arm-and-a-leg Manhattan rents. This plan for small prefab units opens the door to more affordable housing
Full Story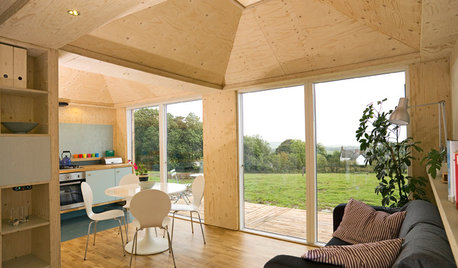
HOMES AROUND THE WORLD9 Houses That Show Why Wood Is the Material of the Future
Most people may associate wood with traditional homes, but in these innovative, modern structures, its uses are really branching out
Full Story
HOMES AROUND THE WORLDMy Houzz: Colorful Weekend Apartment Getaway in Israel
Vibrant hues, custom furnishings and a smart layout come together in this 590-square-foot Tel Aviv home
Full Story
HOMES AROUND THE WORLDThis Wood Home and Treehouse Blend Indoors and Out
Wood and glass create a modern look for a home in Germany that’s grounded in nature and comes with a dream hangout space
Full Story
TRIMThe Transformative Power of Ceiling Trim
Add structure and drama, create rhythm and much more by adding decorative trim overhead
Full Story
REMODELING GUIDESSupporting Act: Exposed Wood Trusses in Design
What's under a pitched roof? Beautiful beams, triangular shapes and rhythm of form
Full Story


Sammy