


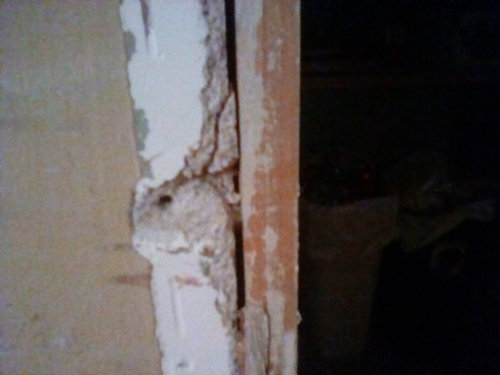
Plaster? Drywall? Need help!!!
Miguel Palacios
4 years ago
last modified: 4 years ago


Featured Answer
Comments (15)
Related Discussions
I need help with taping plaster to drywall & prep to paint.
Comments (5)First you need to cover the 2 hole. You need to attach the replacement piece of drywall on the big hole to something solid before mudding and taping it. 2 choices are to open up the hole larger until you have some wood to attach it to or improvise! My favorite way to improvise is to cut 1 or two thin boards about 2-3 inches wider than the narrow width of the hole. Stick it up the hole the long way and rotate it so it is resting on top of the hole with about an inch on either side. Hang on to the board in the middle through the hole and put two screws up through the ceiling on either side of the hole to hold the little board in place. Screw your new piece dry wall into the little board(s) you put up there. Tape and mud. Can't tell how big the little hole I but I would probably jut dry to put a piece of mesh tape over it and mud. If it sags you might need to put something up there to back up that patch too or purchase a firmer patch to go over it. No need to prime anything until you get all your mudding and sanding done. Use a putty knife and scrape as much loose paint away as possible. I would do little to no sanding of the paint edges as you are sanding paint with lead. Just skim coat everything with mud. Patch, tape your corners, mud everything (couple thin coats) and sand. Then prime and paint. Your joint compound will be perfect for all. Wear a dust mask when you sand....See MoreKeep original plaster or install drywall?
Comments (50)We took a more conservative approach when renovating our 1928 Tudor, course our plaster was in fairly good condition. The house needed new wiring, plumbing, and we needed to remodel the kitchen and bathrooms as well. We decided to create arteries to get these new systems up to other floors. Think of potential opportunities for these arteries when you embark on a remodel. Example, when we gutted the kitchen, we used this artery to get the wiring up to the second floor. We gutted one wall in the bathroom to run our new copper plumbing up and some wiring. We did gut our basement entirely of 70's paneling and use that to help us channel the new systems up. So, with a good bit of planning and thinking, you can save the headache of removing the plaster. I for one believe the plaster and some of the cracks and repairs give the house it's age and character. I've seen houses that have been completely gutted and drywalled, they look a bit sterile to me. It freaks me out when I see people on tv and whatnot, bashing away at plaster without a respirator or something, you know they're sucking in tons of lead paint and possibly asbestos. Think people! Negatives of removing plaster: 1. The weight of all that plaster and lathe 2. The lead and asbestos dust, yuck! 3. The nails holding the lathe on take forever to remove, and they're rusty. 4. Removing the character of the old walls. That said, if the plaster is trashed, beyond repair, have a company come in and take it all down. If you want to insulate the exterior walls, you can have a company drill holes on the outside and force blow-in insulation in the cavities. Myself, I think it's better to have the house breathe a bit. I really think some of these new homes are over insulated. We insulated our attics to R38 and insulated the remodeled rooms we have done. So far the house is staying cooler with the AC and Warmer with the heating and our bills have gone down. We put new Marvin Infinity Fiberglass windows in and they've helped a ton. Hope these ideas help!...See MoreTexturizing plaster wall w/drywall mud?
Comments (1)I believe what you are looking for is called skip troweling, here is a link for various skimming methods. Here is a link that might be useful: skip troweling...See Moremodern (smooth) plaster over uneven plastered & painted drywall?
Comments (1)I did something similar in a place with crazy mixed plasters (some dating back to late 1800's and some from the 30's). We sanded down the highest levels of plaster in the areas that had huge discrepencies in plaster level (yes it's a bit messy, but better than your other options). Then we used venetian plaster for the new wall finishes. That was ten or more years ago when venetian plaster had to be purchased through a high end paint dealer. Now you can buy the stuff by the gallon at home depot and pay for a custom color as well. It's some elbow work to apply, but it will provide a very even finish (you trowel it on and the finish is only limited to the number of layers you're willing to trowel). It's a very old technique, but done in the right colors it's a great modern finish as well. And it's so easy to do. The stuff sticks to just about anything, but if you want to do a test, buy a gallon and practice on a section of your wall. It's VERY important to remember to keep each layer thin as possible. You get cracks when it's too thick, so given the many layers you've got, it may take several layers, but it's not that hard to do. For a more modern finish I'd recommend a pretty wide trowel. Follow instructions, and give it a week to "cure" after you've done at least two, or possibly three coats on your practice section. If you're going to have trouble with it sticking to the old finish you'll see it right away. I personally would pop down a layer of primer before I did anything else, just to seal in anything that might be on those dirty walls :) The plaster finish is hard to get through, but sometimes "stuff" from the old days tries really hard and makes it :) So to be safe, seal it all in and then go for the venetian finish. I highly recommend using a paste wax finish verses the sealer that they sell in the stores. It's basically the same thing, at 1/3 or less the cost, and it's richer. I am picturing a light, silvery or soft green color for some reason, and if you do go light, use a clear paste wax. If you want rich and dark (think chocolate or ebony) then seal the finish with a dark paste wax....See More
Miguel Palacios
4 years ago PRO
PROHALLETT & Co.
4 years agoMiguel Palacios
4 years agoMiguel Palacios
4 years agoMiguel Palacios
4 years ago


Related Stories

MATERIALSRaw Materials Revealed: Drywall Basics
Learn about the different sizes and types of this construction material for walls, plus which kinds work best for which rooms
Full Story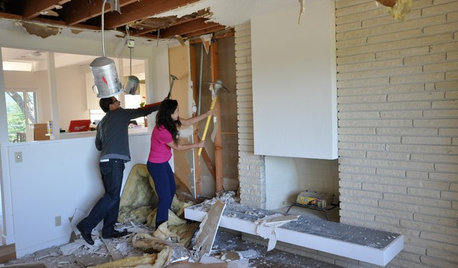
REMODELING GUIDESWisdom to Help Your Relationship Survive a Remodel
Spend less time patching up partnerships and more time spackling and sanding with this insight from a Houzz remodeling survey
Full Story
REMODELING GUIDES8 Tips to Help You Live in Harmony With Your Neighbors
Privacy and space can be hard to find in urban areas, but these ideas can make a difference
Full Story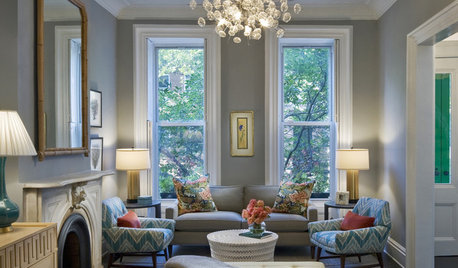
COLORPick-a-Paint Help: How to Quit Procrastinating on Color Choice
If you're up to your ears in paint chips but no further to pinning down a hue, our new 3-part series is for you
Full Story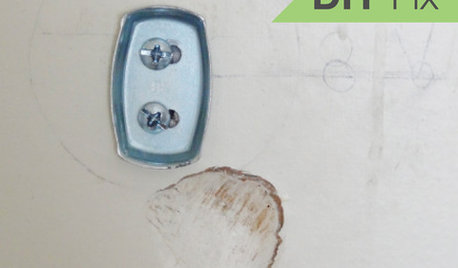
HOUSEKEEPINGQuick Fix: How to Patch a Drywall Hole
Dents and dings disappear, leaving your walls looking brand new, with this fix that even a novice can do
Full Story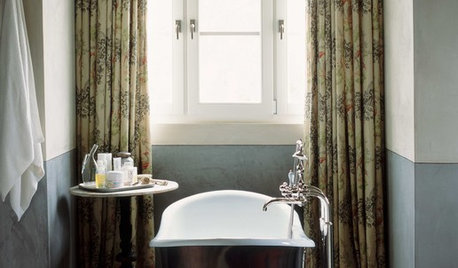
WALL TREATMENTSSurface Smarts: Venetian Plaster
Centuries-old Venetian plaster has made a roaring comeback in modern interiors. Could this old-world wall favorite work in your home?
Full Story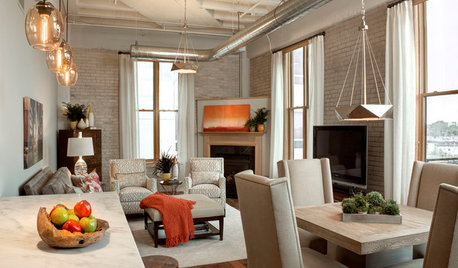
LOFTSDesigner Helps a Couple Adjust to Loft Living
A careful balancing of refined and industrial touches creates an inviting home in downtown Milwaukee
Full Story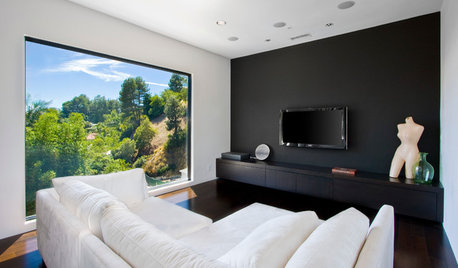
DECORATING GUIDESGot a Problem? 5 Design Trends That Could Help
These popular looks can help you hide your TV, find a fresh tile style and more
Full Story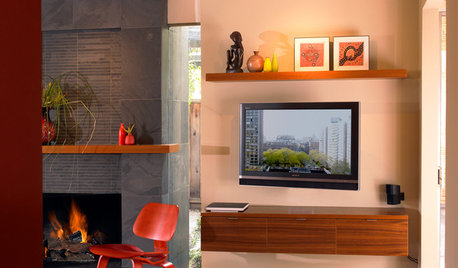
DECORATING GUIDESDecorate With Intention: Helping Your TV Blend In
Somewhere between hiding the tube in a cabinet and letting it rule the room are these 11 creative solutions
Full Story
MOST POPULAR9 Real Ways You Can Help After a House Fire
Suggestions from someone who lost her home to fire — and experienced the staggering generosity of community
Full Story

HU-178658043