


Construction almost complete...timeline estimates?
HU-629673584
4 years ago
Featured Answer
Comments (38)

live_wire_oak
4 years agoRelated Discussions
Estimates for new w.cedar privacy fencing 70' backyard
Comments (12)Eileen, Privacy fences can suffer significant wind loading, but much depends on where you are, your house versus the neighbors, landscaping, wind breaks, etc. Houses close to one another can sometimes act as wind breaks, other times they can contribute a venturi effect and actually increase wind loading. For a 6' fence I use 10' posts and go down 42" - 48". Frost depth in our area is 42". If they do use concrete, have them dig the hole, then put in a few inches of gravel, then tamp the gravel. Then set the post and add a few more inches of gravel. Then pour the concrete. As mentioned by the other posters. By doing that you end up with a concrete collar around the post instead of the post sitting in a "bowl" of concrete, the bowl can hold water. The life of the post can be extended markedly by using a collar instead of full immersion. Regardless, for a 6' tall privacy fence, due to wind loading 2' of burial won't cut it. Shallow burial depth combined with concrete can actually exacerbate frost heaving. The pricing is fair. Have you been to Rings End in Darien? I was there this morning to pick up some panel molding. They have a 6' cedar privacy fence, not sure if it'd suit your needs in terms of sturdiness or style, the fence you're getting does sound more sturdy and more decorative. Rings End panels are about $115 per 6' tall by 8' long section, and 5" square 10' cedar posts are about $40. Their fencing is not mortise/tenon though. I do need to say that I always build my own fencing, so I've never purchased fence from Rings End and because of that I've never looked at their fencing up close and personal with a critical eye. But it doesn't sound nearly as substantial as your proposed fence. Best, Mongo...See More(Almost) Free Raised Beds
Comments (0)Often new gardeners desire to have raised beds and wonder what would be the best, cheapest, or longest lasting material. They are also sometimes faced with ugly concrete slabs that they want to remove. The following is a way to deal with both issues and all you need is the desire and a strong back. If you spaced it out over a few weekends it is well within the capabilities of most folks. The main things you need are the aforementioned strong backs, some simple tools and the vision to see the finished product. If you find that your slab has embedded wire mesh or rebar in it all bets are off. The hassle of cutting thru the mesh/rebar and the inevitable raw metal sticking out of the edges will make this project MUCH more difficult and the chunks will be for the most part unusable. You wouldn't want a wall full of rusty, raw metal edges anywhere near your garden. If you find this is the case call someone in to remove the concrete slab for you and start with a blank slate. The term for this is Rip-Rap. I had a link with a detailed how-to on doing this but I can't find it so I'll try and explain the process myself. Some other advantages to this are, you are getting free material that will last a very long time, you are recycling, and you don't have to pay a large disposal fee to remove the slab. You will need to remove some debris, but with planning it will be much less than the cost of hauling away the entire amount. The first thing I'd do is sketch out the future locations of the beds before the demolition. This will allow for you to plan the beds to use up as much of the slab pieces as possible, minimizing the amount of debris you need to remove. A very rough estimate would be 1 running foot of 12" high wall for every 4 Sq. Ft. of slab you are removing. This will depend on how thick the slab pieces are and how wide a wall you are building. Use a pinch bar and a heavy sledge to smash the slab into pieces. You can try for uniformity of size with the pieces but this is very much hit and miss in practice. Start at a convenient corner and pry up the slab a bit with the pinch bar. This allows the cement to break fairly easily with just one or two hits from the sledge. Just work thru the slab using the busted pieces as fulcrums for the pinch bar. If you try to smash up concrete without lifting it up a bit you will find it VERY hard going. The sub-base absorbs most of the force of the blows and you will quickly wear yourself out. You could rent a jackhammer but in practice the "Lift and Smack" method works much faster on most average slabs you will find. Once you have the cement reduced to manageable sized pieces clear it from the areas you wish to the have beds in. Clean the debris down to the soil. Prepare a level trench as wide as needed and a few inches deep to define the edges of your walls. Place a layer of leveling base in this trench (stone dust, coarse sand, or if you are so inclined, mortar). If you are lucky you may be able to reuse some of the existing sub-base for this step. Use some of the larger pieces of broken cement as a base course and carefully place and level them is whatever material you have chosen for the leveling course. Continue to stack the busted up pieces staggering the joints as you go. You can mortar the pieces together or dry stack as you desire. Use the straightest edges as the face of the wall. If you use mortar you needn't be fussy about it. Just a couple of fist sized dollops under each piece would suffice to adhere them together and will serve as a cushion to level the sections to each other. You may need a small 4 lb. hammer and a wide stone chisel to shape and "dress" the pieces to fit but cement is fairly easy to work in this way. You could also rent a wet saw if you desire much tighter joints. Ideally the wall should SLIGHTLY taper back as you go up but for short walls of say 12-18" this is not crucial. Cut long strips of heavy landscaping fabric and drape them inside the walls to contain the soil from washing thru the joints. Use dots of construction adhesive to hold it in place until you get the final top course in place. This top course can be made from the same concrete pieces or use some other material for a more finished look. You can then gather up all the unused debris and whatever substrate was under the slab for removal and begin the process of amending the soil that was under it. For the soil inside the raised beds I would look to purchase good topsoil or better yet, a topsoil and compost to fill these areas After the wall is built you can spray or brush on a concrete stain or paint to disguise the grey concrete color. A deep brown blends in quite well and camoflages the utilitarian nature of the material well. Hope this helps and Good Luck...See MoreHoly Cow! Rough estimate of adding second story - 645K!
Comments (87)Rocky, for the time being we will use our architect's plans. Our plans are not currently final but I think that our house will be quite close to our current plans. So it will be a custom home and the modular builder's price reflects that. Our plans have a lot of features that I would want (considering the $$'s that we are spending) -- such as a formal entry area, and it's hard for us to find stock plans that offer all this anyway. That said, I would highly recommend going through stock plans first to check if they have what you are looking for, and if needed, make minimal modifications to them. That would save design costs for you. Just my 2c. And shop, shop shop! We had one of the contractors who told us that painting alone may cost 40K and considering that it "shows", we should get a good quality painter, even though it's expensive. I agree in principle, but I found someone who has excellent workmanship and he has quoted 25K for exact same job. Prices do vary a lot. Lastly, regarding your comment about the area supporting the route: yes our area supports either route price-wise, and we will get our money back. Our main problem is not recouping the costs, but it's more like raising so much cash without touching other important investments such as retirement etc....See MoreEstimating Tile
Comments (5)If a tile person has to handle and cut 120 ft to tile 100 feet, he will charge for 120 feet. Then he will factor in any pattern upcharges, like for herringbone, or for large format tile. Those all get upcharged on top of the 120 sf. The edges of rooms where all of those cut pieces go is the most work of the installation. It's a lot more work than the middle with no cuts. Large tiles require specialized expensive setting materials. Patterns like diagonal or herringbone require a lot more cutting, and more time to do correctly. Those all have to be factored into the quote total. But Sophie is correct. Very few qualified tiler professionals charge simply by the square foot. There are too many other variables to installing tile to use just that metric....See More
shead
4 years agolast modified: 4 years ago
HU-629673584
4 years agoKristin S
4 years agoSusan L
4 years agoHU-629673584
4 years ago PRO
PROJeffrey R. Grenz, General Contractor
4 years agoHU-629673584
4 years ago
millworkman
4 years ago- PRO
Jeffrey R. Grenz, General Contractor
4 years ago HU-629673584
4 years agoshead
4 years agoHU-629673584
4 years ago PRO
PROFlo Mangan
4 years agoHU-629673584
4 years agoHU-629673584
4 years ago
Trish Walter
4 years agolast modified: 4 years agoHU-629673584
4 years agoTrish Walter
4 years agoHU-629673584
4 years agoHU-629673584
3 years agoJoe
3 years ago- PRO
Jeffrey R. Grenz, General Contractor
3 years ago HU-629673584
3 years agoJoe
3 years agoHU-629673584
3 years agoJoe
3 years agoHU-629673584
3 years agoHU-629673584
3 years agoJoe
3 years agoHU-629673584
3 years agoJoe
3 years agoshead
3 years ago- PRO
Jeffrey R. Grenz, General Contractor
3 years ago HU-629673584
3 years ago
The_Lane_Duo
3 years ago- PRO
Jeffrey R. Grenz, General Contractor
3 years ago
Related Stories
CONTRACTOR TIPSHow to Create a Realistic Design and Construction Timeline
Find out the length of time you should allow for planning, building and unforeseen mishaps
Full Story
BUDGETING YOUR PROJECTConstruction Contracts: What to Know About Estimates vs. Bids
Understanding how contractors bill for services can help you keep costs down and your project on track
Full Story
REMODELING GUIDESConstruction Timelines: What to Know Before You Build
Learn the details of building schedules to lessen frustration, help your project go smoothly and prevent delays
Full Story
CONTRACTOR TIPSLearn the Lingo of Construction Project Costs
Estimates, bids, ballparks. Know the options and how they’re calculated to get the most accurate project price possible
Full Story
BUDGETING YOUR PROJECTDesign Workshop: Is a Phased Construction Project Right for You?
Breaking up your remodel or custom home project has benefits and disadvantages. See if it’s right for you
Full Story
INSIDE HOUZZHow Long It Took to Plan and Complete a Remodel in 2019
Kitchens took the longest of any room to plan and renovate, the 2020 U.S. Houzz & Home survey reveals
Full Story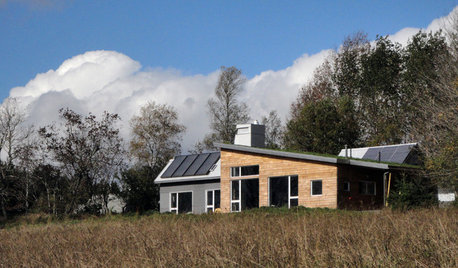
GREEN BUILDINGHouzz Tour: Going Completely Off the Grid in Nova Scotia
Powered by sunshine and built with salvaged materials, this Canadian home is an experiment for green building practices
Full Story
WORKING WITH PROSYour Guide to a Smooth-Running Construction Project
Find out how to save time, money and your sanity when building new or remodeling
Full Story
BUDGETING YOUR PROJECTConstruction Contracts: What Are General Conditions?
Here’s what you should know about these behind-the-scenes costs and why your contractor bills for them
Full Story
REMODELING GUIDESWhat to Consider Before Starting Construction
Reduce building hassles by learning how to vet general contractors and compare bids
Full Story

Mark Bischak, Architect