


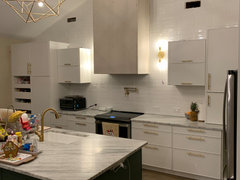
Experience with IKEA Sektion custom door company "Mix-it Modern"?
ellenjean12
4 years ago
last modified: 4 years ago
Featured Answer
Sort by:Oldest
Comments (28)
 PRO
PROPatricia Colwell Consulting
4 years agolast modified: 4 years ago
Ariel Rey
3 years agoRelated Discussions
What do you think of this idea for IKEA Sektion door fronts?
Comments (22)Let's see what I can remember... I don't think I saw white shaker doors. In addition to the new ash fronts, there's going to be a walnut or walnut-look front (not sure if it's foil or walnut textured laminate) with an integrated handle at the top of drawers and handles on the side of the doors, something like the Godmorgon vanities in the textured oak laminate. They're keeping the high gloss Ringhult white (I think it's their bestseller) but probably the Ringhult grey will be discontinued. As an alternative to the Ringhult, they will introduce a new line of less expensive high-gloss fronts in white, cream and some other colors. Also, the yellow accent doors will be replaced with orange ones....See MoreOTR microwaves not compatible with Ikea Sektion depth
Comments (32)Hello, newbie girl here needing some help with the ikea microwave install. Hoping someone can answer some dumb questions... A. I know that I need to use the Nyttig spacer but I’m not clear on how this works with the mounting bracket. Wanted to confirm: I should attach the nyttig spacer to the wall stud (using super long screws). Next, I attach the mounting bracket to the nyttig spacer. Is that correct? B. The instructions say to leave a 1/4” gap, my understanding is that this refers to the comments above where the microwave needs to stick out from the cabinet for venting and door hinge allowance - is that correct? There is no other 1:4” gap required anywhere else, correct? (The instruction pictures almost make it seem like a 1/4” clearance is required between the top of the microwave and bottom of the microwave cabinet. Which doesn’t make sense to me...but I wanted to be sure.) Any info you might have is much appreciated....See MoreIkea Sektion Kitchen- Filler needs
Comments (5)"Everything you wished you knew about trimming out Ikea, but didn't know to even ask" regarding IKD, that's a great idea, bubblyjock. here is a photo from their website that demonstrates some filler/trim issues: https://inspiredkitchendesign.com/spacious-ikea-kitchen/ https://inspiredkitchendesign.com/wp-content/uploads/2018/01/After-3-1000x750.jpeg starting at the left side of the photo: 1. first cabinet to left of microwave There is a trim piece under the cabinet, also called "light rail' there appears to be a metallic customization on the light rail (I think...) I'll bet you can do this with automotive tape (??) would love to hear someone else weigh in on this. 2. microwave there is a thin end panel on both sides of the microwave, these are wall end panels. there is also a strip of filler between the microwave and the cabinet bottom, this can be done with thin end panels, light rail, thick end panel, or toe kick filler, depending on how you want it to look. You can recess this filler to the level of the cabinet box or bring it flush with the door fronts, in this case it appears to be recessed. *** this item is a customization, if you use the IKEA planner, there will be no way to place this trim piece, you will have to account for it and plan for it separately. You can use a strip of an end panel, leaving more finished edges for other creative uses. 3. over the sink each side of the over-sink cabinet has a side panel, and there is light rail trim under the over-sink cabinet. 4. ceiling there is filler above all of the cabinets at the ceiling line. This is generally done with toe kick, however, it is recessed to the level of the cabinet box. If you want a different look, you can overlay slivers of cabinet doors, or slivers of tall panels over this trim to bring it flush with the cabinet door - different look. 5. inside corner there is filler - either toekick or panels, at 90 degree angle on upper and lower inside corner. Again, here you may create a different look by overlaying slivers of cabinet door fronts or side panels. *** if you wish to do this pay attention to the thickness of the two types of side panels and the door fronts and make sure you are applying matching pieces, especially for a high end modern/uniform look. I did find it worth the money to buy additional door fronts for this type of filler (door fronts are > $$'s than panels/toe kick). *** if you are using wood grain, pay attention to direction of the grain on the panels/door fronts if you are concerned (read "obsessed") about uniform look (ask me how I know this...) 6. Fridge Notice the flanking tall panels, the over-fridge cabinet is a bridge between these panels. you may not notice that there is also a panel under the over-fridge box hiding the cam hardware that is used to put the cabinet together. *** this under cabinet panel is not included in Ikea planning software, you will need to account for it separately. Just as with the microwave, you can recess the front edge of this panel or bring it flush with the cabinet doors for a different look. *** be really careful when you order your fridge, make sure to look at how tall the TOP edge of the hinge is so that it clears the underside of the over-fridge cabinet, you may or may not have space for additional trim panel. the fridge in the photo looks short-ish. I also don't really like that huge gap between the fridge and the cabinet bottom. this can be trimmed out. 7. toe kick nothing to say, but you do need it. 8. buy at least 1 extra tall end panel if you have space to store it. This will accommodate possible future changes. It may also potentially save you from nuclear disaster. well, maybe not. 9. now that you have a new-found appreciatio n of filler/trim/panels, spend some time looking at Sneidero, Bulthaup, and other higher end European brand web sites and think about how they use their trim pieces to achieve certain looks. You can do the same with Ikea for a fraction of the cost....See MoreIkea Sektion reviews?
Comments (11)Ditto what Ulisone posted above. We diy'd our kitchen about a year ago with white Ringhult fronts. I love them, they don't show any fingerprints, and a wipe with a soapy rag is all it takes to clean up any spills, even dried up ones. We've had a glossy white Godmorgon vanity in the kids/guest bathroom for 7 yrs and it's still looking like new, as well as a sideboard in the dining room with the same glossy fronts, it also looks like the day it was put in. The Ringhult's glossy fronts, are nothing like the typical thermafoil finishes, that can have issues with peeling or yellowing. By the way, Ikea's glossy fronts are manufactured in Italy by a well known cabinet company. As mentioned by Ulisdone above, Ikea cabinets aren't touching the floor, they're hanging on a rail. This imho, is a much smarter way to install built-in furniture. Should you ever have water on the floor, it's not going to touch the cabs. Shim the rails to plum, and level them perfectly, and hanging the cabs becomes easy-peasy. Also, each cabinet is bolted to the one next to it, thus creating one single block, solid as a rock. They're not going anywhere. Obviously our kitchen is only a year old, but I know it will last as it's not our first Ikea kitchen. Way back in the late 90s it was our first Ikea kitchen put in in 1987, that sold our house. I loved that kitchen and missed it terribly after moving to our current much larger house, which unfortunately, came with a tiny kitchen. We finally, after year of planning we bit the bullet and remodeled, almost tripling the size of our new kitchen. It's still a bit of a work in progress, we're waiting for the custom stainless steel backsplash and DH needs to finish installing trim and some other odds and ends, but the kitchen is fully functional and a pleasure to cook and be in! Here is our DIY Ikea kitchen : Best of luck with your project!...See More
Monica K T
2 years agoAriel Rey
2 years agoMonica K T
2 years ago
Andi
2 years ago
Marisa Silveira
2 years agoMarisa Silveira
2 years agoKendall VanConas
2 years agoAriel Rey
2 years agoMonica K T
2 years agoLouise
2 years ago
Jehshav
2 years agolast modified: 2 years agohthrtckr
2 years agoMonica K T
2 years agossmarinello
2 years agoMonica K T
2 years agossmarinello
2 years agoMimi
2 years agossmarinello
2 years agoMimi
2 years agossmarinello
2 years agoJehshav
2 years agoMonica K T
2 years ago
Alexandria Crow
last yearAlexandria Crow
last year
Amey Kanade
6 months ago

Related Stories

BATHROOM MAKEOVERSFamily Tackles a Modern Farmhouse-Style Master Bath Remodel
Construction company owners design their dream bath with lots of storage. A barn door with a full mirror hides a closet
Full Story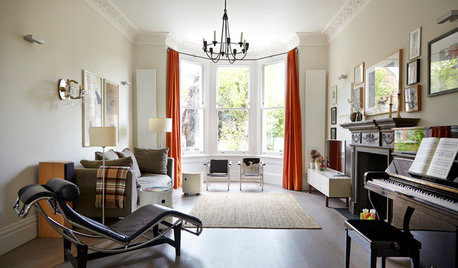
HOMES AROUND THE WORLDHouzz Tour: Easy Mix of Old and New Revives a Family Townhouse
Contemporary furniture and modern fixtures blend with period architecture in this large open-plan home in London
Full Story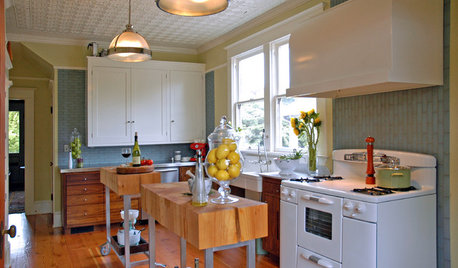
VINTAGE STYLEKitchen of the Week: Preservation Instincts Create Vintage Modern Style
Original features in this 1908 kitchen join new custom accents for a look that bridges the years
Full Story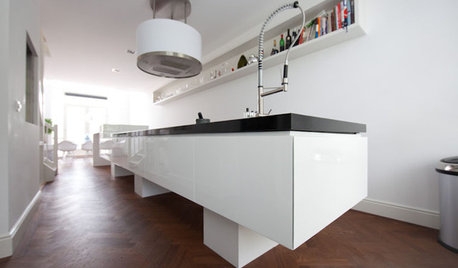
HOUZZ TOURSMy Houzz: Ultra Modern in Rotterdam
Showcase home features dramatic floor-to-ceiling windows, custom kitchen island and a stunning bathroom
Full Story
ECLECTIC HOMESMy Houzz: A Pre-Revolutionary Home for a Modern Family
A dedicated DIYer mixes colonial style with today's comforts to create a meaningful home for 5
Full Story
TRADITIONAL HOMESHouzz Tour: A Made-to-Order Modern Farmhouse in Massachusetts
Architectural salvage, barn doors, shiplap and industrial touches contribute to this historic-looking new home
Full Story
DREAM SPACESNew This Week: 4 Modern and Spacious Dream Bathrooms
For the ultimate bathroom experience, cozy up to heated shower benches, large soaking tubs and high-end tile
Full Story
ECLECTIC HOMESHouzz Tour: Styles and Eras Mix in a Former Stable Block
Modern touches balance bountiful antiques in a beautifully eclectic home that housed horses in the 1700s
Full Story
FARMHOUSESHouzz Tour: Barns Inspire a Modern Farm Compound
Classic gabled looks mix with modern solar panels, universal design and more in the California hills
Full Story
APARTMENTSHouzz Tour: In Tel Aviv, a Warmly Modern Pied-à-Terre
A mix of glossy new finishes and vintage finds creates a textured yet sleek apartment for a single father
Full Story
Monica K T