


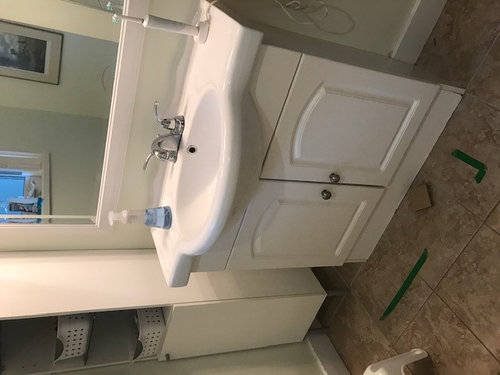
Hi, I am stumped on how to create more storage space in my bathroom
katiegaydon
4 years ago

Featured Answer
Sort by:Oldest
Comments (18)
Related Discussions
STUMPED! Bathroom design ideas...
Comments (25)carraig, How fun! I'm not an architect, but I have designed and over-seen the construction of multiple additions. First, are you modest or not? I'd say not, if you want a shower for two, but all those doors....You can gain a much greater sense of space if you eliminate most of the doors and the walls from both ends of the lavatories. I know you didn't mention a tub, but if you ever want to re-sell or grow old there, you may wish you had one in the master. Here are ideas that include a tub and side by side W & D. CLOSET: Change the access of the WI to the far end of the BR wall. Build a wall at the pass through end of the closet and flip the "U" shaped clothes rods to the other end or add a stack of shelves between rods. LAUNDRY: Move W & D to the new closet/hall wall. Hang shelves/cabinets above W&D for linens, detergents etc. Close off with doors or you may find you like to do without the laundry doorsÂit makes it feel roomier when using it, plus it gives you wider access for repairs. You can put laundry baskets on the W&D and teach the family to sort as they bring dirty clothes there. I have baskets marked "white, medium, dark and red" on mine. HALL: Remove both of the current laundry walls. Make the laundry area a hall, from MBR ot bath,against the outside wall and add a window--light tends to expand an area & the light from the window will save on electric bill, help with ventilation and light when doing laundry. The hall gives great access to W&D and bath from outside/MBR. BATH: Gain almost 2' by removing interior walls and using a 5' vanity with center drawer stack below. Add a shelf under mirrors for more work space, if you use a lot of stuff-works great for us. Toilet paper, tissue, etc, can go below sinks or in cabinet above stool Trade vanity and stool spaces. You will directly face vanity as you enter from the hall. A window could be installed on your left. Put door/arch where W&D-stool wall is now. At far end, have tub on long wall at rt angle with shower (all-glass will open up the space) on far wall or the other way around,depending on the length you want for each. BEDROOM: Now, your bed can be centered with the extra length of the wall due to the laundry.However, I would center it on the long wall to the right for the following reasons: easier access to WI closet, more accessible for clean laundry to be put away, bed can be focal point from any of your doorways, won't directly face light from window when trying to sleep, have a nice wall opposite for furniture/TV, can have larger night stands/chests /w lamps. Remember good vents and fans, non-skid tile and tub/shower, a side light for each end of vanity and one in center and lights at the far end will be key. jan...See MoreAm I deluded about cost of renovating my 154 sq foot bathroom?
Comments (8)Prices differ in different parts of the country, and the materials you use will affect price (larger format tile will cost more to install). Our bath is only 5'6" x 13'4" with a large shower/no tub. We did the demo ourselves, gutting it to the studs. Wiring, plumbing and toilet were all relocated by a company. It's still not completed, but by the time it is, we will probably come in around $18,000 for all the materials(travertine, vanity, fixtures, toilet, heated floor mat, etc.) and labor, and the wiring & plumbing. Just the labor for the bath (not including wiring and plumbing) is about $7,000, but he provided the hardibacker, drywall, KERDI, SLC, grout, constructed the shower and poured a mudbed, layed the heated floor, etc.) Considering our bath is so much smaller than yours, I'd say that $12,000 sounds pretty good if the person doing it is reputable and thorough. You'll save alot by doing demo yourself. Yes, we could have saved quite a bit by choosing porcelain tile over the travertine. But, it was one of our splurges and we love it. I actually thought the $7,000 sounded high, but after seeing the thoroughness and quality of work that our tile contractor is doing, I can see how long it takes to do a mudbed, kerdi, tilework. Instead of using trim pieces, he bevels the edge of the travertine for a smooth finish. He's not only a good tile contractor, but a designer as well! Good luck with your reno!...See MoreSee my bathroom choices over at Bathroom forum
Comments (16)Hi everybody! I have been waiting all summer for it to cool off. It seems that the heat makes my dizziness and nausea worse. I have lost about 15 lbs with being too sick to eat throughout the summer. I just this week got my helper here to help me clean the garage and then I moved the vanity out there and sanded it a bit in the easy places, and got it up on a table. I got the brass floor protectors pried off the bottom of the legs and was pleased to find no holes have been drilled in them. That means that I can drill holes for the feet I bought. I have adjustable feet that will give the vanity an extra 1/2" of height, and that can be screwed up to give another 1/2" if we want. That would make the legs appear to float way too high in the air, so I don't think it will work. the extra 1/2" will have to suffice, with the ability to make the vanity level so that the sink will drain properly. I have also decided that the bail-type handles that came with it are not going to work for us. I can't see us fumbling around trying to grab the bail that has recessed back into the grooves of the handle around it, standing there with water or soap in our eyes. A knob is much easier to use. I had Hubby try using the bail and he vetoed it on the first try and said, "replace 'em!" I am using these on doors of a set of shallow cupboards that will be recessed into the closet of the the neighboring bedroom. I figured they were a sure bet for the six drawers, too. I am not going to use the center drawer anymore, what with all the plumbing going on above it, so I will just fill in those holes. I need to cut away the bottom of the drawer space, then move the drawer support piece to the left or right. It is at dead center right now, and the sink's drain will need to go there. I just have to sand down the fluted areas of the vanity table, then it will be ready to be primed and painted. I am still leaning toward painting it the violet Peace and Happiness. I have purchased more components for the plumbing. I have all of the shower controls and the rain shower head and regular shower head. Still need to get the hand-held and some safety hand-hold bars for the shower area. I still have not finalized a wall tile (looking at fake Cararra tile for the room's walls) or floor tile or the surface for the top of the vanity. We HAVE concluded, though, that we cannot get this job done until Toby, our ever-more-confused beagle/golden retriever mix, dies. He will be 16 at the end of this month. He has spinal arthritis and began vomiting every time he was given his Tramadol or his glucosamine/chondroitin pills, then quit taking them. He had to go on prednisone to control the pain. He is peeing a lot in the house, always on a rug or quilted mattress pad put down for him. The bathroom is his main place to pee. I will not have my new floor grout saturated with dog pee. I don't think the poor guy would cope well with the construction, either. He is now blind in one eye and somewhat deaf. It would be too confusing for him to do all that construction. So even though I can't get Jim over here to do the work, if I could, I would not be able to do it until Toby passes on. So, instead, we are getting new gutters and trim, and getting our four remaining windows replaced. We did the other three windows when we remodeled the kitchen and made the living room into the library/music room. I am in the process of cleaning and decluttering so the window guys can get in to measure!...See MoreBathroom stumped.... Help!
Comments (5)Quickly -- I'd skip the half bath in the hallway near the family bedrooms. Make the two corner bedrooms larger. Here is also an example of the rule that any room that *can* have windows on two sides *should* have them. Those are small closets for one person, let alone two. Is your MBR big enough to serve as 'sanctuary' from the kids? (Think teenagers.) Windows over bathtubs look pretty in pictures; in real life they are drafty and need to be covered for privacy. I don't see enough 'elbow room' at the two sinks in the master bath. I would move this wing forward and put a pair of closets flanking a hallway leading into the bathroom. You could then have two windows (with neither one over a tub). OR you might do skylights or light tubes. Make cut-outs of furniture to place in the living areas without walls -- and bedrooms. Imagine your kids as being 12 - 20. Think of how you and they -- and their friends -- will use the bedrooms and living spaces. An idea I've liked is a separate play room/study area that becomes a living area for children and their friends. Where will the family enter and leave the house? Is there a 'mud room' and a half bath there? How do groceries get into the house? Is there a barn/garage/driveway? Where? I would build ducting for possible future A/C. How will you humidify the house in winter? How wide are these long hallways? Doors wide enough for a child on crutches or in a wheelchair?...See More
shirlpp
4 years ago
littlebug zone 5 Missouri
4 years ago
auntthelma
4 years agokatiegaydon
4 years agopartim
4 years agolast modified: 4 years agoshirlpp
4 years ago
Related Stories
BATHROOM STORAGE10 Ways to Create More Bathroom Storage
See the many options for stowing your toiletries, tissues and towels
Full Story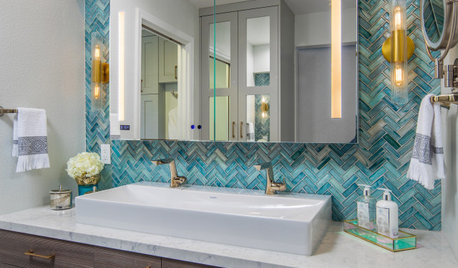
BATHROOM MAKEOVERSBathroom of the Week: Spa Look and More Storage in 95 Square Feet
A San Diego couple work with a design-build firm to create a cheery master bath with adjustable cabinetry
Full Story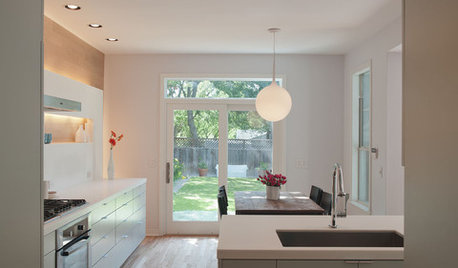
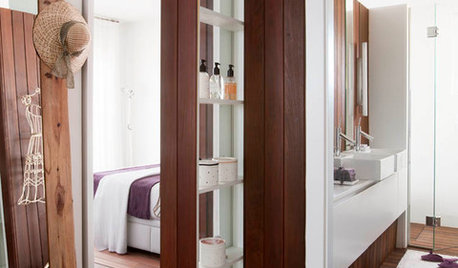
THE ART OF ARCHITECTUREHow to Create the Feel of More Space at Home
Storage, sunlight and interconnected living areas can make a home seem much larger than it is. An architect has his say
Full Story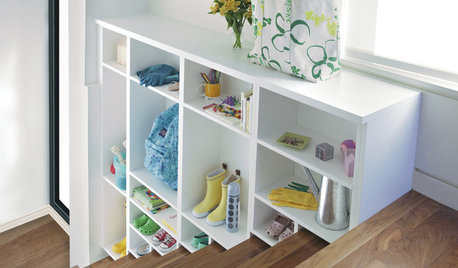
STORAGE10 Ways to Get More Storage Out of Your Space
Just when you think you can’t possibly fit all your stuff, these storage ideas come to the rescue
Full Story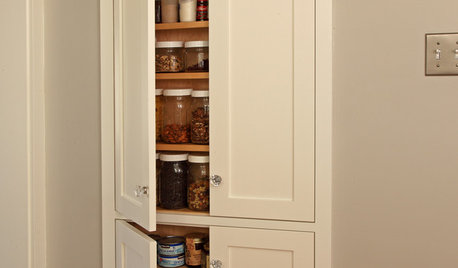
STORAGETap Into Stud Space for More Wall Storage
It’s recess time. Look to hidden wall space to build a nook that’s both practical and appealing to the eye
Full Story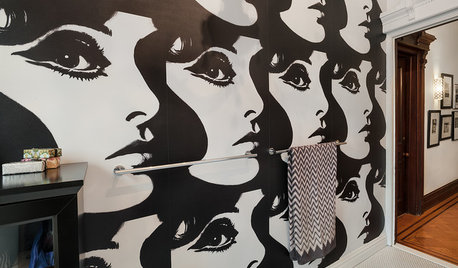
BATHROOM DESIGNNew This Week: 3 Bathrooms That Feel More Like Living Spaces
Graphic wallpaper, ornate chandeliers and furniture-like pieces help these bathrooms seem less like a sterile space and a lot more like home
Full Story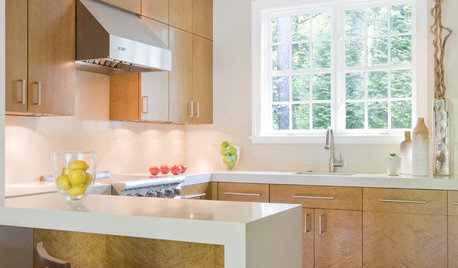
KITCHEN DESIGNSee How Peninsulas Can Get You More Storage and Countertop Space
Make the most of a compact kitchen with a mini peninsula
Full Story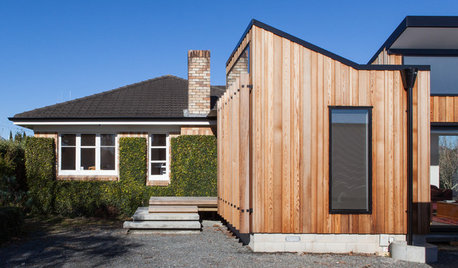
ADDITIONSAn Addition Creates More Living Space Out Front
A small addition transforms a cramped New Zealand bungalow into a modern light-filled home
Full Story
BATHROOM DESIGNBuilt-ins Boost Storage in Small Bathrooms
Need more space for sundries in a compact bathroom? Check out these 10 innovative ideas for building storage into the plan
Full Story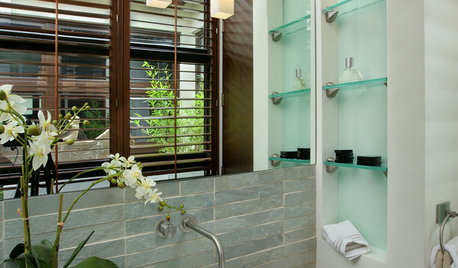
BATHROOM DESIGNGet More From Your Small Bathroom
Tired of banging your elbows and knocking over toiletries? Here's how to coax out space in a smaller bathroom
Full Story


User