


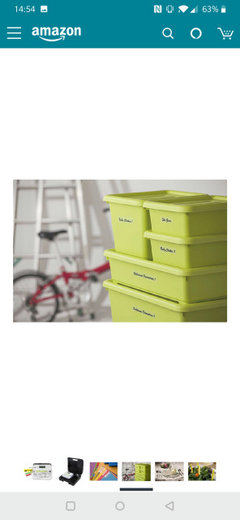
Marie kondo label maker
ירדן פל
4 years ago
Featured Answer
Sort by:Oldest
Comments (24)
Related Discussions
Help with Bread Maker Recipes
Comments (15)The Missing Manual People often ask me what to do with a bread machine that doesn't have it's own manual. It can be very frustrating, especially when you have never used a bread machine before. Some folks find used bread makers at yard sales. Other folks may receive their mother-in-law's old bread maker when she buys a new, sportier model. These previously owned bread machines seldom have their manual included. Other people, myself included, have set their bread machine aside for a year or two. Time and neglect create a gulf of separation between a bread maker and it's manual that mere mortals are seldom able to bridge. The result of all these scenarios is that the manual is missing and the bread machine is inactive as a result. Never fear, with the help of the following information, you should have your machine up and running within the hour. The Machine and It's Parts Bread Machines have three main parts. The machine itself is Part # 1. Set the machine on the kitchen counter and take a look at it. No matter what brand you have you should notice two things right away. There is a hinged lid which can be lifted and shut. There may be a window in it, and probably a small vent too. Next to the lid you should see a control panel with a few buttons and maybe a light or two if you have a fancy version. Don't worry about the control panel and all it's bells and whistles yet. We'll get to it in a little bit. Right now we are going to concentrate on the lid, and what you find when you lift it. Inside the bread machine there is a bread pan or bucket. This is Part # 2. It will be square-ish or rectangular-ish shaped. There should be a handle on it, which is probably folded down so the lid will close completely. The bread bucket works as both the mixing bowl and the baking pan. In the center of the bread bucket will be a little bread paddle or kneading blade. This is Part #3. It is responsible for kneading and mixing the dough. When the dough bakes, it bakes around the kneading blade. You must remove the blade from the bottom of the loaf after the bread is baked. I'll explain that in a little while. You must have all three parts in order to make bread. The machine itself, the bread bucket, and the kneading blade. If any one of these parts is missing you must replace it. The kneading blade is the smallest part and the one most likely to be missing. It is also the least expensive to replace. If you need replacement parts then do an Internet search to find the manufacturer of your machine. Go to their website and email them about what you need. They will be happy to help you. When you have all of the parts you can go to the next step. The bread bucket and kneading blade are removable. To take the bread bucket out of my machine I lift up the handle and give it a good, hard yank. Your machine may require you to pull harder or softer, depending on how it snaps in. Look it over, grab the handle, and pull. Don't worry. You aren't breaking it. After you get the bread pan out, examine it. If you turn it upside down the kneading blade will fall out. There will be a little spinning gear underneath the bread bucket. This is what turns the kneading blade. Don't worry about it much. There will be a peg inside the bread pan that the kneading blade fits over. Place the kneading blade on it's little peg and then take it off again to familiarize yourself with it. It should go on and off with little trouble. Set the kneading paddle aside in a safe place so it won't get lost while you do the next part. Now practice putting the bread bucket into the machine and snapping it into place. For my machine I have to shove down really hard. Don't worry, you aren't breaking it. Take the bread pan out and put it back in several times until you feel pretty secure about the process. Yours may go in very easily or you may have to turn the gear under the bread bucket just slightly to get it to fit into the machine the right way. Keep trying until you are satisfied with your skills in this regard. What is Your Bread Bucket Capacity? Next take the bread bucket out set it next to the sink. Get a measuring cup and fill it with water. Pour the water into the bread bucket. Do it again and again and again, until the bucket is full. Count how many cups of water you are adding to the bucket, until you get a total. This part is important, so measure carefully. If your bread bucket holds 10 cups of water then you can make 1-1/2 pound loaves of bread. If your bread bucket holds 12 cups or more then you can make 2 pound loaves of bread. If your bucket holds less than 10 cups then you can make 1 pound loaves of bread. I have heard tell of larger buckets that hold 2-1/2 pounds of bread, but I have never actually seen one myself. I suspect they would hold 14 cups or more. When you choose a recipe it is important that you match it up to the size of the bread bucket you have. You would not want to make a 2 lb recipe in a 1 lb machine. It would result in a big mess. Here is a chart for handy reference. Bread Bucket Capacity Size of loaves you can make Less than 10 cups 1 pound 10 cups 1 & 1-1/2 pounds 12 cups 1, 1-1/2, & 2 pounds 14 cups or more 1, 1-1/2, 2 & 2-1/2 pounds .. Finally, place the bread bucket into the machine, and place the kneading paddle on it's little peg. Fold the handle down, and close the lid. You are now ready to move to the control panel. Control Panel & Settings Have a good look at the buttons and display screen on the control panel. You will probably find a Select button, a Stop/Start button, Crust Color and Timer or Arrow buttons. Don't worry about the crust color or timer yet. The Select button and Stop/Start button are the most important ones. Unplug your machine. Plug it back in. The machine will be on it's Basic (or default) setting now. Place the bread pan and the kneading blade in position. Close the lid. Press Start. Watch what happens. It should make mechanical sounds and the kneading blade should begin to swish around at a steady pace. It goes slowly at first and then goes faster after about 10 minutes. Watch it as long as you like. There isn't any dough in it yet so you can see everything that the machine is up to. You can lift the lid and watch if you like. Place it back down when you are done. Lifting the lid while the machine is running doesn't hurt it. When you are ready, press the Stop/Start button to stop it. You might need to press it twice. Everything should come to a stop and the machine should reset itself to the Basic setting again. When you have mastered the Stop/Start button, it is time to look at the Select button. Close to the select button you will see several choices. The most common ones are White or Basic; Whole Wheat; French; Sweet; Rapid, & Dough. To set the machine to a particular cycle you have to keep pressing the Select button until it gets to the cycle you want. Sometimes each cycle is identified by a number. For instance, White or Basic is usually 1. Whole Wheat is 2. French is 3; and so on; you get the idea. Each cycle takes a different amount of time to mix and cook the bread. On my machine the White Bread or Basic Cycle takes 3 hours. Whole Wheat bread takes 3 hours and 40 minutes. French bread takes 3 hours and 50 minutes. Sweet bread takes 2 hours and 50 minutes. Rapid Mix takes 1 hour and 20 minutes. Not all machines take the same amount of time for each setting. My dad's machine takes 3 hours and 40 minutes for it's Basic Cycle. It's Rapid Cycle is 3 hours. This is because each machine has it's own way of doing things, the same way that each cook has her own way of doing things. Practice pushing the Select button and then pushing Start and then Stop until you are confident in your ability to select a specific setting. Remember, you cannot break the machine by pressing the buttons. If you are worried you have broken it then unplug it and plug it back in. It will automatically reset itself to the Basic setting. When you have mastered cycle selection you can go on to the next step. Crust Settings The crust setting is not available on all machines. If your machine doesn't have one then don't worry about it. I almost never use my crust setting. I don't find that it makes that much difference in the finished loaf of bread. If you do see a button labeled Crust then it will have 3 settings available: Light, Medium & Dark. The default setting is medium. When you unplug the machine and then plug it back in, it will automatically set itself to the medium setting. If you prefer a light or dark crust instead then you press the Crust button to change the setting. Usually the Crust button will not work until after you select the dough cycle and before you press Start. The order works like this. 1. Select your bread cycle (Basic, or Whole Wheat, or whatever) 2. Select your Crust Setting. You may have to press it several times, to get the setting you prefer. 3. Press the Stop/Start button. Follow this order with your empty bread machine using different cycles and different crust settings until you feel confident about the process. The crust button probably won't work with the Dough Cycle. This is because the Dough Cycle doesn't actually bake any bread, so the color of the crust doesn't come into play. Usually the Rapid Cycle doesn't allow you to choose a crust color either, but this may not be true of all machines. Using the Timer or Delay Cycle This part is challenging at first, but it has great benefits, so I urge you to learn how to use it. Start with an empty bread machine. Use the Select button to choose a setting like Basic or Whole Wheat. If you look at the control panel it will have the number of hours and minutes until the bread will be done. For this example I am going to use the Basic Cycle on my machine, which takes 3 hours; yours may take more time. The control panel will look similar to this: [ 3:00 ]. The bread will take 3 hours to mix, rise and bake. If you start the machine at noon, then the loaf will be done at 3 p.m., 3 hours later. There should be 2 buttons on your machine with arrows on them. One arrow will point up, to increase the time on the display screen. One arrow will point down to decrease the time on the display screen. These are the buttons you will use to adjust the time on the delay cycle. You can press them right now if you like, to see what they do. When you are done pressing them unplug the machine and plug it back in to reset everything to it's default mode. Example #1: Let's say it's 6 a.m. on Saturday morning, and you have a bunch of yard-sailing to do today. The crock pot is cooking a nice roast with some carrots and potatoes or some yummy lentil chili. Wouldn't a fresh loaf of hot bread be just the right thing to serve alongside your meal? How can you get the bread machine to delay it's cooking action so that the bread will be fresh cooked at 2 p.m. when you plan to eat dinner? First, choose your bread cycle. We are using a 3 hour Basic Cycle for our example. Yours may be different, that is all right. The display screen will look similar to this: [ 3:00 ]. In 3 hours it will be 9 o'clock. You don't want to eat your bread at 9 a.m. though, you want to eat it several hours later at 2 p.m. You need to increase the time on the display screen so that the machine will finish baking the bread at 2 p.m., not 9 a.m. To do this you will need to do a little math. How many hours are between the time you are starting (6 a.m.) and the time you want the bread to be finished baking (2 p.m.)? In this example, there are 8 hours difference. The display area looks like this [ 3:00 ], you want it to look like this [ 8:00 ]. You want the bread to be finished baking, hot and ready to eat in 8 hours, or at 2 o'clock. Next, use the arrow buttons to increase the 3 on your display screen to an 8. Each time you press the Up-Arrow button, it will increase the time by 10 minutes. Pressing the Down-Arrow button will decrease the time by 10 minutes. Give it a try. Press the Up-Arrow once. The display screen will look like this [ 3:10 ]. The bread cycle is now delayed by 10 minutes. After a ten minute delay, the machine will start it's regular business of kneading, rising and baking. Press the down-arrow button next. The screen will change and go back to this [ 3:00 ]. Pretty easy huh? The Up-Arrow increases the time, the Down-Arrow decreases the time. Press the Up-Arrow now, and hold it. The time should increase really fast. Keep holding it down until the display screen says [ 8:00 ]. If you go over, then use the Down-Arrow to adjust it. Lastly, make sure your bread pan and ingredients are in the machine, close the lid and press Start. In 8 hours you will have a perfect loaf. This may seem complicated, so let's walk through another example using a few basic steps, for easy reference. 1. Put your ingredients in the bread pan and snap the bread pan into place. 2. Select the cycle you prefer (Basic or Whole Wheat or French or whatever). 3. Using math, figure out how much time before you want the loaf to be finished baking (8 hours in the above example, 4-1/2 hours in the example below). 4. Use the arrow buttons to adjust the time on the display screen to match the number of hours your figured out above. 5. Close everything up and press Start. Walk away now, and let it do it's magic. Example #2: It's 1 o'clock in the afternoon, and you want a nice loaf of whole wheat bread for supper at 5:30. Your whole wheat cycle lasts 3 hours and 40 minutes. Put the ingredients into the bread bucket and snap the bucket into the machine. Select the Whole Wheat Cycle. The display screen will look similar to this [ 3:40 ]. Yours may be longer or shorter, depending on how long your Whole Wheat Cycle lasts. If it's noon now, then the bread will be done at about a quarter to 5. (1 p.m. plus 3 hours and 40 minutes is 4:40, or about a quarter to 5). You want it to be fresh, hot, and finished cooking at 5:30, which is 4-1/2 hours away. Use the arrow buttons to increase the time from [ 3:40 ] to 4 hours and 30 minutes. The display screen will look like this [ 4:30 ]. Now press the Start/Stop button, and let the machine do it's job. In 4 hours and 30 minutes, it will be 5:30, and the bread will be finished baking. A quick note about using the Timer or Delay Cycle, make sure you use a recipe that you have already tested and that you trust. I wouldn't make a recipe for the first time on the Delay Cycle. Also, make sure that you place the ingredients into the bread bucket in the correct order (see below). This means the liquid ingredients first, then the dry ones, and finally the yeast. If the yeast comes in contact with any liquids during the delay cycle, it will over work and you will have a nasty mess to clean out of the machine, trust me on this one. Using the Delay Cycle isn't difficult. It is a lot simpler than using a pressure cooker. When you get the hang of the Delay Cycle you can pair it with your crock pot and serve up some pretty spectacular homemade dinners that cook while you are away. Even if it seems a little bit intimidating it is still worth trying. One thing you might want to try is to set the Delay Cycle without any ingredients in the pan, and see if it works the way you think it will. Personally I would stop the machine before it got to the bake cycle, because I wouldn't want it to heat up without any dough in it. It would be a good way to try a starter run though, especially if you are afraid of trying it with ingredients the first time. About The Ingredients There are a few basic ingredients you need to make bread in a bread machine. They are yeast, flour, salt, sugar, liquids and fats. Yeast used in a bread machine should always be labeled 'Active Dry' on the label. Sometimes you can buy yeast in a jar that says it is specifically for bread machines. If that is the kind that is most available to you, then it is fine to use. Packets of yeast, available in the baking aisle of the grocery store, usually hold 2-1/4 teaspoons of active dry yeast. You may use one packet of yeast to replace 2 teaspoons of yeast in most bread machine recipes. The extra 1/4 teaspoon of yeast won't make that much difference. The cheapest place I know to buy yeast is at my local Warehouse Store (Sam's). A 2 lb package costs less than $4. This is even cheaper than my local health food store, which charges over $3 a pound. I had been paying over $14 a pound for yeast, when I was buying it in 7 oz jars from the grocery store. I find that when I bake all of our bread myself, I go through about 4 pounds of yeast a year. This savings of $52 more than pays for the Warehouse Store's yearly membership fee. If you bake a lot of bread, you owe it to yourself to find a good source of yeast. A quick note, I don't use rapid rise yeast. I don't think it's worth the extra cost, and the time savings is negligible once you get the hand of making bread. Bread Flour makes better bread. I know you don't want to hear that but it is true. Bread flour is made from hard wheat so it has more gluten, or wheat protein, in it than regular all-purpose flour. All-purpose flour is a blend of hard and soft wheat. This makes it serviceable for biscuits, cakes and quick breads, which prefer soft wheat flour; and also serviceable for yeast bread, which prefers hard wheat flour. It is called all-purpose flour because it is designed to be used for all baking purposes. Bread flour is made for yeast bread. If you don't have bread flour then you may use all purpose flour for most bread recipes. Your results will not be exactly the same as if you had used bread flour, but you will still have good results, and you will still get good bread. Sometimes you will need to add a tiny bit more flour to your dough if you use all-purpose flour. This isn't always true but it is sometimes. Different brands of bread flour produce different textured breads. I use the cheapest bread flour I can find and have always been very pleased with the results. Bread flour costs a little bit more than all-purpose flour. I consider it worth the extra cost. Salt is a necessary ingredient in machine made bread. It regulates the rising process so that the bread dough doesn't spill over the bread bucket into the machine. I have read that it takes at least 1/4-teaspoon of salt per pound of bread to regulate it properly. I don't know if this is true or not. If it is though then it means that you can reduce the amount of salt in a 2 lb recipe to a minimum of 1/2-teaspoon. Salt also adds flavor to the bread. Bread made completely without salt doesn't taste as good as bread made with some salt. Sugar, honey and other sweeteners soften the texture of the dough and the finished loaf. They also contribute to the browning of the bread and the crispness of the crust. The main role they play though is as easy-to-use-food for the yeast. Yeast can use the starch in flour for it's food but it is much happier if it gets an easy to use food like sugar or honey. Most bread machine recipes call for at least a small amount of sugar. A very few may not, like machine made French bread, or occasionally pizza crust. If desired you may add between a teaspoon and a tablespoon of sugar to recipes that don't call for any sweeteners of their own but you don't really have to. Bread machine breads do best if they don't have too much sugar added to them. When making sweet dough from scratch it isn't unusual to add a full cup of sugar to the dough. When making sweet dough in the machine though it is better to use 1/4 to 1/2-cup of sugar or honey at the very most. This is because the dough rises faster and higher in a bread machine than it does when prepared by hand. Too much sugar is too much food for the yeast and it gets over-excited. This can result in a machine made mess that is unpleasant to clean up. Liquids used in a bread machine should be room temperature or a little bit warmer. You should never use hot liquids in a bread machine. Liquids that are too hot will kill the yeast. Room temperature liquids make the yeast happy. If you are using tap water then warm tap water is fine. If you are using yogurt or buttermilk you may want to take it out of the fridge to warm up a bit before you use it in the bread machine. This isn't strictly necessary, especially for breads baked on the Basic Cycle or longer. If you are using the Rapid Cycle though it is imperative that the liquids be warm or at least at room temperature. Milk, buttermilk, and yogurt make the finished loaf of bread softer and give it a finer crumb. With milk or buttermilk, I usually use warm tap water and add powdered milk or dry buttermilk with my dry ingredients. If you have any whey leftover from making cheese it makes a very finely crumbed bread. It tastes really good too, better than you would think. Also runny yogurt that didn't set up quite right is great in breads. If you are making bread with water and you want to try something fun for a change, add a spoonful of vinegar along with the liquid ingredients. You will not taste the vinegar in the finished bread but the acid in it will keep the bread fresh for a little while longer after it is baked. This is an old-fashioned trick that still works well today. Fats make the finished loaf richer, softer, and also keep the dough from sticking to the non-stick surface of the bread pan (weird, huh?). Usually between 1 and 4-tablespoons of fat are used in a 2 lb loaf of bread machine dough. You can use most fats interchangeably in a bread machine. Margarine, oil, shortening, lard, chicken fat, bacon grease or butter will all give you pretty much the same results. Some of the fats will add a different flavor, and the texture of the bread will change very slightly, depending on which type of fat you use. The changes however, are minor so you can pretty much use whichever type of fat you prefer. Most often I use margarine or oil. Solid fats do not have to be melted before adding them to the bread machine. It helps if they are at room temperature, but this isn't always practical. I have added a couple of tablespoons of cold margarine to warm tap water before, and the bread has turned out fine. If you are using the Rapid Cycle the temperature of the fat becomes more important than for the Basic Cycle or longer cycles. The Order In Which Ingredients Should Be Added to the Bread Machine There is a big mystique about the order in which ingredients should be added to a bread machine. The truth is, if you are going to mix and bake the dough right away then it really doesn't matter which order you add the ingredients. The machine will mix them all up regardless of the order they were added to the bread bucket. If you want to program the machine with the Delay Cycle to start while you are away, then the order becomes very important. The ingredients must be added in a way that will keep them inert until the machine begins it's mixing. Therefore it is a good idea to get in the habit of adding the ingredients in this way from the beginning. Most machines like it best if you put the liquid ingredients in first. This would include water, eggs, milk, honey, buttermilk, fats and extracts. Put the liquids into the machine first. Next add the flour. As you are adding the flour, urge it out overtop of the water so that that it sort of seals the water in. Then you can add the other dry ingredients like salt, sugar, dry milk powder and seasonings. The last thing you should add is the yeast. Most recipes suggest that you make a shallow indentation or well in the center of the flour and sprinkle the yeast into it. This is important because it prevents the yeast from coming into contact with the liquid until the machine begins mixing. If the yeast and liquid get together before the machine is scheduled to begin, then the yeast will become active and likely make a big mess out of the machine. I have never seen this happen, but my imagination is pretty vivid, and I try to avoid it. For quick reference, here is the order in which the ingredients should be added: 1. Liquid ingredients (water, eggs, milk, fat, honey) 2. Flour, to 'seal' in the liquid 3. Other dry ingredients (dry milk, salt, sugar, seasonings) 4. Add the yeast last. To sum it up, if you are going to mix and bake your bread right away, then add the ingredients in any order you please. If you are going to use the delay cycle to program the bread machine to work while you are away, then add them in the order given above. Hillbilly Housewife 2003-2008 Permission is granted to print, copy and download this article for home, school, church, and personal use. You may not sell it, you may not charge money for it, not even shipping and handling if you send it to a friend. It can only be given away for free with love and kindness. Thanks --Susanne :-) Provided by : www.myspace.com/breadmachinepartsfinder...See MoreLabel maker mavens, can we talk? I'm ready to leap..
Comments (42)Duh. I stand corrected. Me foolish, not them. I meant to say black on white. I'd be surprised if the 9/64 is the security type because it is not even laminated. Too small maybe for that? I have see the security kind, also very new, in a different section with a different code format. Can't find out much about it. Not really sure what it does when it gets "tampered with". Be cool if it beeped or smoked or threw red dye, but I doubt it does much other than "show" it has been messed with....See MoreCookalong - #40 Wine
Comments (1)o RE: Cookalong #40 - Wine clip this post email this post what is this? see most clipped and recent clippings Posted by walnutcreek (My Page) on Sun, Feb 12, 12 at 16:05 CHICKEN IN HEAVENLY WINE SAUCE 1/4 cup plus 1 tablespoon all purpose flour 1/2 teaspoon salt 1/4 teaspoon fresh ground black pepper 1/2 teaspoon crushed dry oregano 4 skinless, boneless chicken breast halves 1/4 cup butter 1/4 cup plus 1 tablespoon olive oil 8 ounces sliced fresh mushrooms 1 cup Marsala wine 1/2 cup sherry wine Clean and rinse chicken, place between sheets of plastic wrap and using the side of a square mallet pound chicken breast to 1/4 inch thickness. In a shallow dish or bowl, mix together the flour, salt, pepper, and oregano. Coat chicken pieces with the flour mixture. In a large skillet, melt butter in the oil over medium heat. Place chicken in the pan and lightly brown, then turn over chicken pieces and add mushrooms and any remaining flour mixture. Pour in wine and sherry. Cover Skillet and bring to boil, then reduce heat to simmer,and cook for 10 minutes, turning chicken once, cook until no longer pink. Serve over egg noodles or your favorite pasta, topped with the wine sauce. Serves 4 SPICY WINE MUSTARD 3/4 cup brown mustard seeds 3/4 cup yellow mustard seeds 1 cup white wine vinegar 1 cup dry white wine 1/4 cup EVOO 1/4 cup sugar 2 tablespoons dry mustard (Coleman's) 1 tablespoon sea salt 1 - 2 teaspoons red pepper flakes 1/2 teaspoon freshly ground black pepper Put all ingredients into a deep, medium-sized bowl, stir well, cover and leave on countertop at room temperature, stirring once or twice, for 24 hours. Transfer bowl contents to a food processor puree until creamy. Transfer mustard to jars, seal tightly and refrigerate. Makes about 3 cups. APPLE, CHICKEN, AND WINE 1 whole fryer chicken 1 whole apple 1 cup apple juice or 1 cup white wine Salt and pepper Sprinkle salt and pepper all over the inside of the chicken. Put the whole apple inside the chicken cavity. Place chicken breast side down in a crock pot. Pour apple juice or wine around the chicken. Cook on low 4-6 hours. SHALLOT AND WINE BUTTER 1 shallot, finely chopped 3/4 cup dry red wine 4 oz butter cut into small pieces Salt and freshly ground pepper to taste Bring the shallots and wine to a boil in a small saucepan over moderate heat. Boil until all the wine has evaporated, about 10 minutes. Remove from the heat and whisk in the butter, salt, and pepper until the mixture is smooth except for the pieces of shallot. Refrigerate for 1 hour before serving. To serve with steak, top each steak with 1 to 2 tablespoons of the butter. BLACKBERRY WINE CAKE 1 Duncan Hines white cake mix 1 3-oz. box blackberry Jell-O 1/2 cup salad oil 4 eggs 1 cup blackberry wine 1/2 cup chopped pecans Preheat oven 325 degrees. Combine all ingredients except pecans. Mix on low speed until moistened then on high for 2 minutes. Grease and flour a 10 inch Bundt pan. Sprinkle pecans on bottom and side of pan. Spoon batter to cover pecans. Bake 1 hour. GLAZE: 2/3 stick butter 1/2 c. blackberry wine 1 1/4 c. powdered sugar Combine butter, sugar, and wine, bring to boil. Punch holes in cake with ice pick and pour half of glaze over cake while in pan. Let stand 30 minutes. Turn out and pour glaze over cake. PARMESAN WINE RICE 1 tablespoon butter 1 medium onion, chopped 1 clove garlic, minced 1 cup chicken broth 1 cup uncooked rice 1 cup dry white wine 1/2 cup grated Parmesan Melt butter in heavy medium skillet over medium heat. Add onion and garlic; cook 8 minutes or until translucent. Stir in broth, rice and wine. Bring to a boil. Reduce heat to low; cover and cook 25 minutes or until liquid is absorbed. Stir in grated Parmesan and serve warm. Serves 4 o RE: Cookalong #40 - Wine clip this post email this post what is this? see most clipped and recent clippings Posted by wizardnm (My Page) on Mon, Feb 13, 12 at 10:28 A big Thank You to all that participated in this thread, there are some really good recipes here. I just pulled a name for the next Cookalong. ~~~~~~~~~~~~~~~ bbstx ~~~~~~~~~~~~~~~~~~~ Please choose the next focus ingredient. Try to pick something you have a special interest in. If it happens to be something that has been covered in the older Cookalongs, that's fine, especially if it is basic. All the older Cookalong threads are in the FAQ. Think about Seasonal, Fresh, Basic, and Readily available ingredients.... If you have questions, you can email me through GW. I will check back here and then set up the new Cookalong. Nancy o RE: Cookalong #40 - Wine clip this post email this post what is this? see most clipped and recent clippings Posted by foodonastump (My Page) on Mon, Feb 13, 12 at 12:51 A little late, but I think worth mentioning here. I had been meaning to try this since I first chose wine for the cookalong. Recent conversations about mussels and fennel finally got me to do it today for lunch. I winged it but here's approximately what I did: Saute about 3/4 cup small-diced fennel and a minced shallot in butter with a pinch of salt. Add some thyme, a pinch of saffron, and 1.5 cups or so wine. (I used Gewuertztraminer, as recommended in Patricia Wells' "The Paris Cookbook" for its slightly sweet note.) Reduce wine by half and add scrubbed mussels. Steam for about 3 minutes or until they open. If some open earlier than others remove them so they don't overcook. Once all the mussels are done, remove them from the pan and add a dollop or two of creme fraiche to the broth. Adjust seasoning to taste. I think that's about all I did. I ended up eating the full 2.5 pound bag, plus half a baguette to sop up the sauce. It was awesome! o RE: Cookalong #40 - Wine clip this post email this post what is this? see most clipped and recent clippings Posted by wizardnm (My Page) on Mon, Feb 13, 12 at 15:42 The next topic is #41 - Greens - Cooked and Raw Here is a link Here is a link that might be useful: Cookalong #41 Greens, Cooked and Raw o RE: Cookalong #40 - Wine clip this post email this post what is this? see most clipped and recent clippings Posted by sally2 (My Page) on Sun, Feb 19, 12 at 8:19 I'm reporting back way late on my cooking with wine attempt. I made Ruthanna's French Bean Soup, and know it would have been wonderful if......I didn't burn it. Yes, I actually managed to burn soup. We were up in Oklahoma where I have a substandard set of pots and pans, basically camping gear, cause I don't want to spend a lot of money on another set of pots and pans. Anyway, the soup pot I used is very thin aluminum. It was already cooked earlier in the day, and tasting delicious. DH had to go on an errand, and while he was gone, I turned the soup back on to heat up for dinner, and sat down with my cross stitch. Big mistake. When DH got home, he headed for the kitchen,stirred the soup, and announced, "Did you know the soup is burning?" Aaahg! Oh, well, it was still edible, and I'll definitely make it again, but I was very disappointed that I did something so stupid. Ruthanna, I think I'm drawn to your recipes. I'm sure I've made more than one other of your recipes. If you had a cookbook, I'd probably buy it. I do have one question about the recipe. In the last part of the instructions you say to remove the cinnamon sticks, but there are no cinnamon sticks mentioned anywhere else in the recipe. I didn't have any, so I added a dash of cinnamon to the soup. Sally o RE: Cookalong #40 - Wine clip this post email this post what is this? see most clipped and recent clippings Posted by lakeguy35 (My Page) on Fri, Feb 24, 12 at 0:53 I'm late checking back here too...I did make the dessert that Lindac posted. Oh man was it good!! My group loved it. Photobucket I have my eye on several recipes posted here that's for sure. Glad to see the cookalongs back in action. David...See MoreFavorite Organizing Ideas?
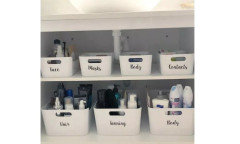
Comments (58)Did someone say "organize?!" I LOVE to organize and seeing everything where it should be. Everyone has great ideas. DD2 just did the Marie Kondo’d folding and her family is loving it. She also labeled containers in linen closet and kitchen pantry closet. DD1 has all drawers (9) in her vanity. Before ordering clear containers from The Container Store, she cut out pieces of paper to the various sizes, so she could see what would fit where (including contents after they were put in drawers). I liked her system so much after she finished, I borrowed one of each container and decided what would go in each of the master bathroom vanity. I visually like the clear containers vs white or black plastic. In the closet, I went to 3 Lowe's and purchased the cloth covered and lined boxes. Use them for shoes, extra clothing (I often will buy 2 of clothing I really like, putting 1 never worn piece away for another year/season), out of season items, seldom used items, etc. The ones up high also hold out of season shoes, and I switch out end of summer/winter. We swapped the old bathroom (no windows) and old closet (two windows), so while the closet looked large gutted, it is odd shaped. DH and a helper built it out to my specs. In my iPhone Notes, I have what is stored in each container, so it's easier to locate if needed (I really only do this twice a year.) I purchased dressers that will slide in/out (to access outlets) and built the closets around them/the dimensions. I also changed to the velvet hangers, which really made a difference in the number of clothes we could hang. I store my shoes in this tower. DHs are in the containers over his dresser. His clothes, here, go back to the corner. In the corner above, where the stool is, there is a scarf and belt slide out hanger (dead space, but made the most of it.) I buy things in bulk, so under the bathroom sinks I store things in frosted plastic containers with handle cut-outs purchased at Target (in store and online). They stack nicely since they have formed bottoms. They come in other colors also. I also use them in the laundry room cabinet for easy access and grouping things. I used the OXO Pop containers in the kitchen and laundry room, and also woven hyacinth baskets in lower kitchen pantries for bottled drinks/water. I just ordered more Rubbermaid cereal containers to store bird seed and peanuts. Takes us less space in laundry room cabinet. The best thing for organizing I did in the kitchen was my baking pan/dish drawer....See More
ירדן פל
4 years agoירדן פל
4 years agoירדן פל
4 years agolast modified: 4 years agoירדן פל
4 years agoירדן פל
4 years agolast modified: 4 years ago
Kathy
4 years ago
Annette Holbrook(z7a)
4 years agoירדן פל
4 years agoKathy
4 years agolast modified: 4 years ago
cd7733
4 years agoירדן פל
4 years agoKathy
4 years agoירדן פל
4 years ago
waverly6
4 years ago
Dora Thomsan
4 years ago

Related Stories

ORGANIZING‘Tidying Up’ Author Marie Kondo Tells How to ‘Spark Joy’ at Home
A new book from the author of ‘The Life-Changing Magic of Tidying Up’ delves deeper into her KonMari Method of decluttering and organizing
Full Story
DECLUTTERINGA Pro Weighs In on Decluttering the KonMari Way
As Marie Kondo’s Netflix series sparks an organizing blitz, an expert discusses the practicality of 7 KonMari principles
Full Story
ORGANIZINGTeaching Kids to Clean Up — the KonMari Way
Marie Kondo has sorted our shelves and tidied our drawers. Now she takes on a new challenge: teaching kids to tidy up
Full Story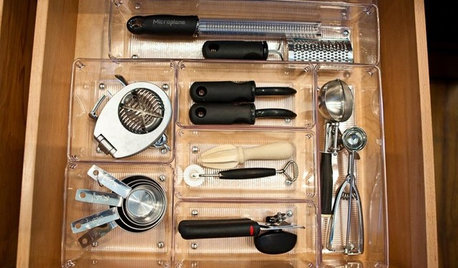
FEEL-GOOD HOMEPost-KonMari: How to Organize Your Kitchen Storage
Find out which storage tools are essential and which are nice to have to keep things looking neat
Full Story
ORGANIZINGPost-KonMari: How to Organize Your Closet
Arrange your clothing and accessories to make it easier to find what you want and get dressed each day
Full Story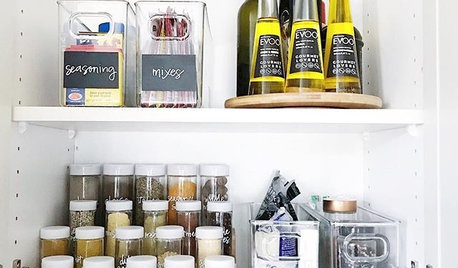
ORGANIZINGPost-KonMari: How to Organize Your Pantry
Get the skinny on setting up your food storage so it’s easier to find ingredients and cook
Full Story
ORGANIZINGPost-KonMari: How to Organize Your Keys, Mail and More
Keep your entryway neat and clutter-free with these must-haves and nice-to-have options
Full Story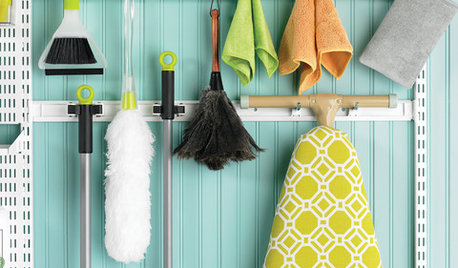
ORGANIZINGPost-KonMari: How to Organize Your Cleaning Supplies
Make your products and tools easy to access so cleanup will be less of a chore
Full Story
BOOKSCan Tidying Up Result in Life-Changing Magic?
Organizing phenom Marie Kondo promises big results — if you embrace enormous changes and tough choices
Full Story
DECLUTTERINGDecluttering Help: What to Do When Nothing ‘Sparks Joy’
If the Marie Kondo phrase doesn’t help you decide what to keep and what to discard, try asking these 4 questions
Full Story


Laura Hill