


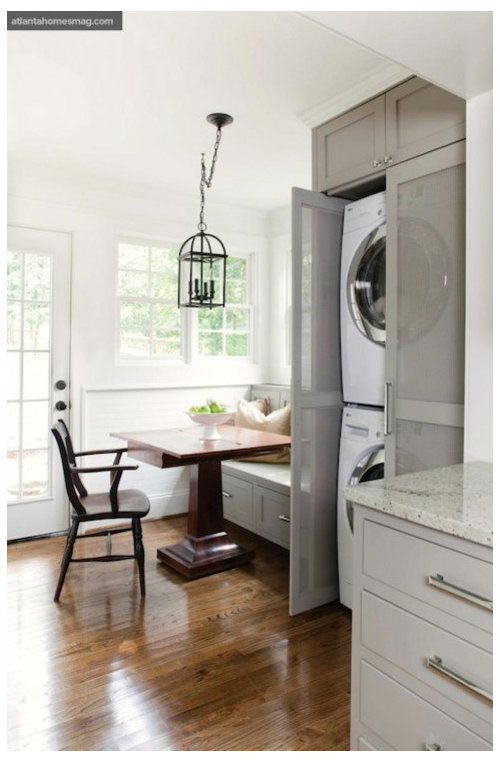
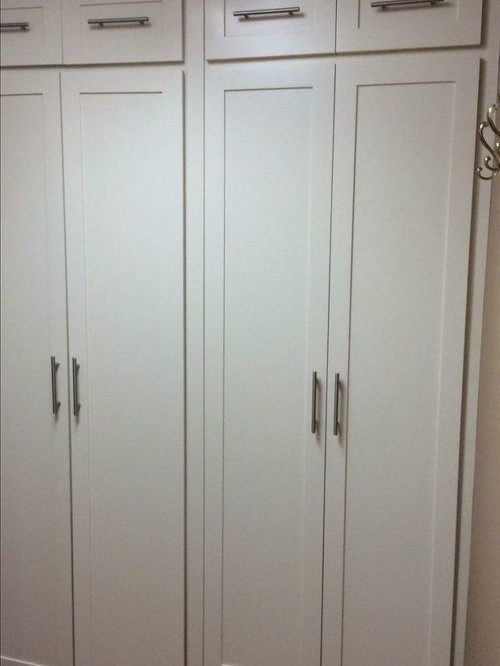
6' wide floor to ceiling cabs--how to not look like a monolith?
girl_wonder
4 years ago


Featured Answer
Sort by:Oldest
Comments (10)
Related Discussions
is 6 feet wide enough?
Comments (39)I've had my Harbor Freight GREENHOUSE since this past September. With my husband off to Iraq since last July, (due back at the end of June), this greenhouse has been my passion! Being a military spouse of 19 years, this has been my first opportunity to own and run my own reasonably sized greenhouse. With the 9 moves under our belt already, the Harbor Freight Greenhouse has been the perfect solution to an avid military spouse gardener! I also happen to love this Greenhouse so much, that I've taken every precaution so that it may survive any weather that can be thrown at it. I've got heat, a fan, an automatic ceiling vent opener, lower venting for good air circulation, additional support for any snow accumulation, a built in misting system and so on. I have been thrilled with the results of my endless flats of perennials and annuals that have come from the use of this Harbor Freight Greenhouse! And once my husband returns, I will use this Greenhouse even more, especially during the evenings when I usually retire to the house so that my children are supervised! Mylu, unless you speak from experience, this is indeed a greenhouse. And yes, I've been inside during violent storms with no fears! Knowing that another impending move will be upon this military family, this Harbor Freight Greenhouse has given me an opportunity that is usually unavailable to those of us who do not own homes, but continue to move again and again while our spouses serve. I wish I had the opportunity to live in one place and own a home and perhaps someday have a larger greenhouse to play in. But until then, I'll relish and enjoy my 6 foot by 8 foot Harbor Freight GREENHOUSE and be thankful for my small opportunity to garden like I dream! Dawn DAWN I would like to take this opportunity to say thank you for you and your husbands sacrifices that you make to keep are country safe and make it possible for people like NYLU to have the freedom to say what me whats even if he does make a fool of himself. I'm sure that for your situation the 6x8 HFGH is a perfect gh for you. The best advice that i can think of is what my father told me. NEVER ARGUE WITH A FOOL HE WILL SOON BRING YOU DOWN TO HIS LEVEL AND THEN BEAT YOU WITH EXPERIENCE....See MoreAngled range hoods / hoods that are not monolithic?
Comments (12)The disadvantage to all these goodlooking hoods is that they don't capture air. The hot air rising from the cooking area. Consider capturing air. And doing so in a way that increases your impression of space. We also have low ceilings (94.5 inches) in a galley kitchen and wanted a wall hood that would not feel massive / use a lot of the visual space. I'll use your thread to introduce my solution, and at some other time I'll put it all into a new thread. It's a small space, landlocked. We figured we'd make it feel big and open by not having any upper cabinets above one of the two counters --- just backsplash and open space above it, using a horizontal mirror on the wall to increase light from the adjacent space and that window about eight feet away. We removed most of the dividing wall between the kitchen and the adjoining windowed area. Above the cooking surface we felt we needed a structure that could hold the slide-out hood we would design. Reading arbordomus' thread from last January gave us both this idea and the other idea described so far, i.e. increasing visual effect by having something attractive over that other counter. Both a technically valid hood solution that took the space it needed, and an over-the-sink solution, light and airy. For the hood wall, a basic low-cost customizable solution was a wall of three 30.375" high Ikea Akurum boxes, with frosted glass doors and fluorescent light bars inside. Light comes from the horizontal base plate on the bottom: you replace each cabinet's OSB floor with a shelf designed for this purpose. The shelf has lighting in it. Then I did the same with each cabinet's top panel, and got more light. Then I added extra fluorescent bars with warm light bulbs to counteract the cold sameness of the IKEA fluorescent light shelving; I put these behind the cabinets, after first pushing the cabinets out from the wall (using spacers) and removing the cabinets' false backing. It's great to have two kinds of fluorescent lighting: a linear sum of white lights. The impact of this white light is WAY more appealing than either one all by itself. It's white light with increased "complexity". The fan is an inline FG6 from fantech.net. It's suspended from the ceiling. Neoprene rings prevents the fan's normal hum or vibration from going straight into the wall of the duct and traveling down the duct. (It's so quiet it probably wouldn't need the neoprene.) The fan is eleven inches in diameter. Eleven inches is available when I install the wall cabinets at 53" height -- and that happens to be pretty much at the "industry" norm of 54" height. In your case you could go with the 15" Akurum wall cabinet and save a lot of money. The fan has a six inch duct. I had the duct turn down and change shape to fit into my wall's stud cavity. A standard duct adaptor / transition piece, readily available in a large hardware store, turns the duct ninety degrees downwards and changes the 6" round duct into a 3.25" deep by X" wide rectangular duct. Here is where I had a guttermaking shop make another adaptor to turn the corner and transform into a wide wide rectangle for me since my wall studs are 24" O. C. apart. This big rectangular duct comes out of the wall at a 45 degree angle under the wall cabinets,at 47.5"- 53" above floor level. I cut this last angle myself since I had the metal shop just make a long straight rectangle and I didn't know yet what distance it would travel; also, I didn't know the precise height it would be installed at, near the ceiling. The filter fits in here. A wall switch gives me three speeds. I tried a few variable speed controls but they cannot match power factor so they create a little hum at low speed, which is not acceptable to me since low speed operation has to be silent for me to accept it. Summary: Blower motor : invisible since it is in an 11" header box above the wall cabinets. Duct: invisible since it's inside the wall. This increases your options for space / visual effects in your wall cabinets. Filter: under the wall cabinets at the mouth of the in-wall duct. Glass pullout: under the wall cabinets. Remember the goal: to increase the visual impact and the impression of space. A header box overhead holds three recessed 50W 12VDC 12.5 degree spotlights shining onto the counter. I removed the magnetic transformer from these recessed halogen cans, and installed a single electronic transformer instead, because I couldn't stand the hum from the magnetic transformers. Each bulb shines onto the counter while also highlighting the wood frame around the frosted glass panels of the wall cabinets. These glass panels are lifted to open, not pivoted out. The lift mechanism is Blum Aventos HF with 104 degree angle stop. The advantage is space and visual effect (again). The wall cabinet doors slide up and fold up. No opening sideways. If you get 15"h Akurum boxes WITH a lift up hinge, you'll save a lot of money and hassle time compared to my 30"h box. The overhead halogens are in a piece of the header that extends far enough out overhead to put the halogens directly above the front edge of the counter. A portion of the header 7"h extends 11" out from the plane of the wall cabinets. This portion was built in a gently curved shape; again to increase the visual impact. When the door panels are lifted up, the halogen light shines through the frosted glass to the counter below. - So far so good. Next step is to finish making the filter (baffle or mesh) and the official sneeze-guard / canopy / grease surface. I got this far by taking my time, so stay tuned and read my next post about this, in six months from now. The filter could be baffle or mesh or both combined. I have stainless steel that I can cut to any shape, and take to have welded together. As sneeze-guard / canopy / grease surface, I have a clear, not frosted, tempered glass plate that I intend to slide out and tilt down on a slight angle. The underside of the wall cabinets will hold the supports for the slider mechanism. Note that this is already made of tempered glass -- but in addition to this I intend to use more glass to make the whole air capture area even more fireproof, cleanable and clean looking. On the wall, I'll cover the drywall with perhaps one entire piece of glass, or epoxy grouted glass tiles, perhaps with some mirror pieces in there. 53" above floor is below-eye level. A glass pullout slider puts the airstopping canopy's front piece at a sneezeguard height and angle. Making it be able to tilt downwards too, solves a number of air flow problems common to ALL the kitchen exhaust fans we see in the market today. Consider how to stop your grease-speck laden air from rising and escaping the capture area. Solving this problem with a high-space visual effect will give you both what you want and what you need. h.t.h. -dr...See MorePlease Post Pics of your 5' Wide Floors or 3.25' Wide Floors
Comments (24)Hi jeri, I have not talked with the installer yet on my decision in no longer gluing the floor but floating it. My neighbor has a floated 5"" wide Merbau hardwood floor and I like the way it feels when I walk on it. It has no hollow sound and feels solid but has a tiny bit if cushion so it does not feel like I am walking on my hard tiles in my two foyer areas. My other neighbor's very dark 5" wide plank floor feels very hard to walk on since it was glued. I am hoping my installer agrees with me and feels it is OK to float the 5" wide Triangulo Engineered 1/2" thick with a 3 MM sawn cut veneer of Brazilian Cherry on top floor ( have a concrete floor and installing a sub-floor would cause problems in my door ways and raise my floor much higher than my Porcelain Tile foyers so I decided to go with an engineered wood floor that has a sawn cut veneer). I just hope I can refinish it if I ever need to since BR-111 says you can refinish the floor a few times and I am hoping the floating installation does not affect this....See MoreOld cabs: how to safely remove old paint?
Comments (13)It's probably a safe assumption that there will be lead in the lower layers given the age of the house, I think---not even sure I'd bother to test it. (They do test for free here, though---I wouldn't be surprised if Portland does too.) Lead was in virtually all enamel/cabinet/trim paint before the late 60s. But you can still sand with the sponges---that's what they're designed for, in part. When they're wet, they'll contain the dust so that it's not all over the place; a mask will also help to make sure you're not breathing it, and then afterwards you wet mop to get up any bits of dust on the floor. We did the whole lead testing and education bit with our county last year, and it was super helpful. One of the more important things I learned was that while lead is icky stuff, it's largely a concern if it's eaten or inhaled in quantities, so you can do a lot to prevent that and to let older kids know to avoid chipping paint and wash hands after touching it. It's also less of a concern if it's a one-time project than if it's ongoing chipping, like with a window where someone's painted the sash so every time it opens or closes, fine dust comes down. Projects can be more easily secured so toddlers and pets are away from the work. The really important thing they drilled into us was that the surface of the paint needs to be intact---you don't need to remove lead paint, but you do need to have it covered with a good layer of new paint on top. It's worse to take some of it off and open up lower layers to chipping/flaking than just to leave them alone and paint over with good quality paint, unless you have the resources (time, energy and/or money!) to strip down to the bare wood. In your case, I'd only touch it enough to get it into paintable shape. The biggest problem we had was our dog---lead paint chips apparently smell/taste sweet, which is what attracts babies too. So we would constantly catch him snuffling in an area where work was going on, trying to find the chips. Finally just gave up on that and shut him out of the room all together till we were done!...See More
girl_wonder
4 years agogirl_wonder
4 years agogirl_wonder
4 years ago
GreenDesigns
4 years ago
Related Stories
BEFORE AND AFTERSKitchen of the Week: Saving What Works in a Wide-Open Floor Plan
A superstar room shows what a difference a few key changes can make
Full Story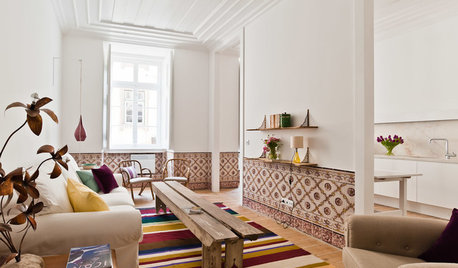
TRAVEL BY DESIGNHomes Away From Home: 6 Appealing International Bed-and-Breakfasts
Live like a local in a foreign land. These design-friendly B and Bs offer comfort and style for a wide range of budgets
Full Story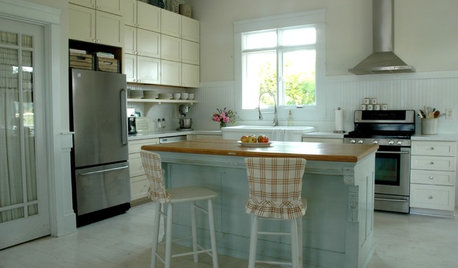
KITCHEN DESIGN6 Kitchen Fixes for Nomads
Renting? Some Affordable Ways to Make That Kitchen Feel Like Your Own
Full Story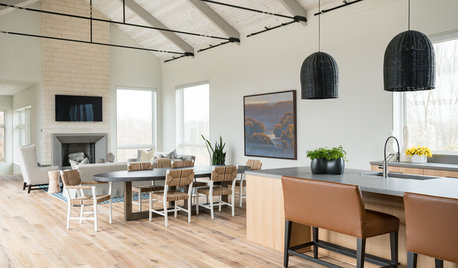
ARCHITECTURE5 Questions to Ask Before Committing to an Open Floor Plan
Wide-open spaces are wonderful, but there are important functional issues to consider before taking down the walls
Full Story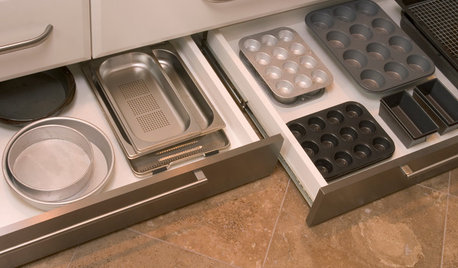
KITCHEN DESIGNThe Kitchen Storage Space That Hides at Floor Level
Cabinet toe kicks can cleverly house a bank of wide drawers — or be dressed up to add a flourish to your kitchen design
Full Story
LIGHTINGDramatic Lighting for Low Ceilings
No room for a big chandelier? See how your overhead lighting can still make a statement
Full Story
LIVING ROOMSLay Out Your Living Room: Floor Plan Ideas for Rooms Small to Large
Take the guesswork — and backbreaking experimenting — out of furniture arranging with these living room layout concepts
Full Story
KITCHEN DESIGNKitchen of the Week: White, Wood and Wide Open
A Pennsylvania couple and their designer take down walls to create an open, light-filled great room
Full Story
REMODELING GUIDESLaminate Floors: Get the Look of Wood (and More) for Less
See what goes into laminate flooring and why you just might want to choose it
Full Story
KITCHEN CABINETSNew This Week: 6 Blue Paints for Stylish Kitchen Cabinets
See how undertones in blue cabinets create diverse styles and moods, from playful and fun to daring and dramatic
Full Story


JAN MOYER