


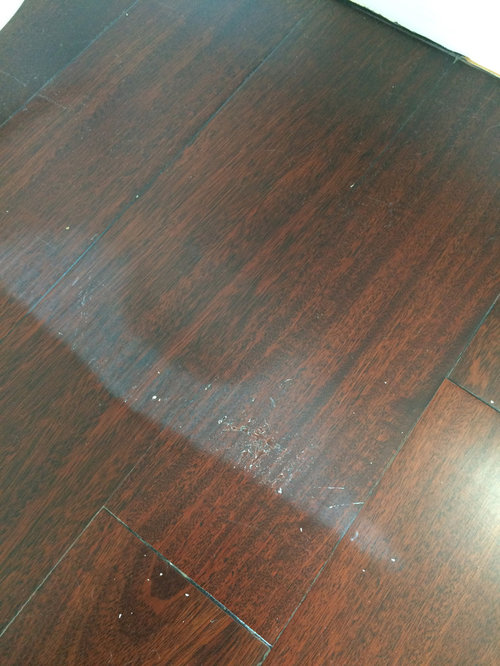
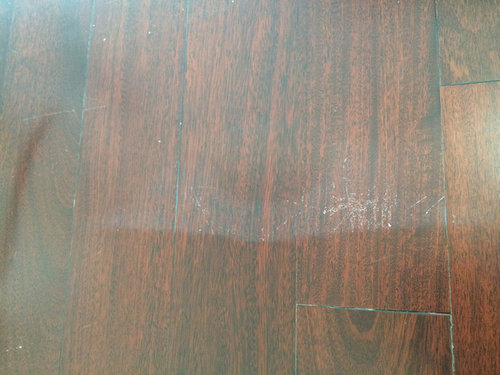
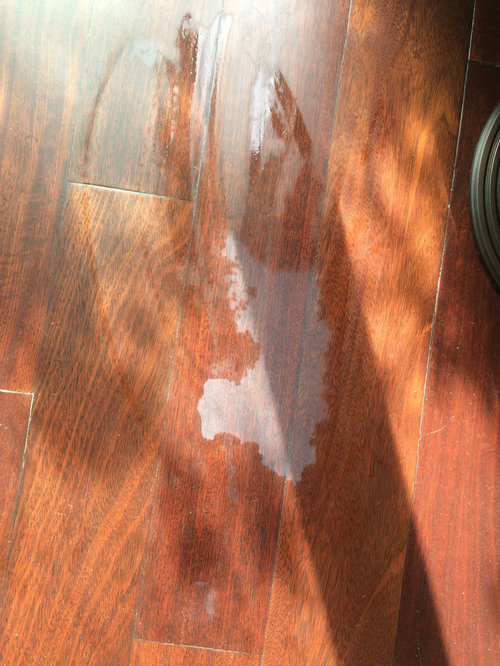
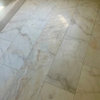
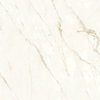
Water marks after buff and recoat.
icenet333
5 years ago
Featured Answer
Sort by:Oldest
Comments (9)

icenet333
5 years agoRelated Discussions
how to clean drip mark off stainless dishwasher?
Comments (192)Well Mo, sgmkj22 et al... we're observing same phenomenon, which seems to have no viable solution other than "staying on top" of the streaks. Which means every day I suppose. But it sure is bizarre that none of us can make real sense of where/how it comes from. For example the vent idea makes sense, however these evaporation vents are in different places on the appliances - yet some of us get the streaks from seemingly unrelated areas. ALSO I wonder if its mostly Bosch brand, or if its a general stainless steel door thing ? Maybe some of them have really thin/flimsy door panel which essentially translates "heat" from inside leaving ghost marks! All I KNOW is that I hate stainless steel appliances, never understood why they became so popular as to be ubiquitous -- and the ONLY reason I have this new dishwasher in SS is because my husband insisted it would "look better" than my old white one. HA ! I think I'll have HIM "stay on top" of the streaks. Thanks everyone for chiming in... We're hosed. That's it....See MoreHelp! Lap marks in poly on new floors!
Comments (14)Hi! I just wanted to let everyone know how our floors turned out . . . The owner of the flooring company finally came out to look at the floors and pronounced them unacceptable. He proposed sanding back down to the bare wood and starting over - which is what we'd hoped he would suggest. The plan was to sand the floors at an angle and then follow with a multi-head machine in order to remove the chatter marks. They also wanted to water-pop the floors prior to staining in order to achieve a richer, deeper color and then re-apply 3 coats of satin Bona Woodline poly. And the results were . . . GREAT! The chatter marks are still slightly noticeable (at least to us) but are not objectionable. The stain color is beautiful - we used 2 parts Dark Walnut to 1 part Red Oak - since the previous mix of 50-50 Provincial/Dark Walnut had produced a pale, cool color on our white oak. It's a much warmer, richer color now and we love it! For the poly application, we used our programmable thermostat to do the following: Warm the house to 74 degrees 1 hour prior to application Turn the air OFF as application began Turn the air back on at 68 degrees 4 hours after application They also took the poly home with them at night and took it inside to keep it warm. I have no idea which, if any, of these modifications worked to resolve the problem but we ended up with a streak-free floor and we're happy! We did have one problem though, that I want to mention as a warning . . . Around 1:30am after the 1st day of sanding, we received a call from our next door neighbor saying that a large black bag in front of our house was on fire. The bag (containing sawdust) was sitting at the base of our front steps (and in front of her car) and apparently had started to burn spontaneously. She was about to call 911 because her house was full of smoke but her son (whom she'd also called) arrived just in time to keep her from doing so. It took us about an hour outside in freezing temperatures and snow to get a hose hooked up, break open the bag, spread out the sawdust and wet it down until it stopped burning/smoking. Both homes and everyone's clothes smelled strongly of smoke and everyone had to shower before going back to bed. The next day (also in the snow), it took another hour or so to shovel up all the debris from the night before and bag it up so it could be thrown away. Not fun! Apparently, because the poly on the floors had been recently applied, it reacted with the sawdust and spontaneously combusted. We'd heard of this happening with stain-soaked rags but were unaware that it could happen in this manner. Very thankful the bag wasn't left in our house or garage! Anyway, there's a happy ending to our story and we're so very glad we decided to allow them the extra time to make the floors right!...See Morecabinet coat has brush marks??!!
Comments (5)In the years I've been using CC I've not had any issues with brush strokes except in a couple scenarios as Michael mentions: ridges in the primer and brushing over CC that has begun to set up. I'm no pro, just a gal that likes to paint ;) Our new trim was preprimed poplar, but I still had to lightly sand some drips and bumps out before applying CC. And wipe with a vacuum, tack cloth and then clean damp lint free rag to get any sanding residue off. Preprimed MDF tends to be smoother, my guess would be either they're recoating too soon, loading brush too heavily, or dragging the brush back through after CC has begun to set. When I first started using CC, learned that the hard way. (A small job, I had to let surface dry, go back and sand it smooth and start overt.) Once CC has started to level, if it's brushed back over too late after application the result is much like dragging a brush through Elmer's glue that has begun to set up. It will create a goobered up mess. It's been my experience there is a small window of opportunity to go back and brush out any drips/runs developing. My method was to paint the surface, move on to the next area, but closely watch for runs/drips where I had just been, and immediately brush them out. If it was more than 10 minutes or so and I went back over that area, I'd be making brush marks. Is it possible your painters are re-coating too soon? (I ask because I once witnessed a 'pro' painter do a family member's foyer walls with primer/1st coat/2nd coat back to back.) CC must be completely dry before another coat is applied. With CC, I learned it's far better to load the brush with about half as much as one would if they were using 'standard' latex paint. It will still cover well, and if applied too heavily, it will create many runs/drips that if brushed out too late will leave marks. (Often runs will not develop for about 20 minutes on some surfaces, so it's best to avoid those ahead of time.) It really does pay to take a scrap piece and practice a bit before diving in, doesn't take long to get the feel of it and saves a world of grief....See MoreOak TableTop discoloration / Re-coat w/urethane?
Comments (22)Well Folks..more than a year..the table is back to being...ehhh. Recall I had wiped it down with mineral spirits and pretty much left it go. We have not used any polish since either but it was likely polished with pledge at some point...again not for at least a year and never regulary. So, it time to strip or seal. About half the posts mentioned stripping. I have some concerns and my wife does not like the idea for a variety of reasons including the mess and smell and time without the table. So..that not happening. She'd be happy leaving it go but I do not want it getting worse. It was bought at 'Just Cabinets' 10 years ago..From the other posts it seems the consensus is that its likley a was water based poly use by manufacturers of cheaper table because it dries quick. If so, it sounds like I can sand lightly and re poly with another water based poly without worry of peeling. Correct? Is there a huge difference in the MixWax water based Poly and anything else. I am guessing I will have to do this again down the road so unless special ordering something somehow lasts longer, I can get MinWax locally. Thanks!...See Moreicenet333
5 years agoicenet333
5 years agoicenet333
5 years ago
Related Stories

HOUSEKEEPINGHow to Remove Water Rings From Wood Tables
You may be surprised by some of these ideas for removing cloudy white water marks from wood surfaces
Full Story
DECORATING GUIDESQuick Fix: Erase Water Rings from Furniture
A few household items can quickly rejuvenate tarnished wood tabletops
Full Story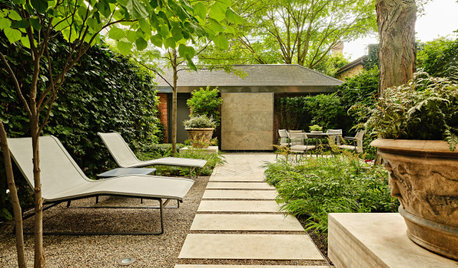
LANDSCAPE DESIGNBefore and After: 5 Patios That Celebrate Outdoor Living
See how landscape designers transform yards of all sizes and styles into stylish, hardworking patios
Full Story
TRAVEL BY DESIGNArchitectural Wonders: Postcards From Singapore
Today's masters — Safdie, Libeskind, Koolhaas and more — have put their fantastically modern mark on this flourishing city
Full Story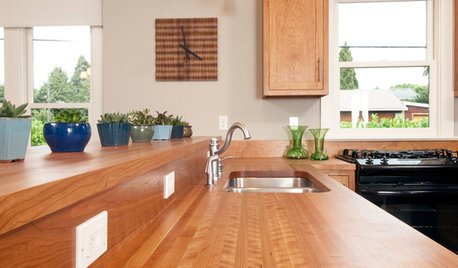
KITCHEN DESIGNWonderful Wood Countertops for Kitchen and Bath
Yes, you can enjoy beautifully warm wood counters near water sans worry (almost), with the right type of wood and sealer
Full Story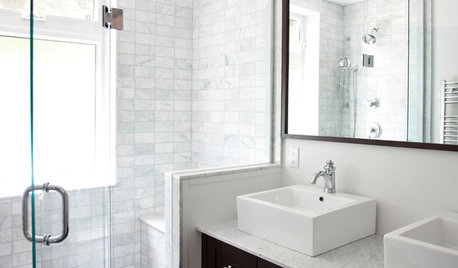
REMODELING GUIDESHow to Keep Your Home's Beautiful Glass Sparkling Clean
A few simple tools and tricks keep water spots and soapy film at bay
Full Story
BATHROOM MAKEOVERSFrom Canning Porch to Beautiful Vintage Bath in Oregon
Thrifty finds and DIY labor transform a cramped space into a serene hotel-style bath on a budget
Full Story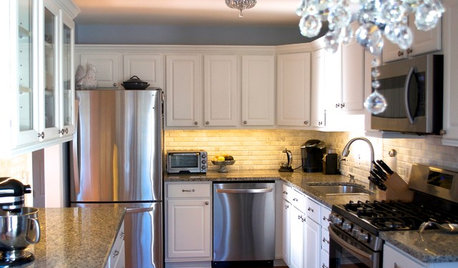
KITCHEN DESIGNDIY Spirit and $8,700 Transform a Townhouse Kitchen
The Spanos taught themselves some remodeling tricks, created a Houzz ideabook and then got to work on their kitchen makeover
Full Story
KITCHEN DESIGN24 Dramatic Kitchen Makeovers
From drab, dreary or just plain outdated to modernized marvels, these kitchens were transformed at the hands of resourceful Houzzers
Full Story
TILEPorcelain vs. Ceramic Tile: A Five-Scenario Showdown
Explore where and why one of these popular tile choices makes more sense than the other
Full StorySponsored
Zanesville's Most Skilled & Knowledgeable Home Improvement Specialists
G & S Floor Service