


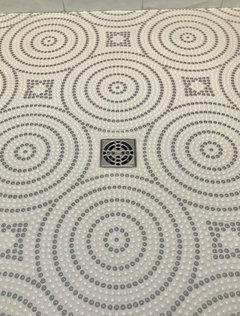
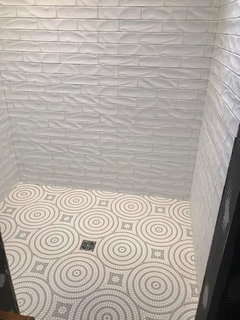
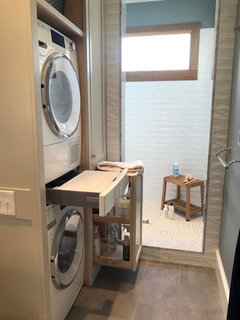
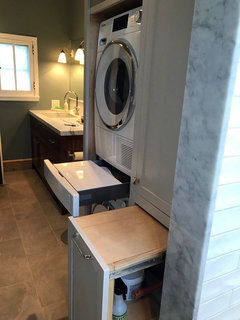
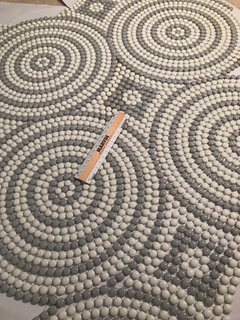
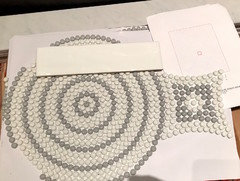
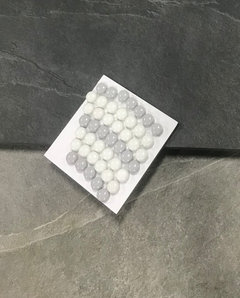
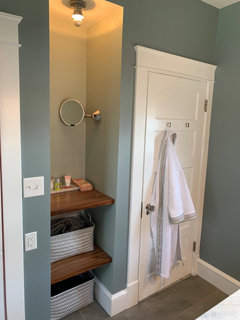
Bathroom remodel ready to reveal! Laundry too!
scottie mom
5 years ago


Featured Answer
Comments (52)
Related Discussions
Bathroom Reveal, Thanks to the Bathroom and Remodel Forums! (pic
Comments (56)This old thread got revisited. @dani_m08 to answer the question about extra probe, I believe I ordered an extra one when I bought the set up. The probe wire is just setting in the junction box I think but honestly I cant remember. When I laid out the underfloor heating and the probe, I just ran another probe near the first probe, and it was then sealed into the floor self leveling compound as per instructions. then the end was just threaded into the wall like the one that would be live, and not connected, but just laying there in the box. Regarding the tile layout. I just decided to run it this way, after getting instructions on the 90Degree way, IIRC. The herringbone that I love is from my childhood and the side walks in my neighborhood that all ran at 45Degree. so that to me is herringbone. I know you posted on @sochi thread about her amazing bathroom and a wall mounted faucet. I would totally do it if I had the right sink for it. In my case I had made my sink out of soapstone and an integrated backsplash. The pictures of this bathroom reveal are no longer available because of the use of photo bucket, when it was Gardenweb. I did not keep my account with photo bucket. I'll add some of the reveal pictures so you can see the sink and floor. Regarding the sink there is no ledge for water to drip from my hands when using the faucet. The water drips right into the sink. In my other bathroom with a deck mounted faucet I am always wiping up drips and it is a nuisance. I much prefer the setup for this sink. Below: I love the flush finish from the faucet to the bottom of the sink. nothing drips on a counter or edge of a sink. Below: looking in from the doorway. Below: Here I am finishing up the sink. the backsplash was epoxied on as a separate piece. The whole soapstone install in the room took next to nothing to buy as they were all small pieces that I epoxied together with a 3 part stone epoxy. Below: this is the counter at the tub, and is in 2 long pieces but I was able to epoxy them together at there edges to make a wide slab for the top. All the soapstone was finished with a 60 grit sandpaper to be rough and this lovely soft tone of blue/green/gray/white. I did not oil it so this color tone would remain light. Below: If I recall correctly @sochi helped me decide on this Hubberton Forge Mirror. I have 3 different metals in this room, but they are all a cool silver to black color. Below: the center of this tower shares space with the kitchen on the other side of the wall. there is also some extra space that houses some electrical wiring. this is an old simple house. this bathroom was an add on when it got move to the farm in the 30s IIRC. The plumbing was all rearrange and some of the details that were orignially there I kept but updated it, such as this tower feature. The old one went and the carpenter did a wonderful job with this one. Below: This feature was another thing I kept from the old bathroom but flipped it from the other end and had the carpenter put drawers in it. Before it was a hell hole. things got lost and the build was soooo old and creapy I didn't like using it for storage. Now it is perfect for storage....See MoreNew Bathroom/Addition vs. Bathroom/Kitchen Remodel
Comments (5)thanks to all who have posted so far, especially Eric. We can probably save/budget down the road for a kitchen redo, or do part of it ourselves. Additions would be a little harder for us except finish work (floors, tile, etc. Can do drywall even but would need to find time to do it). What that kitchen has is a U shaped layout, not too bad except there are overhanging cabinets between a small dining/family space and the kitchen. It's a counter/pass through kind of setup where someone can sit at stools and talk with the person in the kitchen....except the cabinets hang down so the person in the kitchen has to look under them. We would likely tear those out and relocate the stovetop to the perimeter wall and make that pass through an island. Then that entire space could become kitchen/dining. It is possible we could still move out a wall on that (kitchen) side of the house down the road too, we are in Hawaii so all the construction costs are much, much higher than mainland. So jealous of all the posters here who can put on a large extension for less than 50K. Plan A or Plan B will cost us about the same. We don't plan to sell and move anytime soon, but should we need to we're leaning toward sq. footage instead of just extending current bath and upgrading the kitchen. Our neighborhood is about 20 years old so people are beginning to redo those rooms as the fixtures and appliances are ageing. We redid all the appliances about three years ago with stainless finishes, new faucet/sink, and redid the countertop Corian, so the kitchen is livable - just need to clear out some clutter and make smarter usage on available storage space. We could paint or restain the cabinet doors to freshen it up. A few neighbors are creating the "big bang" kitchen now but I'm not certain a 70K upgrade will improve the value that much as a new neighborhood is planned about 5 miles away within the next couple of years. Would we love to live in a "WOW" kitchen, of course. But as with most people we have to make a decision on where it is best to spend the money for now. We could feasibly also add on a 2nd story in future years, but we prefer the single story and if we age-in-place as planned, the new bath will include wide accesses and no-curb shower....See MoreAt long last - my cottage/farmhouse master bathroom reveal
Comments (58)Haha. Funny that this thread resurfaces today. I am STILL dealing with the grout issue, though I think I am at the tail end. I have not done anything about the door because I was waiting to see what happened with the grout. Basically, original tile guy kept pushing us off and pushing us off til he started ignoring us altogether. Took me some time to find a few other tile guys to come out and have a look. The two tile guys who came out had differing opinions on what to do - one guy said use it, it's fine (which I didn't think it was because gritty bits of grout were running down the wall after every shower!). The other guy recommended painting this sealer on that the grout company sent -- it had to be hand applied -- two coats! -- with a freaking artists' paintbrush (only on the grout lines, not on the tile at all!) so I didn't want to do it myself and he would have had to charge a lot for his time. I decided to test out the sealer to see if it would even help in a few different spots -- some of the threads on the internet from fellow suffferers of this problem said they had spent the time to carefully paint on the sealer and it didn't fix the problem! So the testing took a while cause I kept getting sidetracked (plus I was dreading what I was going to find at the end of the testing so I was kind of procrastinating -- a lot.) But when I finally buckled down and focused on it, I discovered that while the sealer didn't seem to fix the problem, the areas that I had scrubbed really hard (while trying to see where the grout was "loose") weren't running down the wall anymore -- I guess I had gotten off the loose stuff that didn't cure right. So I tested a small area last week by scrubbing the crap out of the grout lines with a stiff grout brush and letting it dry. I rechecked it today - all good! So just this morning I embarked on the process of super-scrubbing every grout line to get off the loose surface stuff -- so far underneath everything seems ok though I'm expecting that I might find a few spots that need touching up as I go -- which will involve getting a tile guy back again - ugh. It's slow going -- all that hard scrubbing is kind of tiring so I can only do so much at a time - I did maybe a quarter of the shower this morning and now my arm is killing me, LOL! But it's better than tediously painting two coats of sealer with a tiny paintbrush!!! Anyhow, thanks for the compliments! I have not hung any towel hooks either, though I did replace the stand with one that has towel bars on the side -- I thought that would work at least for my sink (the one on the end closest to the stand) but since the towel bar is behind me, I didn't end up using it. We've just been folding the towel up on the counter. I'm such a slacker LOL!...See MoreSmall bathroom/laundry room remodel help with mirror and lights
Comments (4)I wouldn't use beadboard because it's cottage/beachy and your bathroom is traditional. If you want the beadboard look, I'd use a Shaker vanity. Otherwise I'd use traditional paneling with that vanity. Here are a few examples: With a warm color palette, you could use polished nickel for a little sparkle. It has a gold undertone where chrome has a blue undertone. The vanity is heavy and ornate so I'd probably look for a wood framed mirror for balance, though I'd keep it simple. I like rectangular mirrors when you are using an overhead light fixture. Something like this: https://www.build.com/avanity-brentwood-m24/s899881 Or the Avanity Madison: https://www.build.com/avanity-madison-m24/s1085061 The floor, vanity, and mirror hits my limit on brown tones, so that's why I'd use nickel lighting, faucet, and hardware. I'd use a traditional three-light fixture that's a few inches shorter than the mirror. What will the countertop be?...See More
scottie mom
5 years agoscottie mom
5 years agoscottie mom
5 years agoscottie mom
5 years agoscottie mom
5 years agoscottie mom
5 years agoscottie mom
5 years agoscottie mom
5 years agoscottie mom
5 years agoscottie mom
5 years agoscottie mom
5 years agoscottie mom
5 years agoscottie mom
5 years agoscottie mom
5 years agoscottie mom
5 years ago
dabjg
5 years agoscottie mom
5 years agowaverly6
5 years agoscottie mom
4 years agoscottie mom
4 years ago
Related Stories
REMODELING GUIDESBathroom Remodel Insight: A Houzz Survey Reveals Homeowners’ Plans
Tub or shower? What finish for your fixtures? Find out what bathroom features are popular — and the differences by age group
Full Story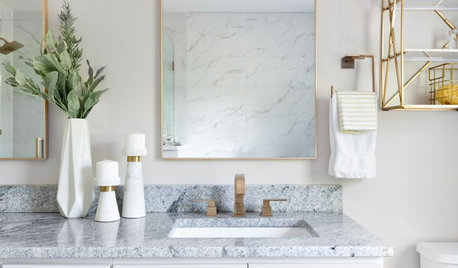
BATHROOM MAKEOVERSNot Ready to Remodel Your Bathroom? Try a Mini Makeover
You can make your room a more pleasing space with a simple spruce-up or a moderate refresh
Full Story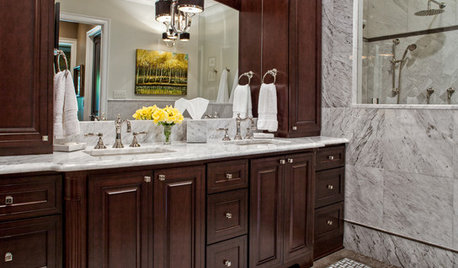
REMODELING GUIDESBathroom Workbook: How Much Does a Bathroom Remodel Cost?
Learn what features to expect for $3,000 to $100,000-plus, to help you plan your bathroom remodel
Full Story
4 Easy Ways to Renew Your Bathroom Without Remodeling
Take your bathroom from drab to fab without getting out the sledgehammer or racking up lots of charges
Full Story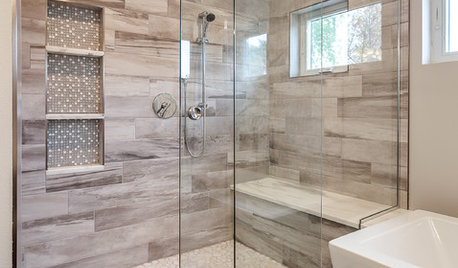
BATHROOM DESIGN10 Things to Consider Before Remodeling Your Bathroom
A designer shares her tips for your bathroom renovation
Full Story
INSIDE HOUZZWhy Homeowners Are Remodeling Their Master Bathrooms in 2018
Priorities are style, lighting, resale value and ease of cleaning, according to the U.S. Houzz Bathroom Trends Study
Full Story
BATHROOM DESIGN14 Design Tips to Know Before Remodeling Your Bathroom
Learn a few tried and true design tricks to prevent headaches during your next bathroom project
Full Story
BATHROOM WORKBOOKHow to Remodel a Bathroom
Create a vision, make a budget, choose your style and materials, hire the right pros and get the project done
Full Story
BATHROOM DESIGN10 Ways to Control the Cost of Your Bathroom Remodel
Bathroom designers offer 10 budget-saving tips for layouts, materials, fixtures and more
Full Story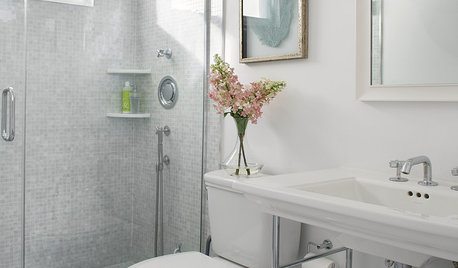
HOUZZ CALLHouzz Call: Show Us Your 8-by-5-Foot Bathroom Remodel
Got a standard-size bathroom you recently fixed up? We want to see it!
Full Story

leela4