


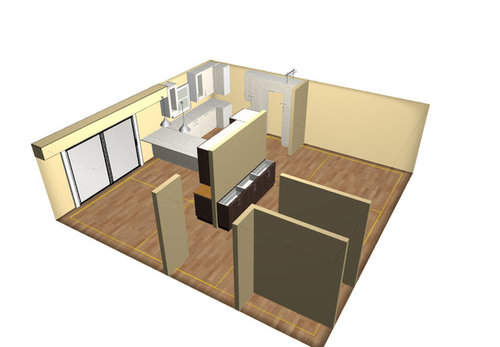
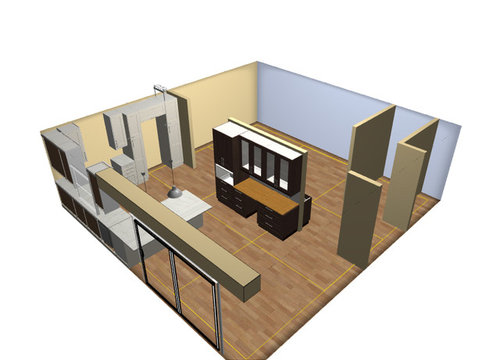
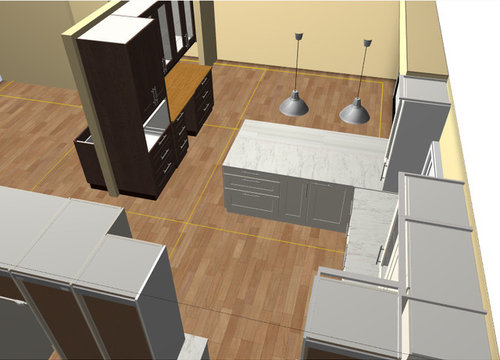
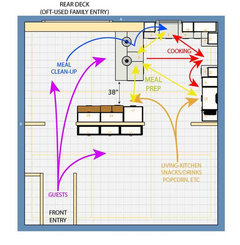
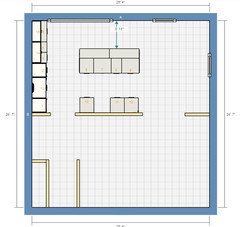
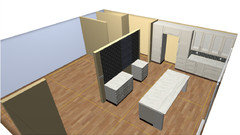
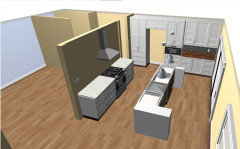
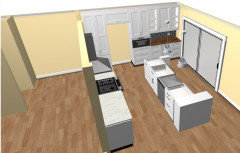
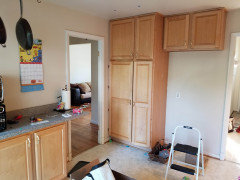
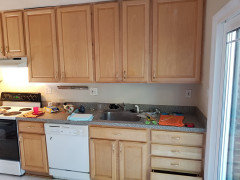
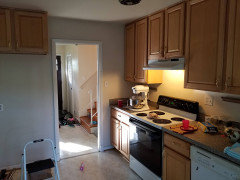
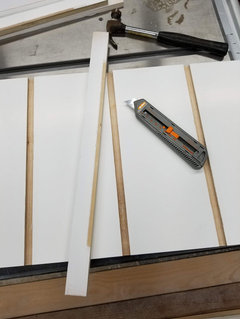
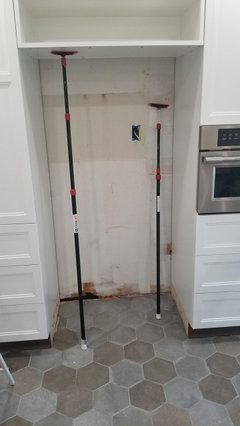
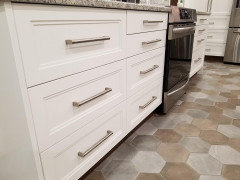
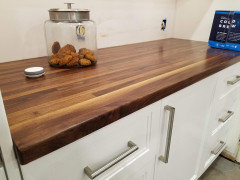
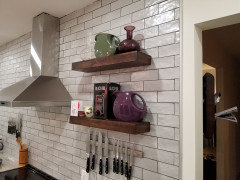
1960's Split-level Kitchen - Design - Process - Reveal
sockpuppetpete
5 years ago
last modified: 3 years ago

Featured Answer
Sort by:Oldest
Comments (52)

sockpuppetpete
5 years agosockpuppetpete
5 years agolast modified: 5 years agoRelated Discussions
Design Around #12--1960s tract house.
Comments (92)Thanks, Sochi...but I haven't even figured out the mood board, yet. I have contractors out every day, working on my house. I've had time for a quick comment, here and there, but no time to concentrate on anything for more than a few minutes. Marcolo- Would you want to do it? That way you can clarify what the thread should be or not be. You did an excellent job, with the 1920s DAT :)...See MoreGreat Kitchen in a 1960s Split? Mission Impossible?
Comments (13)We are in the middle of renovating the kitchen & dining area of our 1979 split level-entry home (stairs going up & down from the front door). We have 2 small kids and were really lacking storage and usable countertop. There is an entrance to the kitchen at the top of the stairs & one into the dining room towards the back sliding door. It was an L shape with a pantry closet, fridge, & range on one wall the sink & dishwasher on the other. That left 2 empty walls with nothing. We took out the pantry closet and put in a broom closet, moved the fridge down, added a deeper cab above the fridge, moved the range over giving us room for a corner lazy susan and a bit more countertop. We took out most of the wall between the kitchen & dining room. The remaining empty wall we placed a pantry cabinet and to the left of that an open shelf cabinet. There will be a peninsula of cabinets being put in there between kitchen & dining room. The microwave going under the open shelves and on top of the counter. The remaining wall will hide the micro from the dining/living area. The peninsula & pantry are going to provide a lot more storage for us, much more countertop, and a place for the kids to pull up at the counter. We also took out the big rectangular fluorescent lightbox and installed 2 solar tubes in that recess, and recessed lights around the perimeter. I can already tell this space is going to work so much better for us and we'll be able to see the kids better in the other rooms while we are in the kitchen. We really tried to utilize all of the space that we have. I will post some pics when we are done, right now it's a mess (Mostly DIY project as well)....See MoreKitchen/House Reveal - DIY with Scherr's RTA. Better late then never
Comments (62)I've been waiting for a quiet morning with a cup of coffee to soak in your reveal. WOW!!! I keep getting up to show my husband another set of before & after pictures. There are so many things to comment on. The new exterior is beautiful. The entry area & staircase redesign sets the stage for the rest of this truly lovely transformation. I love, love, love the kitchen table area with the windows, french doors & window seat. When I saw the 3-D pics with the peninsula, I had to go back & locate the peninsula. It blends in perfectly with the eating area. Absolutely love the Costa Esmeralda. I can just imagine you posting your marble tiles with the countertop & asking for advice with many of us saying "too busy & don't do the framed insert above the stove." It's perfect & it's stunning. I love the colors of the glass tiles with the Costa Esmeralda. Big Congratulations! I'm looking forward to the outside pictures & pics of the fireplace built-ins. Step stool storage - genius!...See MoreWhat Trim Style for a Split Level with No Style?
Comments (19)"Mitered corners have nothing to do with style. It has to do with good craftsmanship." That's one of the oddest statements I've seen on this site. Mitered corners will look very odd and out of place in an Arts and Crafts style house, the Shakers never, to my knowledge, mitered corners in their casework or trim. Miters are no easier or harder to make than any other sort of joint, in wide trim they will open and close with the seasons because of wood movement. Mitered corners are more typical of a MCM style, so probably appropriate here, but better craftsmanship? I don't think so. It has everything to do with style....See Moresockpuppetpete
5 years agosockpuppetpete
5 years agolast modified: 5 years agosockpuppetpete
5 years agosockpuppetpete
5 years ago PRO
PRODebbi Washburn
5 years agosockpuppetpete
5 years ago- PRO
User
5 years agolast modified: 5 years ago sockpuppetpete
5 years ago- PRO
User
5 years agolast modified: 5 years ago 
mad_gallica (z5 Eastern NY)
5 years agosockpuppetpete
5 years agosockpuppetpete
3 years agosockpuppetpete
3 years agosockpuppetpete
3 years agosockpuppetpete
3 years agosockpuppetpete
3 years agolast modified: 3 years agosockpuppetpete
3 years agosockpuppetpete
3 years agosockpuppetpete
3 years agosockpuppetpete
3 years agosockpuppetpete
3 years agosockpuppetpete
3 years agolast modified: 3 years agosockpuppetpete
3 years agosockpuppetpete
3 years agosockpuppetpete
3 years agosockpuppetpete
3 years agosockpuppetpete
3 years agosockpuppetpete
3 years agosockpuppetpete
3 years agosockpuppetpete
3 years agosockpuppetpete
3 years agosockpuppetpete
3 years agolast modified: 3 years agosockpuppetpete
3 years agosockpuppetpete
3 years agosockpuppetpete
3 years agosockpuppetpete
3 years agosockpuppetpete
3 years agosockpuppetpete
3 years agoKsush N
2 years ago
Rs S
2 years ago- PRO
Debbi Washburn
2 years ago 
Rachel
2 years ago
awm03
2 years ago
Purple Wombat
2 years ago
Buder Shapiro
last year


Related Stories
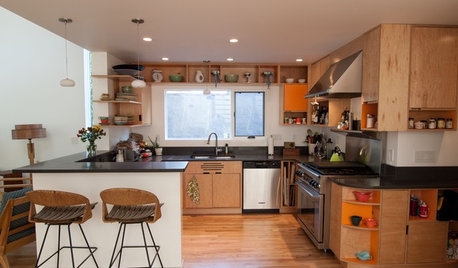
HOUZZ TOURSMy Houzz: Added Space and Style for a 1960s Split Level
With a new second story and downstairs suite, custom touches and midcentury pieces, this Portland family home suits 3 generations
Full Story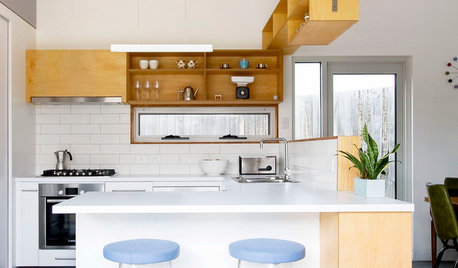
KITCHEN CABINETSA Kitchen Designer’s Top 10 Cabinet Solutions
An expert reveals how her favorite kitchen cabinets on Houzz tackle common storage problems
Full Story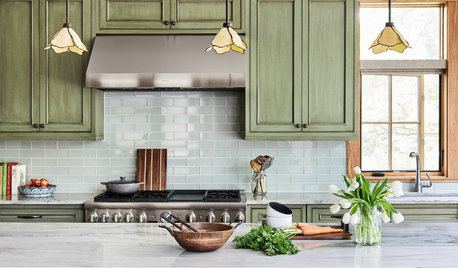
KITCHEN DESIGN11 Must-Haves in a Designer’s Dream Kitchen
Custom cabinets, a slab backsplash, drawer dishwashers — what’s on your wish list?
Full Story
INSIDE HOUZZA New Houzz Survey Reveals What You Really Want in Your Kitchen
Discover what Houzzers are planning for their new kitchens and which features are falling off the design radar
Full Story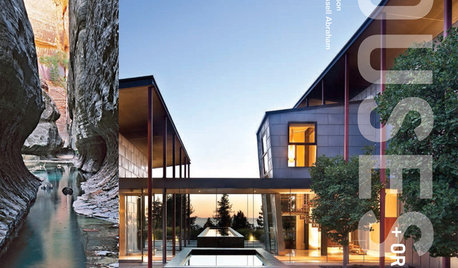
BOOKS'Houses + Origins' Reveals an Architect's Process
How are striking architectural designs born? A new book offers an insightful glimpse
Full Story
HOUZZ TOURSMy Houzz: Contemporary Split-Level in Chicago
An art-collecting Illinois family transforms their 1950s home, starting with a complete color redesign
Full Story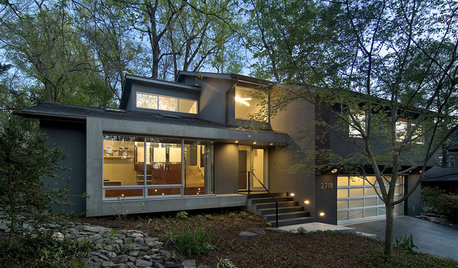
REMODELING GUIDESStep Up Your Split-Level Spec House
Three off-the-rack split-level homes, three dramatically different renovations. Let your favorite be your guide
Full Story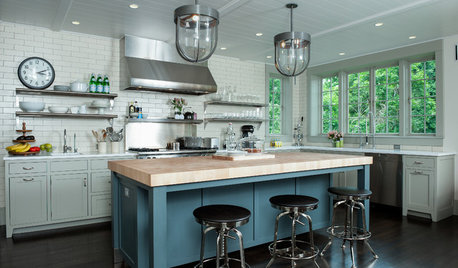
KITCHEN DESIGNExpert Talk: Design Lessons From 9 Stunning Kitchens
Architects share a behind-the-scenes look at the design decisions for some of their most interesting kitchen projects
Full Story
KITCHEN DESIGNA Designer Shares Her Kitchen-Remodel Wish List
As part of a whole-house renovation, she’s making her dream list of kitchen amenities. What are your must-have features?
Full Story
KITCHEN DESIGNHow to Design a Kitchen Island
Size, seating height, all those appliance and storage options ... here's how to clear up the kitchen island confusion
Full Story

stillpitpat