


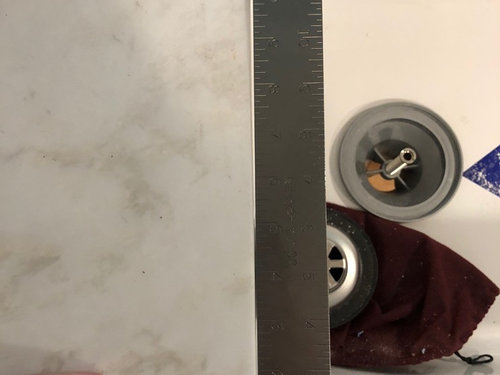
Help! - Advice on bad quartz install
wilkie0408
5 years ago


Featured Answer
Comments (18)

User
5 years ago
50s_ranch Andres
5 years agoRelated Discussions
How can I fix this bad shower pan installation-Help!
Comments (2)Well, you put in a pre-slope, so that's good. I think the water will find the weep holes through the mortar (which is porous), so don't worry about that. As for the curb, if the CBU was screwed at the tops only, then it's going to be fine. It's another story if the screws were applied on the bottom/inside near the floor, since water can get through. But "top/inside" should be fine. If there are screws through the bottom/inside of the liner (near the floor), then unscrew the CBU, patch the bottom holes, and put the CBU back, screwing it only near the tops....See MoreHelp: bad tile install going from bad to worse
Comments (8)Big edit for this post, you posted the Kerdi shot while I was typing. So... 1) The flex in the floor that is causing the grout to crack: It's possible that the Kerdi Tray was not properly bedded in thinset, so as the slightly flexible tray flexes, the inflexible grout is cracking. It's also possible that the small size of the penny rounds is resulting in point loading on the foam tray. The foam compresses ever-so-slightly, the tile moves, the grout cracks. The floor...Is your guy using thinset as grout? Grout as thinset? With the penny rounds, it almost looks like he's doing an all-at-once installation. Setting the tile, promoting between-the-tile-squeeze-through, then grouting. All at the same time. A negative with that is that he's grouting and cleaning the grout before the thinset has fully cured. When I grout I'm pretty aggressive with the grout float in order to get grout into every nook and cranny. I don't want to leave any voids. If your guy took it easy when grouting so as to not displace the unbonded sheets of penny rounds, he could have left a few voids beneath the surface. If he wanted to be gentle while cleaning the grout, he might have used too much water during cleanup, that can also weaken the grout. I don't know why the floor is being grouted piecemeal. That's an easy way to get uneven grout color on a floor. As he continues to tile, he'll have to chip out parts of the hardened thinset/grout at the edges fo the already installed sheets to get the subsequent sheets of tile to mesh with the already installed sheets. He'll need to be careful to not ding the Kerdi membrane. It's also a recipe for mismatched spacing at the edges resulting in being able to see the individual sheets of tile versus the floor being one harmonious surface of penny rounds. With him sliding the floor tile under the bottom course of wall tile, I do hope he's not leaving any unfilled voids in the floor-wall corners. 2) Bullnosing. He bullnosed the tile after they were on the wall? Yeah. Probably not going to get a good outcome. Should be an easy remove and replace. The bowed wall? The tiler tiles on what he gets. If he gets a bowed wall courtesy of the framers, he can put the blinders on and tile right over it...or he can address the bowed walls with whoever hired him...the GC? The homeowner? Then the tiler can either tile right over the bowed wall, OR he can have the contractor fix the wall before he tiles, OR he can repair the wall himself and then tile. One added item...I can't tell what exactly is going on int he bottom left corner of the already installed tile. Could simply be that the tile spacing is skewed and he lost the pattern. After this floor is done and everything cured, I'd recommend having the GC pull the drain grate, install a plug, and flood the floor. As the floor tile is covered with water, watch for air bubbles. They'll indicate voids under the tile or in the corners. Once flooded, pull the plug to see how the floor drains. Make sure it drains completely and that water is not held in the corners. With a Kerdi Tray, the slope of the floor and a properly draining floor should be a no-brainer. But based on what I'm seeing and what you described regarding the bullnose, this could be a "no brain" installation. Sorry for that. Remediation after-the-fact is always a tough spot to be in. Good luck....See MoreIssues with quartz installation - advice please!
Comments (7)What does Mr. Tape Measure have to say about the dimensions of the island, please? Pictures can lie, he can't. Measure from corner to corner diagonally. If the dimensions are the same, the top is square. Standard tops overhang cabinet fronts by 1 1/4" - 1 1/2" generally. Mine overhang 2" and I like it. The pony wall looks like it got a hammer kiss during demolition, not installation. Push a little mud in the cracks and it will paint up just fine. You may be able to save the cabinet side if you soak the adhesive in lacquer thinner (careful, it's flammable) and scrape at it with a credit card which is stiff enough to remove adhesive, but not sharp enough to cut the cabinet veneer. I'd get the last of it with a sanding block by hand so you don't sand through the cabinet veneer, then refinish the side. The caulked gap will look great. Reusing your old plywood was fine, splinters or not. It's done off-gassing and is probably more dimensionally stable than new. If the tops are level and square, yes, you're being too picky....See MoreHELP! Bad Design, Bad install. WHAT SHOULD I DO? Any Suggestions?
Comments (61)" I would attack’s it with a sponge at least to see if you can clean that up." You do that and you own the entire thing, make him clean it up better. Sooner the better as grout hardens over time. Also as alluded to above he needs to remove the grout at all chnages of plane and use 100% silicone caulk....See Morewilkie0408
5 years agowilkie0408
5 years ago
Molly D. Zone4B
5 years agokudzu9
5 years agosmit2380
5 years agofelizlady
5 years ago
weezel
5 years agokudzu9
5 years agowilkie0408
5 years ago PRO
PROJoseph Corlett, LLC
5 years agolast modified: 5 years ago- PRO
Joseph Corlett, LLC
5 years ago HU-464286693
2 years agolast modified: 2 years ago- PRO
Joseph Corlett, LLC
2 years agolast modified: 2 years ago Molly D. Zone4B
2 years agoHU-464286693
2 years agolast modified: 2 years ago


Related Stories

REMODELING GUIDESContractor Tips: How to Install Tile
Before you pick up a single tile, pull from these tips for expert results
Full Story
LIGHTINGReady to Install a Chandelier? Here's How to Get It Done
Go for a dramatic look or define a space in an open plan with a light fixture that’s a star
Full Story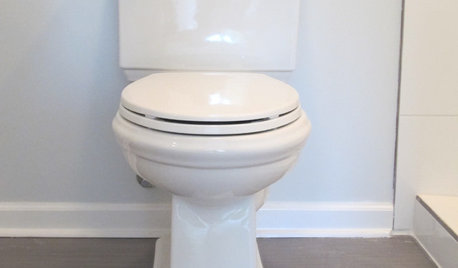
BATHROOM DESIGNHow to Install a Toilet in an Hour
Putting a new commode in a bathroom or powder room yourself saves plumber fees, and it's less scary than you might expect
Full Story
GREAT HOME PROJECTSHow to Install Energy-Efficient Windows
Learn what Energy Star ratings mean, what special license your contractor should have, whether permits are required and more
Full Story
FENCES AND GATESHow to Install a Wood Fence
Gain privacy and separate areas with one of the most economical fencing choices: stained, painted or untreated wood
Full Story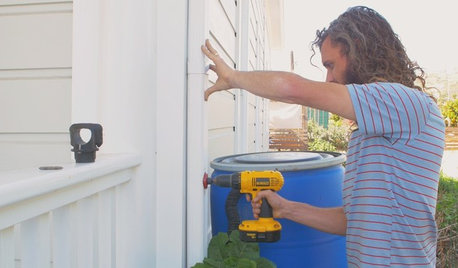
HOUZZ TVHouzz TV: How to Install a Rain Barrel
This DIY tutorial shows how easy it can be to capture rainwater from your roof to use in your garden later
Full StoryLATEST NEWS FOR PROFESSIONALS‘Help Clients Narrow Down Choices’ and Other Advice From Pros
Home design and building professionals share tips they learned from recently completed projects
Full Story0
BATHROOM DESIGNHow to Match Tile Heights for a Perfect Installation
Irregular tile heights can mar the look of your bathroom. Here's how to counter the differences
Full Story
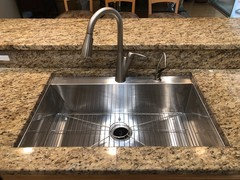
CONTRACTOR TIPSContractor Tips: Countertop Installation from Start to Finish
From counter templates to ongoing care, a professional contractor shares what you need to know
Full Story
FLOORSWhat's the Right Wood Floor Installation for You?
Straight, diagonal, chevron, parquet and more. See which floor design is best for your space
Full Story

partim