


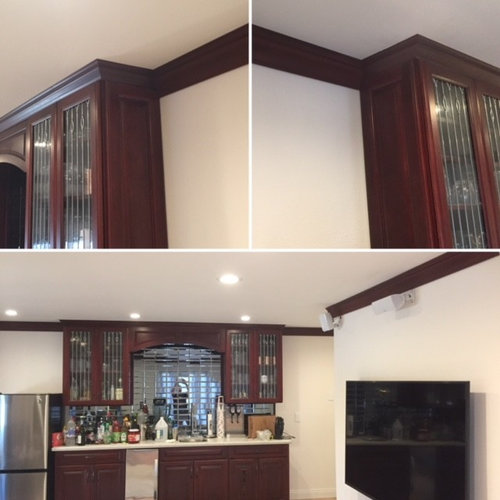
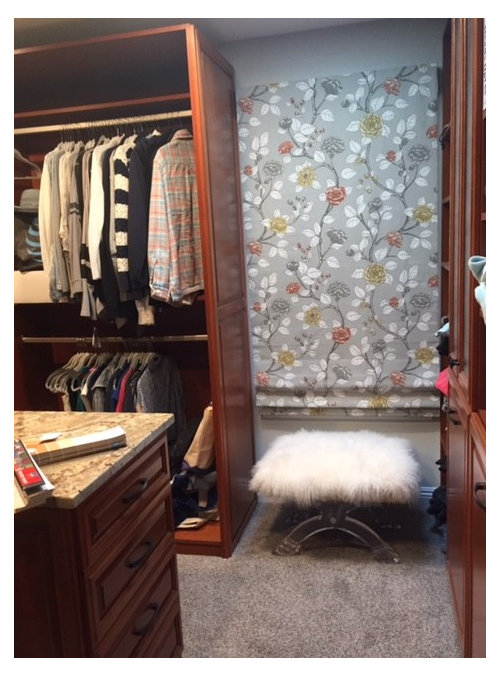
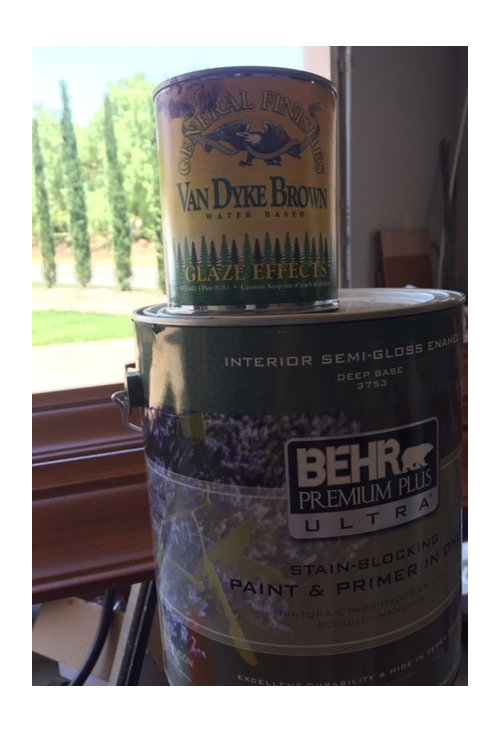
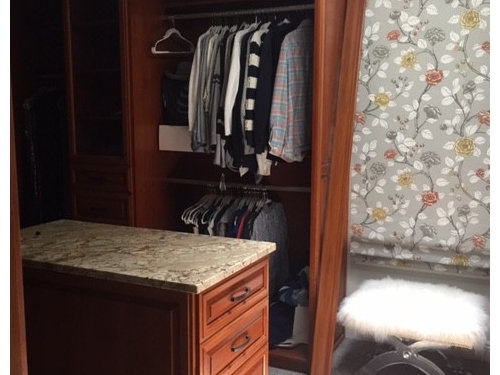
Easy DIY Crown Moulding To Match Stained Wood Cabinets/Trim/Etc
April Sakane
5 years ago
last modified: 5 years ago


Featured Answer
Comments (10)

April Sakane
5 years agolast modified: 5 years agoRelated Discussions
Easy Crown Molding
Comments (40)There are 2 seams on 2 walls, and 1 seam on 2 walls. Each peice was about 6.5 feet long, and the room is 16' x 11'. So, I'd do a corner 6.5 feet one way and 6.5 feet the other. To complete the 11' wall I had to cut off about a foot of the other corner panel creating only one seam. For the 16' walls I had both 6.5 foot panels, and had to cut a peice for the remaining 6 feet. Hope that makes sense :) I ran out of paint, I'll probably touch up the molding with a second coat for those seams. Hopefully it will conceal them even better, but if it doesn't I'm not really worried about it. I'm still very pleased with the results!! Christy :)...See Morecrown molding and cabinets--long (sorry)
Comments (2)We've come up with a quasi-solution that seems to solve most of the problems. We're leaving the white crown molding up so that it goes all around the room. Then he's going to add a teak/cherry stained piece of wood (that he called scribe) to the top of the bookcase--below the crown molding--so that the bookcase looks more finished and not as cut off. For the final touch he's adding two square 2x2 decorative pieces for the two corners where the side pieces of scribe meet the top piece of scribe. With some adjustment of the shelves, it should be fine. But thank you for your sympathy!...See Moredo I need a crown molding or trim on my cabinets? (pic)
Comments (25)First of all, I appreciate all of the sweet comments regarding my husbands work. This has been SUCH a labor of love. We have been in this house for 2 years with disgusting, original 70s cabinets and NO DOORS. I did not even store anything in the cabs, because they were so gross. I fashioned some pitiful "curtains" (basically panels of material velcroed to the openings) to cover the nasty looking innards of the cabs. We priced cabinets and got depressed. Some basic, china made cabs at Panda would have been minimum 12k. My husband has a woodworking shop in the upstairs area of his warehouse/office. He is great at making simple furniture and things. At first, he was going to make the boxes and we would buy the doors. Well, even THAT was expensive. I don't care for fine jewelry, we do not take exotic trips, I am not a "shopper" and I am not into fashion. However, I have always wanted and deserved a dream kitchen. My husband wanted to make sure it happened. We absolutely LOVE our house and plan to be here a long long time. We own a small business and he works 6 days a week. He started planning, measuring etc probably a year ago. We kept tweaking, and he started cutting and making cabinets, a little at a time. I saw nothing of this work, he would come home and tell me he was excited for the kitchen but to me it still didn't seem real. There are a few "flaws" that might not be fixable, but because they are small and also because they are from my husband's hands, I do not mind them at all. I can't wait to show you the interior of the cabs, and all the bells and whistles in this kitchen. That will have to wait, though! The pictures are dark because my kitchen is dark. I hate not having a window. We may add one of those "solatube" things eventually...I found out about them on the home decor forum here on GW. Hubby is adding some hi hats in the kitchen, plus we will have a light fixure over the peninsula (which is barely visible in the picture...it is jutting out at the bottom right.) We are getting a island hood vent (which I will start another thread about eventually, I am overwhelmed) and I am bummed because it is going to cause some of that "openess" to disappear, but I *need* an island hood vent! We are going to cover the gaps below and above the dbl wall oven. We are putting a curtain under the SS farmhouse sink, to hide all those cleaning products you see. Haven't decided the color or look just yet. Yes, that is a wood trim where the countertops meet the wall. My husband is going to stain it the same color as the countertops. You see...the counters...they are PLYWOOD! yes, PLYWOOD! We are eventually doing butcher block on the perimeter, and something different on the island (haven't decided yet) but the plywood looks so darn good, I told him let's just keep it until it falls apart! He rounded the corners and put a band on the edges, also. So, the wood trim you see, the backsplash will stop there for now and when the permanent countertops come in, he will finish the backsplash. We had discussed some sort of trim on the lower part of the cabs, but he got some undermount lights to put under the cabs that will not show at all, so we decided to skip it. Now I am wondering if maybe we should go ahead and do it. I am glad to see everyone was in agreement about needing something at the top of the cabs! I want to add that the ceiling is REALLY uneven so that is why you see such variations in the cab heights. I am worried that is going to make doing a trim even more difficult. My hubby curses the builder of this home every time he tries to do something to the house. He is sure he was an alcoholic, and says if he ran into him on the street he would punch him! lol. Walls are uneven, floors uneven, ceiling uneven, pitiful rigging of electricity, plumbing...you name it! As far as the help in posting pics...THANK YOU for taking the time to type that out and/or provide helpful links. I know how time consuming it is to explain these things (heck, I have already been typing this post WAYYYY too long, lol) so I appreciate the help. I think the problem is in the resizing, not the posting. Maybe it is indeed the picture quality as a few of you have suggested. When I see the pic in photobucket, it looks crisp and in focus, but when I try to resize it, it gets blurry. I will keep trying! Oh, and I do use a digital camera, a canon elph 7.1 megapixels purchased several years ago so I will see if that is the problem. thank you buehl, biochem, suzanne and htracey for the picture help! hollysprings-I will mention those terms and your suggestion to my hubby. Yes, def agree that undercab lighting is a must! still need our glass insert in the door of the corner cab...and shelves, also. Have 2 other cabs that have interior lights across from the island, not visable in this pic. But all cabs will have under cab lighting, for sure! And they will be on dimmer switches! kitchenkelly-thanks for the picture. Of course I need something smaller, but that look is very pretty! suzannel-my husband said if he knew how much work these cabs were going to be, he would have never been able to psyche himself up for the job! He also said he does not want to brag, but he even impressed himself! LOL! lascatx-I remember seeing that kitchen! Love it. I am not crazy about those tiles, but def considered something more "spanishy". BTW, my grandfather was born in Spain, and my husband is of Cuban descent so we do feel like we want to play up the spanish flair in our home. htracey-I *love* molding in general, but in this house, I wanted to stay away from it. Mainly because I grew up in a florida ranch home in the 1970s...and so did all of my friends, and I NEVER saw decorative molding EVER. I am trying to stay somewhat "true" to the era this house was built in. It's one of the reasons I don't want granite counters. I know might sound like a joke to some, not like this is a historic home from the 1800s or anything, lol. However, I have a "thing" for the 1970s...I just can't explain it! Of course, no one I knew had a double oven, or SS appliances for that matter. The other thing about crown molding is the ceilings are SOOOOO uneven it would be a nightmare for DH to install. So, in general I am NOT a molding fan (again, FOR THIS HOUSE) but I do see now that everyone agrees I need molding in this situation! Thank you again for your help. lynn, singingmicki, cmm and green-thank you for your input! And yes, I am definitely thinking something shimmery for the backplash. I don't think I want subway tiles, tho. Or glass. Maybe something mother of pearlish? Ok, I really like this...saw it at Home Depot and loved the sample, but after doing research, I am scared the product that gets shipped to me will not look like the sample. I know this is a marble and not sure how "70s" marble is...but I think it LOOKS very 70s. The 6x6 tile at HD was tubled and had a rough texture, which I really liked. here is *kind of* the antique mirror look that I like. Let's see if those S.O.B.s post, dang it! Ok, thanks again, everyone. I have neglected my family for far too long this afternoon, but I am so grateful for all the help, I need it!...See MoreKitchen Crown Molding Matching Issues
Comments (6)I admit, I'm a little confused as to whether or not you're painting or staining. Staining, I think...? I'd think that now isn't the time to cheap out. "Oh, said the guest/picky MIL, "That would be so beautiful if only that orangey trim actually matched the cabinets." or "How trendy of you." "OH," asked the mean neighbor, "Why you spent all that money on trim and your builder didn't even match your cabinets. Well, certainly is a good thing you like that 'eclectic' look. Honey."...See More
Marci
5 years agoApril Sakane
5 years agoApril Sakane
3 years ago

Related Stories
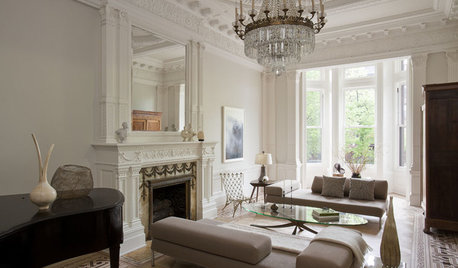
REMODELING GUIDESCrown Molding: Is It Right for Your Home?
See how to find the right trim for the height of your ceilings and style of your room
Full Story
COLOR11 Terrific Paint Color Matches for Wood Details
Pair your wood trim and cabinets with the right shade of wall paint to bring out the beauty in both
Full Story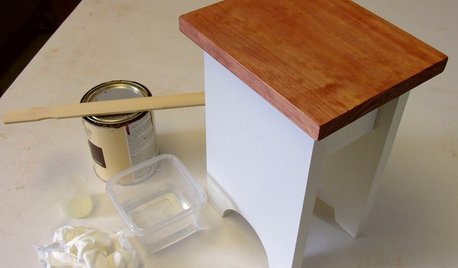
DIY PROJECTSCool Tip: Mimic Stain With a DIY Color Wash
Get the look of an oil-based stain without all the bother, using this easy wash made with paint
Full Story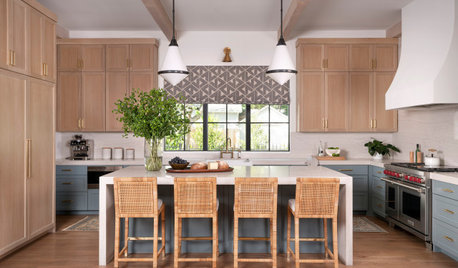
KITCHEN CABINETSPainted vs. Stained Kitchen Cabinets
Wondering whether to go for natural wood or a painted finish for your cabinets? These pros and cons can help
Full Story
KITCHEN DESIGN8 Stunning Stain Colors for Kitchen Cabinets
Transform raw wood for custom-looking cabinetry with a stain that fills your need for color but lets the grain show through
Full Story
KITCHEN CABINETSKitchen Confidential: 7 Ways to Mix and Match Cabinet Colors
Can't decide on a specific color or stain for your kitchen cabinets? You don't have to choose just one
Full Story
KITCHEN DESIGN9 Molding Types to Raise the Bar on Your Kitchen Cabinetry
Customize your kitchen cabinets the affordable way with crown, edge or other kinds of molding
Full Story
KITCHEN CABINETSKitchen Cabinet Color: Should You Paint or Stain?
Learn about durability, looks, cost and more for wooden cabinet finishes to make the right choice for your kitchen
Full Story
KITCHEN CABINETSGet the Look of Wood Cabinets for Less
No need to snub plastic laminate as wood’s inferior cousin. Today’s options are stylish and durable — not to mention money saving
Full Story
KITCHEN DESIGNWhat Goes With Wood Cabinets?
Make those high-quality cabinets look their best by pairing them with the right colors and materials
Full Story

Moulding Warehouse Ltd.