


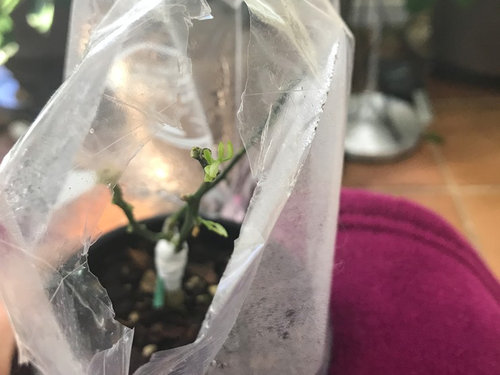
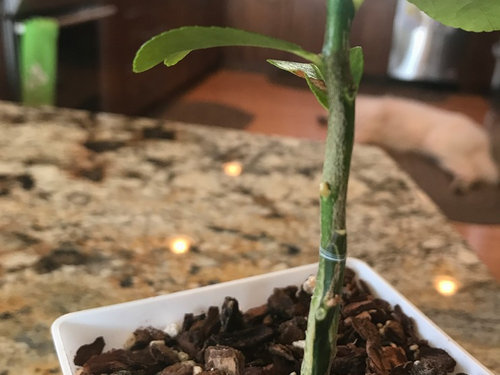
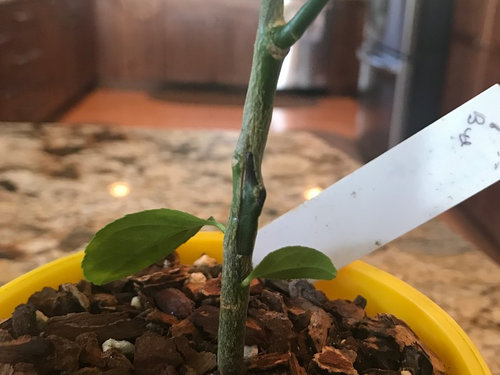
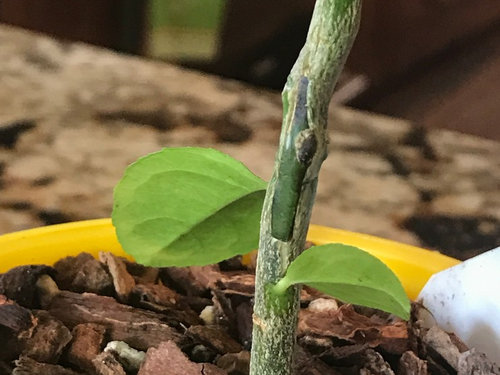
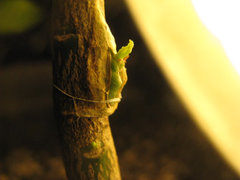
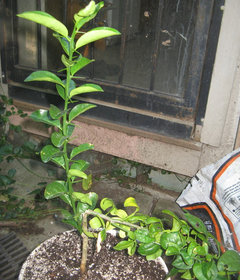
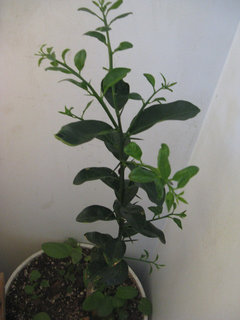
Three week grafting update and questions inc. bud grafts
Laura LaRosa (7b)
6 years ago

Featured Answer
Sort by:Oldest
Comments (18)

poncirusguy6b452xx
6 years agolast modified: 6 years ago
Laura LaRosa (7b)
6 years agoRelated Discussions
My bud grafts are really taking off
Comments (17)So if i was to T-bud now, would i be cutting my buds from this year's growth, and would it matter where along the branch i got my bud from (ie. tip end, mid-section, or closest to the point of attachment? And secondly, I understand the concept with regards to budding onto a rootstock, but when you bud onto the branches (like you are going to do on your 3-branched tree), where do you target the placement of the bud (top-side, bottom, how far along the branch,????). I'll definitely give it a try if i can get a little more feedback.....and thanks for taking the time with these questions........See MoreGrafting questions
Comments (4)Hello Beeone. I don't know if I cam fully answer you, but I'll see if my own experiences are helpful. Your first synopsis of questions: >>My questions are, am I being impatient looking for growth? Was the paint a mistake? Since the cambium was green, I presume it carries out some photosynthesis, so by painting did I block the light and help kill or delay the scions? I know electrical tape isn't recommended, but it was handy and I figured I would remove it later this summer, plus I didn't want to waste a bunch of money on parafilm until I had figured out how to have a reasonable chance of success. Did I cut the scions too early? Should they have been breaking dormancy when cut? Should I have done the grafting earlier or later?I doon't think you're being impatient. The grafts often pop within a week or three. But I've had a couple take much longer, and a friend reports one that didn't come out until the next year. As long as the scion acts like it isn't kindling I leave it on. The cambium should be covered completely, and I doubt that there is much photosynthesis going on from it for long. Once exposed it turns brown anyway. You need a callous to form where the cuts join. I've never used paint, but I doubt it was much of a mistake. Keeping the scion from drying out is a good thing, and people have lots of different ways, as you've read here, of doing that. Similarly, people often use electrical tape, which has the advantage of allowing lots of snugness- a good thing! "Pull those surfaces together!", I say. This is a weakness with parafilm, which is great stuff, but a little wimpy in terms of tensile strength. It stretches too easily, and needs help. I've used electrical tape but only with something under it to prevent it damaging the bark. I've also had successful grafts with masking tape, but I can't recommend it. Now I use budding rubbers or ordinary rubber bands and go over it with parafilm, or some such combination. Main thing is to bring the pieces into good cambial alignment without too much damage to the surrounding parts, hold them there while they heal together, and keep them from drying out until they take off on their own. You did not cut the scions too early. Late dormancy is probably the best time, for a couple of reasons, but mainly the scions have less time to get damaged or dry out in storage if you cut them in March. Although I have grafted sucessfully with scions that were breaking dormancy I understand that they are less forgiving than dormant scions. It is probably best to have the rootstock taking off- flush with water to seep across the seam of your suture into the new scion, which is surely thirsty, especially once it wakes up and embarks on its own career- but it's also doable to graft onto rootstock in its late dormancy and then let them wake up together. Essential, of course, to prevent dehydration. I think you're well on your way and just need to keep at it. But I have to wonder if you'll be happy waiting for results from all those seedlings. You'll have full-sized trees, almost certainly, and it'll be years and years before any of them start to bear fruit. I'd encourage you to graft onto a semi-dwarf rootstock, but I imagine once you have a little succes with this current experiment you'll get there if you want to. (Plus, I think you can do a lot better than Yellow Transparent, but that's just me!) Good luck, M ps- parafilm ain't pricey, and it sure is useful....See MoreMultiple buds grafted onto one rootstock
Comments (10)You're welcome, Lyna! Yes ma'am, each one HAS its own personality. It's observing them then determining what other "personalities" you want to mate them to that's part of the fun of breeding. If your cuttings are rotting, they're too wet. Whether that's due to too heavy soil, watering them too frequently or having too high humidity due to covering them, something is keeping them too wet, so they rot. If they shrivel, they're usually drying out. I'd not had success rooting roses in my new climate until I ran across the wrapping method, which I termed "Burrito Method" and detailed on my blog below. Like all the other methods, it requires tweaking to get it set just right for your specific conditions, but once you get the hang of it, the method works! A few months ago, I received bud wood of a rose I'd sought, from a lovely lady in Northern California. The wood was quite thin and I didn't know what exactly I could do with it. I had stocks rooted, so I tried budding it, then took what wasn't really suitable and tried a modified method of rooting. It was actively growing, and it was warm, so the wrapping method wouldn't work. I treated them as I would any cuttings, then planted them very deeply in seed starter mix, in gallon cans and placed them under other potted roses where they would have higher humidity, some filtered sun, but protection from the real heat and extreme sun. Most failed, but a few ARE rooted! Many of the buds also failed, but some are remaining green after a few months and appear to be successful. I figured by planting them deep, so most of the cutting length was immersed in cool, damp soil, they wouldn't dry out. It's what I do with callused cuttings out of the wraps, and it works perfectly with them. With only an inch or so of cutting poking out of the soil, and only a leaf or two remaining on them, they could provide some photosynthesis to help carry them along until roots formed. Once it begins raining, I will transplant them from their communal pots, lifting them to the level I want them to grow. Until then, I'll let them continue forming roots. The rains will help to harden them off so they won't be lost to being subjected to too high heat, too brilliant sun and too dry conditions too quickly. I'm also getting ready to break the tops of the root stocks so the foliage will remain attached to help keep them fed, but much of the sap flow will be interrupted so it is directed into the inserted buds, forcing them to begin growing. I use both the traditional "T" budding method and Burling's Chip Budding Method on several different root stocks so I hedge my bet with whatever I have and want to insure takes. Using several methods helps spread the risk of loss so chances of success improve dramatically. I use VI IXL, Cardinal Hume and Sequoia's Pink Clouds. I should also obtain some VI Dr. Huey and VI Ragged Robbin. I had the Ragged Robin VI from the Heritage Rose Garden, but lost it. I also have Dr. Manner's VI Fortuniana. It's finally put out enough thicker growth to provide some decent stocks next spring, so I'll probably start messing with budding to it then. If I have material I want to reproduce in the appropriate window here for rooting; I know it roots OK and grows OK own root; and it is of the appropriate condition for wrapping, I will wrap it. If it's summer, hence hotter (too hot for wrapping) and the material is actively growing, I'll try budding it. Whatever remains which isn't suitable for budding, I'll strike as cuttings to see if something works. But, if you wait until you have what you've been looking for, forever, to learn how to make the methods you want to use, work, you're guaranteed to fail. Murphy assures that. It's like waiting until the day before you take your world cruise to buy your new, elaborate camera you have absolutely no idea how to use. You're doomed. Rooting and budding are about equally as easy to learn. The hardest part is determining you are NOT going to allow it to overwhelm you. If it doesn't work, don't get frustrated. Put on your diagnostician's hat, figure out WHY it didn't so you can fix the problems, then get back on that horse to show it who's boss. Kim Here is a link that might be useful: Wrapping cuttings...See Moregrafting update and photoperiod question
Comments (13)Nate, I guess we're talking about two things, light intensity (always going to be the same, not enough intensity, then you'll lose grafts). I know nothing of running 30 minute intervals like Barb is doing. Her "heat" cooler thing sure sounds like a winner. That's funny you've tricked your birds Barb. It seems to me that hopping over to the "Growing Under Lights" forum and linking this thread could be a smart thing to do. There's a lot of information here though that is "out of the norm." Buds not expanding fully but graft successfully meaning that they calloused over properly will break the following year. That's a normal occurance. It may not happen often, however, it does happen. Your bands breaking and the fall of the scion simply means that the graft did not callous either (A) in time, or they never took to begin with. It seems to me that if they fall however, part (A) is actually just a way of saying that it might be possibly, yet very unlikely!..... You had a scion that looked ok but it would have died. That's just a way of you understanding that it wouldn't have taken, no way on that. Nate, you should wrap all those grafts in parafilm tape. I'd also try if "I were You" to seal the working area with the bud strip so there are no gaps. The tape and bud strip are then removed the next year during spring. If you can manage : Temperature, Light, & Humidity you'll be successful. For conifers needing light to break and grow, I'm quite sure you're looking at using at minimum a 1000 Watt Metal Halide for a space 6' x 6' or even a stronger bulb. I really recommend a camping tent in white as it will not only keep humididy, solid... the material itself, "breathes". Plus, a cool humidifier, and you're in ........... As I say, "good luck!" Dax...See More
Silica
6 years agolast modified: 6 years agoponcirusguy6b452xx
6 years agolast modified: 6 years ago
Monyet
6 years agoLaura LaRosa (7b)
6 years agoTheyCallMeDave
6 years ago
sunshine (zone 6a, Ontario,Canada)
6 years ago
jinnylea
6 years agoLaura LaRosa (7b)
6 years ago
Amanda Tyner
6 years agoAlanna Migliacci
6 years ago
myermike_1micha
6 years agoLaura LaRosa (7b)
6 years agoAlanna Migliacci
6 years agosunshine (zone 6a, Ontario,Canada)
6 years agolast modified: 6 years agoJohn 9a
6 years ago


Related Stories

KITCHEN DESIGN11 Ways to Update Your Kitchen Without a Sledgehammer
Give your kitchen a new look by making small improvements that have big impact
Full Story
EDIBLE GARDENSHow to Grow 10 Favorite Fruit Trees at Home
Plant a mini orchard in fall, winter or early spring to enjoy fresh-off-the-tree fruit the following year
Full Story
INSIDE HOUZZA New Houzz Survey Reveals What You Really Want in Your Kitchen
Discover what Houzzers are planning for their new kitchens and which features are falling off the design radar
Full Story
MOST POPULARIs Open-Plan Living a Fad, or Here to Stay?
Architects, designers and Houzzers around the world have their say on this trend and predict how our homes might evolve
Full Story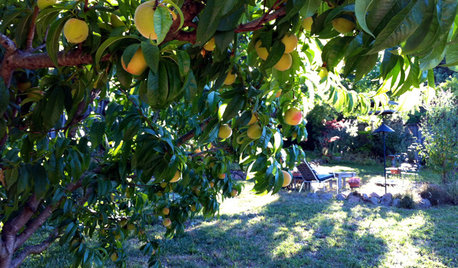
EDIBLE GARDENSHow to Grow Your Own Peaches and Nectarines
Make gardening a little sweeter with these juicy fruits, which you can eat after plucking or preserve for later
Full Story
DECORATING GUIDESFrom Queasy Colors to Killer Tables: Your Worst Decorating Mistakes
Houzzers spill the beans about buying blunders, painting problems and DIY disasters
Full Story
ARCHITECTUREGet a Perfectly Built Home the First Time Around
Yes, you can have a new build you’ll love right off the bat. Consider learning about yourself a bonus
Full Story
WINTER GARDENINGPruning Secrets for Exquisite Roses
Encourage gorgeous blooms year after year with this time-tested advice on how to prune your rosebush in winter for health and shape
Full Story
MOST POPULAR11 Things to Expect With Your Remodel
Prepare yourself. Knowing what lies ahead during renovations can save your nerves and smooth the process
Full Story
LIFERetirement Reinvention: Boomers Plot Their Next Big Move
Choosing a place to settle in for the golden years? You're not alone. Where boomers are going and what it might look like
Full Story
Laura LaRosa (7b)Original Author