


Boxing in and tiling a vertical steam pipe in order to move bath tub
brie44
6 years ago
last modified: 6 years ago

Featured Answer
Sort by:Oldest
Comments (14)

brie44
6 years agoRelated Discussions
Tub in master bathroom -- necessary or not?
Comments (28)I think the obvious answer for me would be to make it a tub with shower combo. I think separating the 2 elements takes up more space than is necessary and probably costs more. I'd much rather shower in my bathtub than to take a bath down the hall from the master. The tub also keeps the water from getting out of the shower. I have never lived in a house that had a separate shower and tub in the same bathroom, so don't see the great benefit. It is 1 more thing to keep clean and I'd rather use the extra space for a closet or something useful. If I had a huge house, then I'd consider separating the 2 functions. In our case, we bought our house with an ugly master bath. We assumed the shower leaked because there was a large crack in the floor tiles. We used the shower stall as a closet, pre-reno. We planned on adding a large air tub but could not make one fit in the space comfortably without giving up too much bedroom. We ended up making a larger half bath with no shower and are just fine with our decision. We have 2 other full baths in our house, so the 3rd was overkill. OTOH, both dh & I would love to someday have a a master bathroom that had a nice size air tub/jacuzzi. We are big time soakers and would get loads of use out of one. It would be nice to not tie up the family bathroom every time one of us wants to take a bath. A master shower is no real thrill for us because we get up at different times in the a.m.. I'd rather he not shower nearby while I am trying to sleep in the early a.m.. A tub is more a nighttime thing....See MoreTub Surround vs Tile
Comments (32)I just finished a Swanstone install over a 72" Laurel Mountain whirlpool tub. This is the second Swanstone surround I have done. (I got a lot better at it this time) I was a professional tile installer for 10 years and didn't want the maintenance of grout in a tub area. Here is what you should know about Swanstone: 1) There is caulking (and the associated periodic maintenance) in the corners where the panels meet and also at the base of the panels where they meet the tub. This will have to be re-done every 3-5 years if you dry your tub/shower after use. If you don't towel down your walls, you'll need to do it more frequently. 2) Swanstone requires carbide blades to cut. Dont even think about reusing a carbide blade for cutting other materials after it has been used on Swanstone. Even carbide dulls quickly when cutting this material. YouÂll destroy a hole saw and probably 3 or more scroll saw/saber saw blades during your installation. Plus a 40 tooth finish grade carbide circular blade. Consider it part of the price of your project. Make sure you have extras before you even start. 3) Scribing and coping the panel walls so they fit closely in the corners and against the tub is a must. Swanstone is easy to sand with a belt sander (makes a mess, use a good respirator). An Accuscribe tool makes this a lot easier. 4) 2 people are required to move and dry fit the panels. They are unwieldy and the material is very dense. Both people need good dry leather gloves on. The edges, when cut with carbide blades, are sharp. 5) You want a really solid backer board behind Swanstone. The panels are a quarter inch thick so they can bow unless adhered to something that is quite rigid. I used Durrock cement backer board. The backer board should be primed with a good primer (Zinsser) before installing the Swanstone product. 6) Acetone!! They say you can clean the Swanstone product well enough with alcohol before caulking. DonÂt waste your time with alcohol. Use acetone. In my experience, Swanstone is impervious to acetone and you will create a much faster drying and oil free bonding surface for silicone caulk with acetone. I wiped all sides and edges with acetone to remove all oil and fine dust after cutting & coping and dry fitting prior to installation. The bond to the walls is very strong. 7) The biggest headache is the required 2x4 bracing. Setting this up is a royal PITA. Use masking tape to hold vertical 2x4Âs in place against the panels while you position and wedge into place the horizontal 2x4Âs that create the side to side pressure. Measure the inside dimension between the vertical 2x4Âs exactly and then add 1/16 of an inch, this is enough to create sufficient side to side pressure. Make sure you pre-drill holes at an angle through the horizontal braces so that you can screw them to the vertical braces. If a horizontal 2x4 falls out, it will damage your tub and you get to start all over. Bracing the back wall panel with shims takes time and patience. Do not be in a hurry, you have plenty of time before the silicone adhesive sets up. 8) A word on framing: Use Timberstrand studs behind the cement backer board. This will draw a lot of comments from folks, but here is the line of logic: Timberstrand is delivered with a much lower moisture content than any other kind of stud except steel. It is also perfectly straight & square. Due to its low moisture content, it undergoes much less dimensional change once installed. This is critical behind tub & shower walls. Timber strand is 3 times more expensive than regular lumber, but it is worth it in this area. When you frame with it, take the time to get everything perfectly square and plumb and you will have a much easier time with coping and fitting the Swanstone panels. Further up in this thread, there was a comment made about redoing grout in tile after 3 years. Yeah, that is true in my experience if the lumber behind the backer board was "wet" (high moisture content) when the tile was installed. This is common. Problem is, it becomes a self perpetuating problem that requires major tear out and remodeling in pretty short order. The cycle goes like this: Tile & grout is installed over high moisture content lumber. The lumber twists and shrinks as it dries out causing micro fine cracks in the grout (grout is brittle). Folks shower and the walls get wet which introduces more moisture that gets behind the grout and ultimately the tile. Do this daily for a year or so and the backer board is now wet. The backer board transfers moisture to the studs so they undergo expansion causing bigger gaps to appear in the grout and more water to be added to the system. Leave it untreated for 5 years and your studs will begin to rot and tile starts falling off the walls. Plus you have mold growing in cracks in your grout that is really tough to keep out. IÂve done two bathrooms in my current house with pretty intricate tile work. They are beautiful! Nothing looks as nice as well done tile. However, both are occasional use bathrooms that get used maybe 10 times per year. I did Durrock over steel studs in both tiled shower areas and they should hold up for 20+ years with nothing more than yearly resealing of the grout. The two daily use shower areas are Swanstone over Durrock with Timberstrand studs in one and steel studs in the other. They should now hold up for 20+ years as well with twice daily use and once every three years re-caulking of the seams....See MoreHelp! Need advice on 1950's bathroom tile & tub/shower
Comments (21)Thank you everyone for all of your replies! Sorry for the absence...I have no internet here at the house yet. In response to questions/comments: kudzu9: There are areas of the grout that are missing, and the remainder has turned yellow. I would like to replace the missing grout and whiten the yellowed. We hope to rent out the home, so I don't trust tenants to wipe down painted walls. I'm hoping to find a complementary alternative. benjesbride: Unfortunately, the reason I have little budget now is that most of the original plumbing has to be redone. The drains are all old cast iron, and have degraded...there are lead pipes too. So, since they are replacing them, I figure that now would be the time to relocate. Thank you for your advice on "embracing the retro" and your link! nosoccermom: I cant really remove the shower head, as its the only bath in the home. I LOVE your idea of glass, and will research it. Have to figure out how to seal it from moisture and how to make area where it meets tile waterproof. Fori is not pleased: LOL!!!! I'm not pleased either! Thanks for the laugh and suggestion. I will def head over there once I have internet at the house, and am ready to make all the decorating decisions.polly929: I had considered having a company reglaze the tub & tile white, but the many opinions of keeping the original intact have made me reconsider. I am keeping the home, but am trying to fix it up to rent out for now. bpathome: Thanks for sharing your experience. I was considering adding 4x4 tile above the existing, but someone else said it wouldn't look good and hearing your experience too really gives me pause. I agree that the glass sounds like a cool possibility, but I need to research the installation issues. Would wallpaper hold up in a shower??? Yes, I absolutely need to redo the floor. Its a pier and beam home, so I am avoiding any real tile. However, I have looked at black & white LVT alternatives in both the hex and penny. jesshs: That is amazing! I cannot believe someone on here has actually had this tile! And its funny you mentioned grey....that is exactly the color I was thinking of going with on the walls! As far as paint on the shower walls, as I said above to kudzu9, we are planning to rent the home out and I worry about tenants taking the time to do that sort of maintenance. I want to go with something I don't have to worry about them taking care of. cpartist: Another retro vote! I'm coming around :) The grout is yellowed, and missing in a few areas. I'm hoping there is a way to bring it back to white. I agree with you, and everyone else, about the grab bars, as well as the shower head. And so glad to get another grey vote! I am absolutely redoing the floor. Just haven't decided what would go best. Again, THANK YOU everyone for your opinions and suggestions. Please, keep the ideas coming!...See MoreBuilder installed wrong bathtub
Comments (57)I could be wrong (but I doubt it), but the 72" x 42" tub noted above, if properly installed, will take up more space than 72" x 42" (see installation guide). I suggest the OP first determine if a two person tub is a need or a desire. If it is a need, then she should seek advice for a solution from the "design architect" or a local licensed architect if the "design architect" is not licensed. From what I can tell from the fragment of the bathroom's floor plan provided, it is not designed as a bathroom fitting for such a grandiose tub. It appears that there was a communication failure in both directions....See Moremike_home
6 years agosuezbell
6 years agobrie44
6 years agoUser
6 years agobrie44
6 years ago
KD
6 years agomike_home
6 years agobrie44
6 years agomike_home
6 years ago
Related Stories

BATHTUBS10 Japanese Soaking Tubs for Bathing Bliss
Get all of the serenity with none of the chemicals in an original all-natural hot tub
Full Story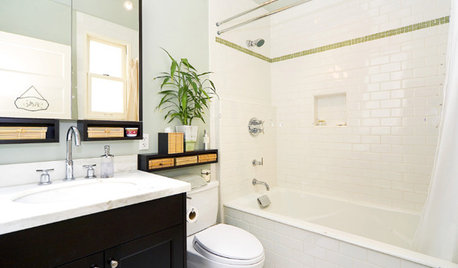
BATHROOM DESIGN7 Tile Tips for Baths on a Budget
How to Add Style to Your Bathroom Without Breaking the Budget
Full Story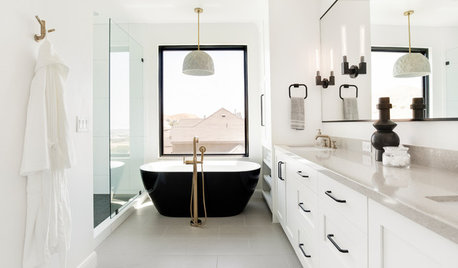
INSIDE HOUZZWhat’s Popular for Toilets, Showers and Tubs in Master Baths
Self-cleaning toilets and tubs with heated backrests are among the novel choices cited in a 2018 Houzz bathroom study
Full Story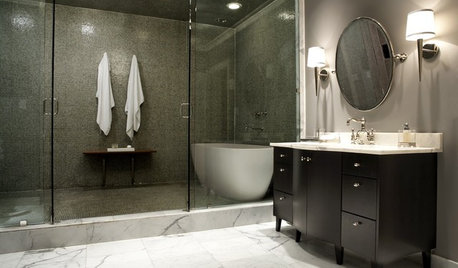
BATHROOM DESIGNHow to Choose Tile for a Steam Shower
In steamy quarters, tile needs to stand up to all that water and vapor in style. Here's how to get it right the first time
Full Story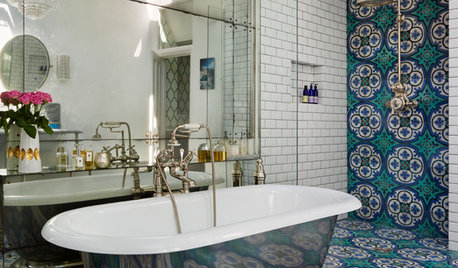
BATHROOM DESIGNRoom of the Day: Bold Tile and Classic Style in a London Bath
Vivid Mediterranean hues and vintage-style hardware create a stunning family bathroom
Full Story
BATHROOM MAKEOVERSA Master Bath With a Checkered Past Is Now Bathed in Elegance
The overhaul of a Chicago-area bathroom ditches the room’s 1980s look to reclaim its Victorian roots
Full Story
COLORBathed in Color: When to Use Black in the Bath
Dare to bring black in for a dramatic and elegant bath that's different from all the rest
Full Story
BATHROOM DESIGNRoom of the Day: Renovation Retains a 1920s Bath’s Vintage Charm
A ceiling leak spurs this family to stop patching and go for the gut
Full Story
COLORBathed in Color: When to Use Red in the Bath
Rev up your space and flatter all skin tones with bold, beautiful red on bathroom walls, floors and fixtures
Full Story
COLORBathed in Color: When to Use Pink in the Bath
Even a sophisticated master bath deserves a rosy outlook. Here's how to do pink with a grown-up edge
Full StorySponsored
Columbus Area's Luxury Design Build Firm | 17x Best of Houzz Winner!

tatts