


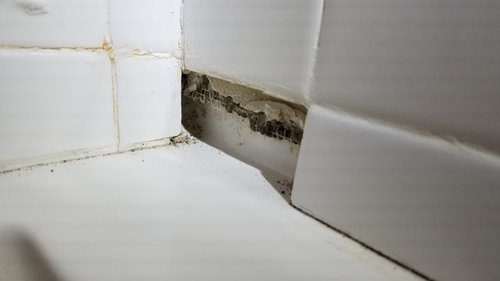
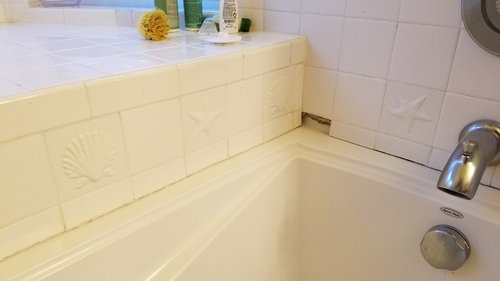
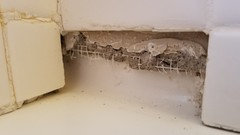
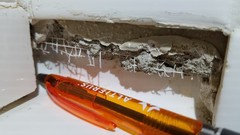
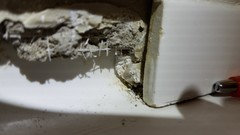
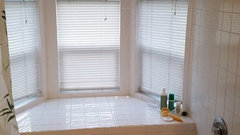
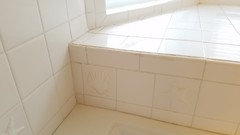
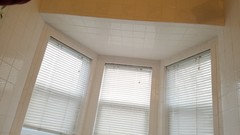
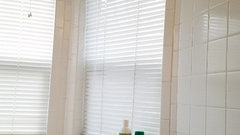
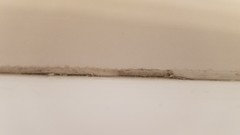
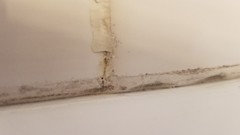
How do I fill gap behind a shower wall and title to flush mount?
garyz8bpnw
6 years ago
last modified: 6 years ago

Featured Answer
Sort by:Oldest
Comments (23)

garyz8bpnw
6 years agoRelated Discussions
How do I cover this gap between wall and stairs? Photos!
Comments (13)Baseboard will look strange here. I was the one who suggested you make a block for this area. But here is another idea that will look very good. You could use some full profile door casing. By full profile, I mean the kind of case that's used with corner blocks because it is a full 3/4" on both sides----not tapered. Some of it has flutes or beading that would look nice and some of it is 5" wide. I would use something wider than your baseboard. Here is something else for you to look at----it might give you some good ideas. This website is one I found a while back for corbels, but they also have some neat wood panels that you might find useful. It's under "new products" on their site. www.osbornewood.com...See MoreFilling gap between over the range oven and cabinets
Comments (20)@Melissa R is correct, you could use a filler strip there. But that doesn’t solve the fact that the solution to your microwave door problem means the cabinet on the left is now installed on top of window trim. Your microwave is too big for the space you have allotted for it, or you haven’t installed it properly. So pull down the cabinets and microwave, rehang the cabinets correctly, and move on from there. I know it sucks to realize you’ve made a mistake, but scootching things around to cover it up just creates more issues down the road, as you now realize. Solve the actual original problem, the microwave, and everything will fall back into place. BTW, you need a filler strip between the upper on the right and the wall as well. Good luck!...See MoreFill gap behind gas range & quartz backsplash scorch issue HELP please
Comments (20)Yes, @Fori, that's what I said to my husband about the molding there--he's a bit of a perfectionist!! I was like, you don't need that there! But he can be a little obsessive about some things! I will pull out the range later and look at the space for that pipe. In figure 3 it looks more centered than to the right where we have it. We'll have to see what we can do about it. Better yet, I will just pull it all out and redesign it. No worries. Lots of time during COVID. Thank you for letting me know @JuneKnow. Although, it's such a little space, not much can be redesigned as there are only the two walls! Better yet @JuneKnow, I can just leave the backsplash until it scorches too--then pull it all down and put up something else. No different than pulling it down now. Same money and time. :)...See MoreHow would I fill this barn door gap?
Comments (25)Terrific resolution -- looks great! FWIW, I think barn doors are great problem solvers for many situations. If people would start calling them sliders instead of barn doors I don't think posters would get as much negativity when mentioning them -- "barn door" conjures a certain image; however, there are all sorts of styles of barn doors (ahem...sliders) from down-on-the farm to sleek, ultra-contemporary....See Moregaryz8bpnw
6 years agolast modified: 6 years agogaryz8bpnw
6 years agogaryz8bpnw
6 years agolast modified: 6 years agogaryz8bpnw
6 years agolast modified: 6 years agogaryz8bpnw
6 years agolast modified: 6 years agogaryz8bpnw
6 years agogaryz8bpnw
6 years agolast modified: 6 years agoHU-755242297
4 years agolast modified: 4 years ago
millworkman
4 years agoHU-755242297
4 years agolast modified: 4 years ago
Related Stories
BATHROOM DESIGNShould You Get a Recessed or Wall-Mounted Medicine Cabinet?
Here’s what you need to know to pick the right bathroom medicine cabinet and get it installed
Full Story
Fab Fixtures: The Wall-Mounted Faucet
Give Your Kitchen or Bath a Stunning Look With One of These Space-Saving Beauties
Full Story
REMODELING GUIDES11 Reasons to Love Wall-to-Wall Carpeting Again
Is it time to kick the hard stuff? Your feet, wallet and downstairs neighbors may be nodding
Full Story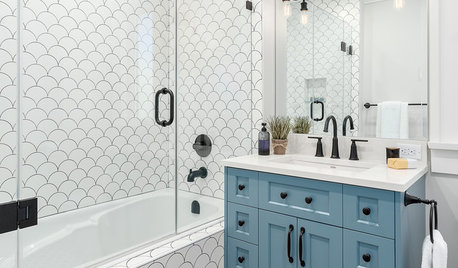
BATHROOM DESIGNShower Curtain or Shower Door?
Find out which option is the ideal partner for your shower-bath combo
Full Story
BATHROOM DESIGNDesigner Trick: Take Your Shower Tile to the Ceiling
Tile the whole wall in your shower to give your bath a light and lofty feel
Full Story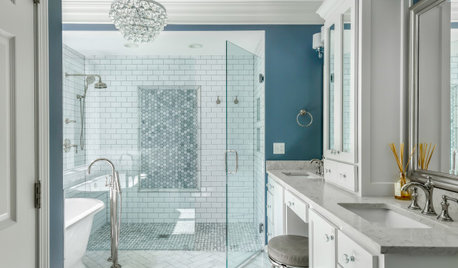
HOUSEKEEPINGHow to Clean a Glass Shower Door
See which tools and methods will keep those glass shower walls and doors sparkling clean
Full Story
WINDOW TREATMENTSCeiling-Mounted Curtain Tracks Open Up Possibilities
These window treatments show what you can do when a wall-mounted drapery rod is awkward or unworkable
Full Story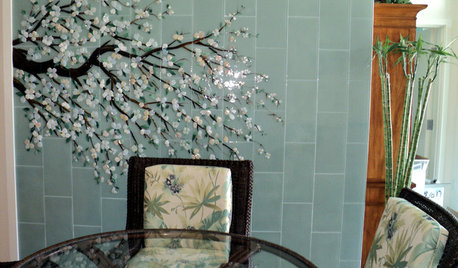
WORKING WITH PROSInside Houzz: An Art Mosaic Wall Banishes Dining Room Gloom
A glass mosaic created by Houzz pros gives a San Diego couple's condo a major design boost
Full Story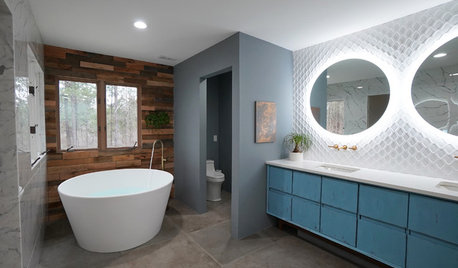
BATHROOM DESIGNBathroom of the Week: Wood Walls Warm Up an Eclectic Master Bath
An Atlanta designer tackles her most challenging remodel: her own master bathroom
Full Story
BATHROOM DESIGNDoorless Showers Open a World of Possibilities
Universal design and an open bathroom feel are just two benefits. Here’s how to make the most of these design darlings
Full Story

millworkman