


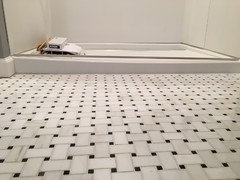
What can I do to make this uneven shower pan threshold level?
Lyn
6 years ago
Featured Answer
Comments (7)

Lyn
6 years agoRelated Discussions
Mongoct & others, I need your help! SLC uneven & so is shower pan
Comments (1)I forged on. The Strata Mat is down and looks pretty good. I used Laticrete 254 thinset. I will leave the shower as is. It will drain and that is the main thing. I plan on having a sliding door, and the lower end will be where the stationary part is. So I think the shower door that slides past will be up a scant amount from the stationary door but...oh well. I don't think it will be a problem....See MoreCan a shower curtain be used w/ a Kohler shower pan?
Comments (44)I keep revisiting this thread, hoping for a Sign. :) Is it ever acceptable to use a shower pan and create a tile threshold over it, thereby making it higher? As for cleaning the nonskid elements of a shower or tub. I have some wonderful nonskid strips in my otherwise very slippery acrylic tub where I take my showers. Yes, they pick up and hold grime a little too well and you can't just go gangbusters cleaning acrylic. The other day I used some Softscrub and a curved nail brush that fits around a couple of fingers. With very little elbow grease ALL the grime was removed and the shape of the nail brush is very ergonomic....See MoreWhere can I find Corian shower pan near me?
Comments (8)Cat_mom...I love Kohler‘s cast iron receptor and would buy one in a heartbeat, but my 120-year old house (a converted schoolhouse) is built over a mostly inaccessible crawl space with dirt floor and my cast iron bathtub is always ice cold. That’s why I’m considering the MTI acrylic pan. It’s heavier than other brands and has some custom options, such as a foam base that provides a sturdy surface (no flexing) and radiant heat built into the floor. Pricewise, it’s similar to cast iron. The radiant heat option adds $800 to the cost, so I’m forgoing it. The no-slip surface is very important....See Morehow can I level uneven flooring without taking off my tiles?
Comments (17)Good news. But the situation with the leveling is still there. If you wish to leave the tiles there, you will have to put some money and muscle and rented machines into this. It will probably take 2-3 days longer than if you hammered out the tiles. But if you insist, here are the list of instructions: 1. Rent sanding machine and purchase pads/belts for stone/concrete/tile 2. Tent off the kitchen with plastic sheeting; as well as air vents to prevent dust from getting into the ducts 3. Sand/rough up the tile (take the shiny finish off so that the next steps have something to grab on to). 4. With shop-vac, vacuum up the dust created by the sanding; wipe clean with water; allow to dry 5. Purchase primer AND Self Leveling Compound (SLC); make sure the two products are compatible....usually working with the same manufacturer is the way to go. 6. Roll on the primer onto the roughed up surface of the tile 7. Allow to cure (probably 1 day) 8. Mix recommended amount of SLC to cover your tiles in the MEDIUM amount of product allowable (read instructions to find out the MAXIMUM and the MINIMUM thickness and then pick an amount in between) 9. Trowel on or 'float' the cementatious material over the tile...remember to check for 'level' every few minutes (remember: SLC is NOT self-leveling = you will work very hard to keep everything level) 10. Allow to cure (24-48 hrs depending on your manufacturer) 11. Check for level. Mark the 'high' points and begin sanding those areas down 12. Vacuum up excess material; wipe down with lighting damp cloth 13. Allow to dry 14. Begin installing the floor. Whew! If you hire this out, you will pay $2/sf for this type of job. If it is a small kitchen, then you will pay a 'minimum job' fee which could look a bit more like $3-4/sf. If you remove the tiles you will pay $2/sf (same applies above). But the height variance between the two floors will be easier to deal with. You only need to 'lift' the kitchen floor to meet the REST of the house...which is much, much much smaller area to deal with....See More PRO
PROFlo Mangan
6 years agoLyn
6 years agoUser
6 years agolast modified: 6 years ago
Milly Rey
6 years ago- PRO
C&S Finishings
last year


Related Stories
BATHROOM DESIGNThe No-Threshold Shower: Accessibility With Style
Go curbless between main bath and shower for an elegant addition to any home
Full Story
THE POLITE HOUSEThe Polite House: Can I Put a Remodel Project on Our Wedding Registry?
Find out how to ask guests for less traditional wedding gifts
Full Story
BATHROOM DESIGNShower Curtain or Shower Door?
Find out which option is the ideal partner for your shower-bath combo
Full Story
FEEL-GOOD HOME12 Very Useful Things I've Learned From Designers
These simple ideas can make life at home more efficient and enjoyable
Full Story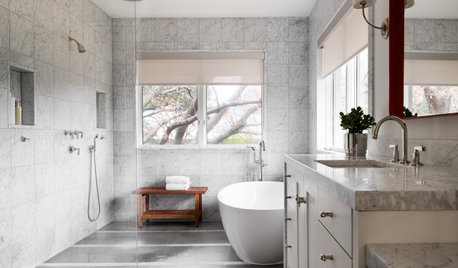
BATHROOM DESIGNDoorless Showers Open a World of Possibilities
Universal design and an open bathroom feel are just two benefits. Here’s how to make the most of these design darlings
Full Story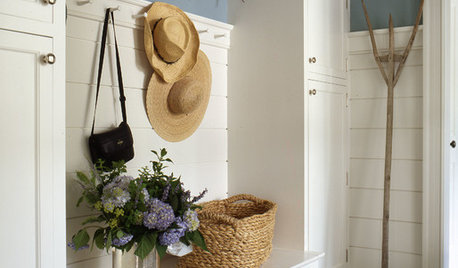
MUDROOMSThe Cure for Houzz Envy: Mudroom Touches Anyone Can Do
Make a utilitarian mudroom snazzier and better organized with these cheap and easy ideas
Full Story
GARDENING AND LANDSCAPINGHow to Make a Pond
You can make an outdoor fish paradise of your own, for less than you might think. But you'll need this expert design wisdom
Full Story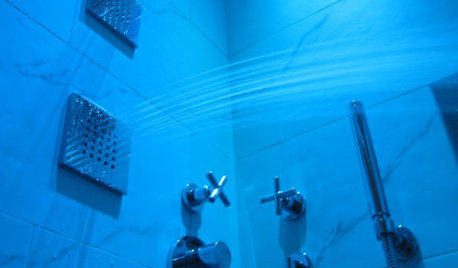
BATHROOM DESIGNShower Lights Bathe Bathrooms in Brightness
Lighting in colors as dazzling or soothing as you choose can bring a whole new dimension to your shower routine
Full Story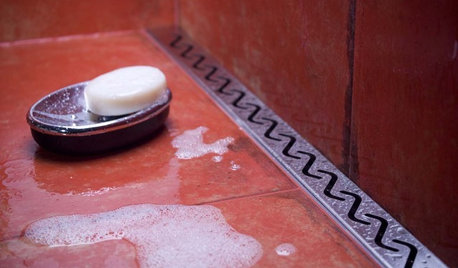
BATHROOM DESIGNHow to Choose the Best Drain for Your Shower
Don't settle for a cheap fix when you can pick a shower drain that suits your style preferences and renovation codes alike
Full Story
BATHROOM DESIGNKey Measurements to Make the Most of Your Bathroom
Fit everything comfortably in a small or medium-size bath by knowing standard dimensions for fixtures and clearances
Full StorySponsored
Columbus Design-Build, Kitchen & Bath Remodeling, Historic Renovations


Patricia Colwell Consulting