


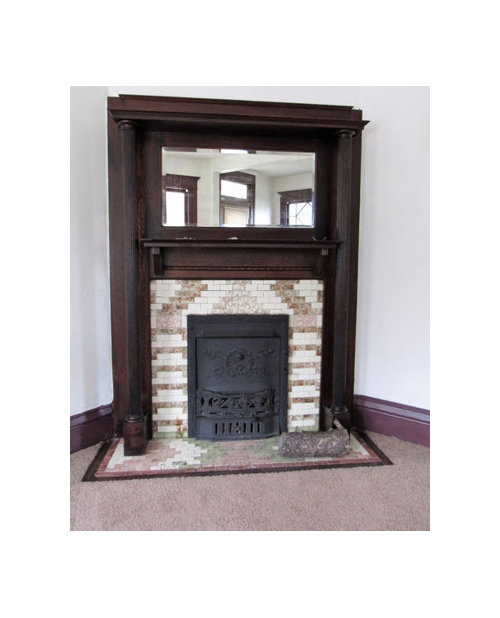
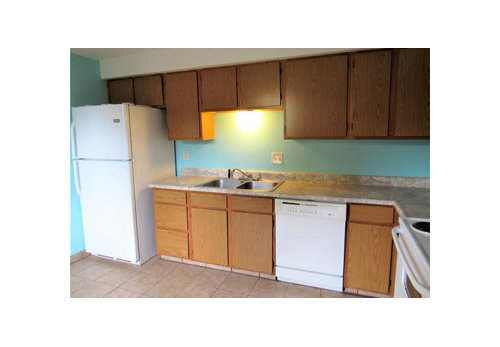
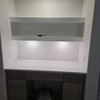
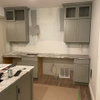
Low budget makeover for a rental
gmp3
6 years ago
last modified: 6 years ago


Featured Answer
Sort by:Oldest
Comments (19)

writersblock (9b/10a)
6 years agolast modified: 6 years agogmp3
6 years agolast modified: 6 years agoRelated Discussions
Need a budget toilet for our condo that will be a rental
Comments (4)I did tons of research before choosing a new toilet. We purchased the Alexis toilet from Sam's Club. If you have Sam's Club in your area, check it out. The price for the complete toilet is only about $100. It has a top button dual flusher, a 2" trap and comes with the seat. It is highly recommended by plumbers. The only complaints I found were concerning the seat. Some people said they replaced it because it was uncomfortable. We think the seat is fine. We don't sit there long enough to get uncomfortable. We've had our toilet for almost a year and it flushes great....See MoreBudget bathroom makeover reveal
Comments (24)Regarding the mirrors, I purchased some adhesive meant for mirrors (and marble etc) I unscrewed the clips at the top of the mirror and squirted adhesive all down the back, then pushed the mirror back against the wall and re-fastened the clips. I waited 2 days for it to cure, then carefully took off the clips and checked that the mirrors were secure. I used the same adhesive to stick the frame wood to the mirror. The wood was cut at Home Depot to my measurements - the top and bottom 1x4 is 1" longer than the width of the mirror so that it overlaps the edge by 1/2" each side to hide the glass edges. The side boards are the height of the mirror plus 1" then minus 7" for the width of the top and bottom boards (1x4's are actually 3.5" wide). First I glued the crown molding to the top board with carpenter's glue and taped it in place overnight to set. I wanted to make "returns" out of crown but even though I am good at math I was unable to cut those angles with my hand saw and miter box! Turns out you would only be able to see it on the toilet side of the guest bath anyway and it looks OK without. Then I used the mirror adhesive to stick the bottom board in place, taped it, then the side boards on top of that, taped them, then the top board with the crown. I left the blue tape overnight for the adhesive to cure it was solid by morning. I used primed pine boards and crown, so I didn't even have to paint the backs since I was using white - they were already white primer (you can see along the edge in the mirror)....See MoreBudget laundry room makeover - Before and After pics
Comments (37)Reader, the prints in the bathroom are called Serengeti I and II by Tandi Venter. The artist is from South Africa I believe. DH and I had the opportunity to go on a safari in SA with our church group a few years ago, and although these are just common art posters, they make me think of our personal trip. I bought the prints on eBay and made the frames out of door casing trim. They are fantastic posters, but the odd size made buying stock frames impossible (and custom was more than I wanted to spend ;-) Lynn, thanks so much for the kind words. I'm glad you commented on the cabinet color; I haven't seen many painted to blend with the walls, so I wasn't sure of the reception it would get. Those original cabinets are extremely sturdy and well built but didn't have anything going for them in the looks department. I wanted to downplay their appearance and size but maximize their function. It didn't hurt that using all one color allowed me to just spray on the paint willy-nilly, either!...See MoreMini reveal for low budget DIY kitchen remodel
Comments (25)The sink did fit within the 24" wide cabinet without sitting on the frame. The sinks rim was about 1" wide, and there was maybe 1/8" gap between the sink and the cabinet on one side, and about 3/8" gap on the other. To mount it under the counter, I made a frame from oak boards, cut small slots in the boards for the mounting brackets the were already on the sink. I then mounted the frame tightly to the bottom of the sink through the sides of the cabinet. Once I had it mounted tightly, I lowered it down, used a clear silicone-like sealant around the rim, and pressed it back tightly into place and reinstalled the screws through the cabinet sides....See Morewritersblock (9b/10a)
6 years agogmp3
6 years agolast modified: 6 years agogmp3
6 years agolast modified: 6 years agorantontoo
6 years agobeanie1922
6 years agogmp3
6 years agolast modified: 6 years agorantontoo
6 years agogmp3
6 years ago
Related Stories
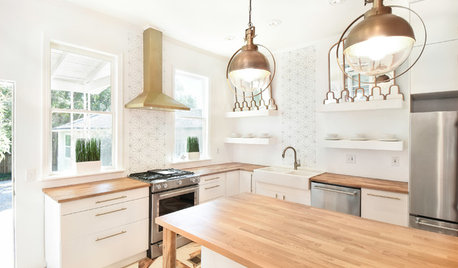
KITCHEN OF THE WEEKKitchen of the Week: A Designer's Budget Wood-and-White Makeover
Low-cost materials used in a design-minded way turn a depressing space into a light-filled showstopper
Full Story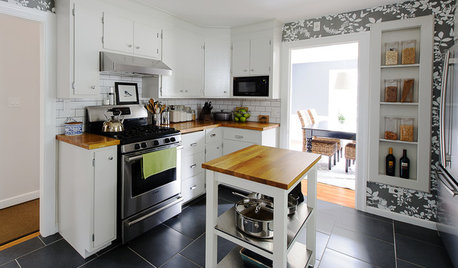
KITCHEN DESIGNKitchen of the Week: A Budget Makeover in Massachusetts
For less than $3,000 (not including appliances), a designing couple gets a new kitchen that honors the past
Full Story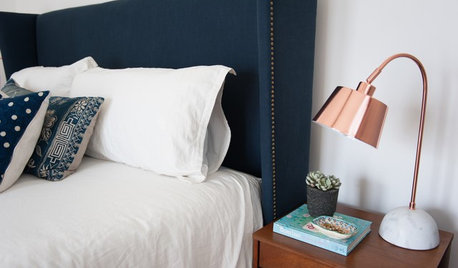
BEDROOMSRoom of the Day: Master Bedroom Makeover on a Lean Budget
Creative use of online retailers helps transform a lackluster room into a light and beautifully finished space
Full Story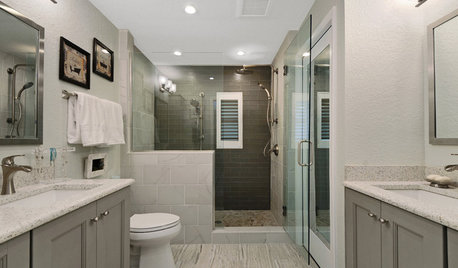
INSIDE HOUZZSee a Couple’s New Spa-Like Bathroom From Lowe’s and Houzz
The sweepstake winners’ master bathroom gets a makeover with a new shower, tile and storage space
Full Story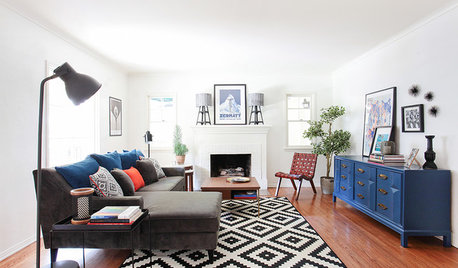
LIVING ROOMSRoom of the Day: A Chic Living Room Makeover for a Temporary Space
Stylish energy suits a young family’s lifestyle in their rental home
Full Story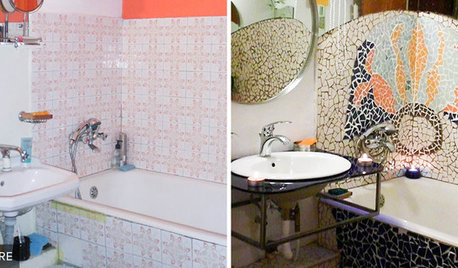
BATHROOM MAKEOVERSReader Bathroom: An $850 Gaudí-Inspired Makeover in Romania
A Bucharest renter turns her bathroom into a tribute to Barcelona’s famed architect. It’s ideal for sipping wine in the tub
Full Story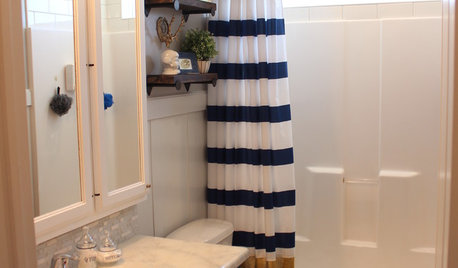
MOST POPULARShe’s Baaack! See a Savvy DIYer’s Dramatic $400 Bathroom Makeover
You’ve already seen her dramatic laundry room makeover. Now check out super budget remodeler Ronda Batchelor’s stunning bathroom update
Full Story
DECORATING GUIDESMake Your Fixer-Upper Fabulous on a Budget
So many makeover projects, so little time and money. Here's where to focus your home improvement efforts for the best results
Full Story
HOUZZ TOURSMy Houzz: A Vibrant Makeover for a Melbourne Apartment
Collected midcentury pieces and personal objects help a designer transform her 1960s rental into a friendly, colorful home
Full Story
KITCHEN DESIGNHow Much Does a Kitchen Makeover Cost?
See what upgrades you can expect in 3 budget ranges, from basic swap-outs to full-on overhauls
Full Story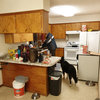

beanie1922