


Building 120" x 10" x 36" fish tank to fit above the wall or arch.
Riffaz Starr
6 years ago
last modified: 6 years ago

Featured Answer
Comments (14)

lascatx
6 years agolast modified: 6 years ago
Porter Edun
6 years agoRelated Discussions
Wood Framed Fish Tank
Comments (30)Eric, I'm computer illiterate so I'm not sure how to do that, especially since my scanner quit working. As poppa says, the greatest pressure is at the bottom. I design and build homes and I went to my design tables for wood construction. My tables are for white woods and you should gain some 25-30% with yellow pine or doug fir. I didn't dig my books out to size the beam for those species, so 2- 2x12 is probably overkill. You would nail them together as you would a header or floor girder. Of course they'd be attached perpendicular to the sheathing.You'd run the corners past each other and one beam over, one under then bolt them. Without digging out my APA books I'd say 3/4" sheathing would more than suffice. Frankly, a round tank might make more sense because the wood framing at the exterior of the tank will eat up 12"all around your tank. You should block between the framing members at all corners and at mid-span. Top member could be a 2x8- only 9" of pressure against it. Just like building a floor vertically, really. Mark...See MoreBuilding a River Tank
Comments (33)I purchased the foam from Frank's Nursery ($8). I had a choice between the standard white and a green foam, I chose the green (12W x 36L x 2 thick). Originally I purchased a floral foam, thinking it would be easier to construct, but it just kept flaking apart and would NOT be right for the tank; even if above the water level. After cutting out the pieces I wanted, I used a knife to bevel (or 45 degree) the edges to make it look more natural. I also used my fingers to "smush" sharp edges I did not like. Next I used a product made for sealing foam, in order to make it smooth and paintable ($3.50 @ Hobby Lobby). I mixed a regular acrylic paint, found in the craft sections of most stores(.40c each bottle) with the special foam sealer to start a base coat. I was leary of using some of the "all-in-one" paints because I could not figure out if they would be toxic, and like you, NOBODY knew. I also kept a cup of water to dip the paint brush in to dilute the mixture; I didn't want to see any brush strokes on the foam after it dried. That's where I stopped yeterday. Originally, I was going to slather on silicone (non- toxic) over the entire surface of the foam in order to seal it and make it safe for the tank. However, when I read that someone was using epoxy, I started re-thinking my game plan. I think I will check out the epoxy; I saw some at Menards. Any particular brand? EVERYTHING I have done so far has been improvisation. I have found other websites that make mention of using foam, but NO ONE has actually explained in detail how to go about painting and preparing the foam for a tank. I LOVE the way the foam is turning out. I have been able to custom design the waterfall and shape everything to my liking. I also love that it does not add any weight. I already have quite a bit of a sand substrate from when I had discus and I have also added lots of large rocks to shore up a "bank" to creat an entry/exit point to the water. I am anxious to finish, as this tank has been sitting for almost a year! I have been very cautious and nervous as to what products I use because I know that amphibians' skin will "absorb" toxins in their environment. As far as mixing inhabitants, well I'm excited to hear yours has been successful! I feel that since my tank is on the larger size, it should be able to handle a few more inhabitants than just a couple fire bellied toads. On a final note, I've posted pictures on other message boards I'm involved in and was wondering if anyone here uses snapfish? Can I post pictures from snapfish? I'd like to share my progress so far......See MoreL20 x W16 x H9 Greenhouse Structure. Please Help.
Comments (13)Hello azee_2009, OK I originally thought it was going to be a rooftop greenhouse, but after rereading your second post I wasn't sure anymore. As far as the construction I used to build mine, it could be applied to a rooftop situation. By just building a sturdy base for the electrical conduit posts/poles. Similar to the baseboards I made for mine. The weight of it will keep it in place. The poles for my greenhouse only go down in the ground about 8-10 inches, and there is no cement holding them down (just the weight of the greenhouse structure itself). I just posted the link/information to give you some ideas. That greenhouse looks much nicer than the one I built. Although much more expensive too. Not including the subterranean system, and the hydro systems inside, I built my whole 10 by 20 foot greenhouse for about $800. Ya, heat will be challenging. Our outside temp today was about 92 degrees, but the temp inside the greenhouse was 108 degrees. When the temps here reach the 120 mark, greenhouse temps would likely be around 140-150 if I didn't have a multi tiered cooling plan. Cross ventilation is great in some circumstances, but it wont help much at all to blow 120 degree air on your plants when it gets hot. Given the best circumstances, swamp coolers may bring the temps down about 20 degrees. But if humidity isn't carefully controlled, they may only provide a difference of between 5 and 10 degrees at most of cooling effect by themselves. Just to clarify, when I mention high humidity, I mean in the greenhouse. That will depend a lot on temperature inside the greenhouse, water vapor given off from the hydroponic systems inside. Not to mention the biggest factor, how many plants your growing, and how big they are. Plants breath out water vapor (called transpiration). The water vapor (relative humidity) in the greenhouse will get higher and higher unless it's ventilated. But ventilating a cooler greenhouse with the (hot) dry outside air will only heat up the inside of your greenhouse. I have searched the web a lot & every where i have read that Double Poly Sheet that makes air pockets between them retain heat within the greenhouse & reduce heating costs about 50% compared to single poly coverings. So how would i be able to use it. As i have to fight against high temperatures. The air pocket in-bitween the two layers of poly is an insulation pocket. Air pockets are the best insulation there is. Insulation will protect against heat just as easy as it does against cold. If your greenhouse is cooler than it is outside, the insulation (air pocket) will help keep your expensive cool air inside the greenhouse stay cooler longer. If you have no way to cool the inside of the greenhouse, then it wont help much. The air pocket is just insulation, not a cooling or heating layer. It just helps block the heat transfer from one side to the other. Blocks heat from getting out during winter, and blocks against heat from getting in during summer. The 4-5 inch's between both layers you describe should be plenty. Typically it's only about one inch between layers. Though I would expect that you will still get much better results with a air blower between the two layers. The reason is if you blew the cooler air in between the layers, it won't give the air pocket a chance to heat up. Thus keep the heat transfer between the inside, and outside layers to a minimum. I want to know the link & name of software you are using to create 3D images. I want to download it to make someone understand what i mean. I use a free program called Google SketchUp. They have a pro version you can pay for, but I've always used the free version, and like it very much. I save all my drawings into a folder so I can expand on them later without starting over. Before you post your drawings, you'll need to remember to export and save it as a 2D image. Otherwise it wont be in jpg. format, and people that don't have Google Sketchup wont be able to view it. Before I built my greenhouse, I did a lot research online to figure out what would work the best for me, as well as my budget. Here are a bunch of the links I have got bookmarked from those searches. I know it's a lot to read over, and it's been a long time sense I looked through it myself. But a lot of it is in lists of topics. I just read through what was of interest to me. Arched Greenhouse PRESENTATIONS REFERENCE SOURCES Horticultural Engineering Greenhouse Energy Cost Reduction Strategies POLYTHENE GREENHOUSE FILM FACTS Chapter 11- Greenhouse Site Selection Chapter 12- Greenhouse Structures Chapter 13- Greenhouse Control Systems Chapter 14- Greenhouse Energy & Resource Alternatives "Greening" the Greenhouse Greenhouse Glazing Greenhouse Energy Conservation Strategies Greenhouse Energy Conservation Strategies: Temperature and Scheduling Managing Greenhouse Temperature...See Moreled lighting for 9' x 10' dark kitchen with no upper cabinets
Comments (28)Greenhaven, yes I should really hold myself back from insanity when discussing lighting with my husband! Those are pretty track lights that you posted. Robotropolis - I thought track lighting is rigid track, while monorail is flexible curvy track? But yes, same concept. Thank you very much for the Canadian lighting online store - I will totally check that. So tricky finding Canadian sources sometimes. I do like the idea of wall-mounted articulated sconces as an alternative to ceiling-mounted lighting, at least on the long part of the perimeter "L". I may have some open shelving on the wall on either side of the range - TBD. Dh knows there are recessed lights designed to come in contact with insulation - but the boxes that go into the ceiling are apparently *huge*. So each one would require cutting a big hole and then a lot drywall repairing. We will hire out the drywall repairs, but don't want to incur unnecessary expense there. I'll definitely try out an LED E26 that you've recommended. EAM44, there *were* upper cabinets on either side of the window before. I agree the window size/proportions really leave a lot to be desired. I *adore* your inspiration photo. Unfortunately, this is an exterior load-bearing wall, with a walkway outside (fire regulations), in a condo building, with a moisture envelope. I've learned the hard way that standard solutions for openings in load bearing walls don't work in this building because replacement vertical studs can't be tied into joists in a structurally/seismically acceptable way due to difficulty accessing the locations where those tie-ins would have to happen. I'm going to add curtains and hope that that visually widens the window a bit. Here's a very crude mockup (no counters, fronts, curtain rod, etc.): Edb2n, I think a small lamp or two on the counter might end up being a good solution for me. Dh will complain about it most likely, but I hope he can compromise a bit there....See Moretatts
6 years agoMrs. S
6 years agoDebbie Downer
6 years agoDebbie Downer
6 years agolast modified: 6 years agoK Laurence
6 years ago
deegw
6 years agoamicus
6 years agoUser
6 years agolast modified: 6 years agosmileythecat
6 years agoblfenton
6 years ago
Fori
6 years ago
Related Stories
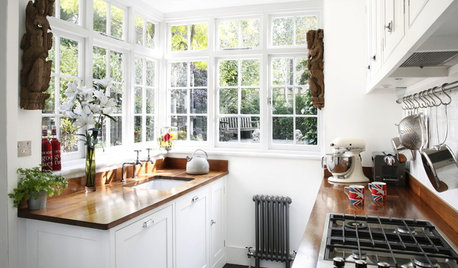
SMALL KITCHENS10 Things You Didn't Think Would Fit in a Small Kitchen
Don't assume you have to do without those windows, that island, a home office space, your prized collections or an eat-in nook
Full Story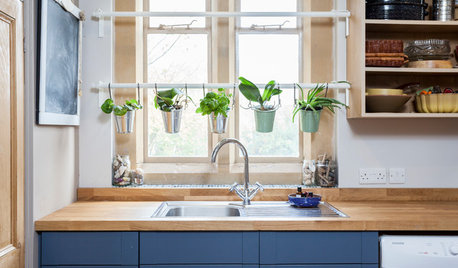
SMALL KITCHENS10 Things You Didn’t Think Would Fit in Your Little Kitchen
Don’t let a small cooking area cramp your style. Instead, consider these ideas to make the most of your kitchen
Full Story
DECORATING GUIDESDesigning Nemo: 30 Fish Tanks Make a Decorative Splash
Bring an otherworldly glow and a calming vibe to your home with the living art of an aquarium
Full Story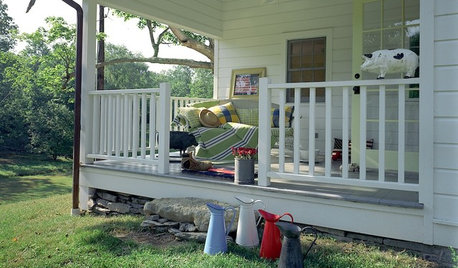
CONTRACTOR TIPSBuilding Permits: 10 Critical Code Requirements for Every Project
In Part 3 of our series examining the building permit process, we highlight 10 code requirements you should never ignore
Full Story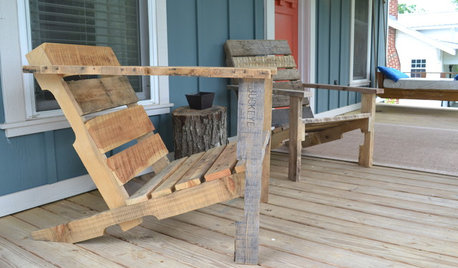
WOODWORKINGBuild Your Own Wooden Deck Chair From a Pallet — for $10!
Take the ecofriendly high road with a low-cost outdoor chair you make yourself
Full Story
REMODELING GUIDES11 Reasons to Love Wall-to-Wall Carpeting Again
Is it time to kick the hard stuff? Your feet, wallet and downstairs neighbors may be nodding
Full Story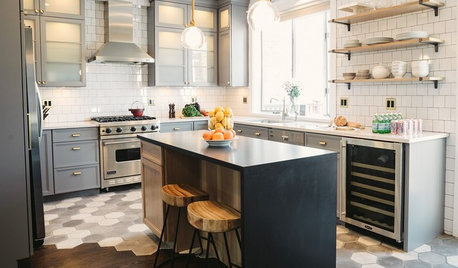
MOST POPULAR10 Tile Layouts You Haven’t Thought Of
Consider fish scales, hopscotch and other patterns for an atypical arrangement on your next project
Full Story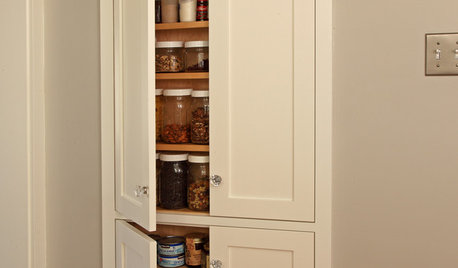
STORAGETap Into Stud Space for More Wall Storage
It’s recess time. Look to hidden wall space to build a nook that’s both practical and appealing to the eye
Full Story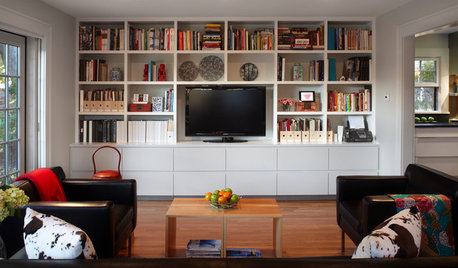
GREAT HOME PROJECTSHow to Get That Built-in Media Wall You Really Want
New project for a new year: Tame clutter and get a more stylish display with a media unit designed to fit your space just right
Full Story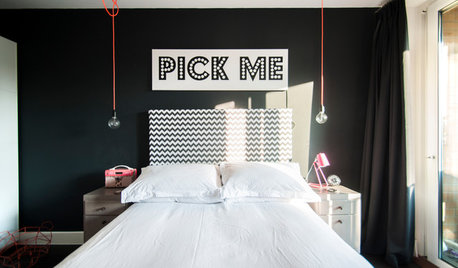
REMODELING GUIDES10 Signs You’re in the Middle of a Renovation
A renovation project allows you to choose every last detail for your home, but decision making can quickly go from ‘Ooooh’ to ‘Argh!’
Full Story

javiwa