


Do you prep on a counter where there is an upper cabinet?
kaismom
6 years ago
Featured Answer
Sort by:Oldest
Comments (15)

dan1888
6 years ago
Fori
6 years agoRelated Discussions
Upper cabinets resting on the counter, yes or no?
Comments (14)Nice "lego" kitchen! Are you reassembling it the same way it's shown in the pic with the range/cooktop on the wall and using the decorative hood? (I hope so!) Now the practical/functional point of view.... Cabinets-to-the-counter...it's a nice look and if you have room, then go for it...but be sure you have enough counterspace in the right places. Just having counterspace for the sake of counterspace isn't the goal, the counterspace needs to be in the right places for a truly functional kitchen. Counterspace in other areas is usually considered "wasted" unless you design a Baking Center, Beverage Center, Snack Center, etc. into the less-useful places. So... Be sure you have enough work room around each appliance/fixture not counting the small bit of counter that will be in front of those to-the-counter cabinets (that counter is pretty much useless...see point 2) Around the sink, you should have 24" on each side of the sink that's not shared with the range or refrigerator for landing and/or work space. If it's shared, add another 12" to 18". Around the range, 24" on each side for work space, emergency landing space, and general landing space that's not shared w/the sink's work/landing space. Next to the refrigerator or across from it no more than 48" away (actually, make that 42" away b/c you won't have the reach of someone taller), 18" (not shared w/anything else). For work space in the Prep Zone, at least 36", preferably not shared with the Cleanup Zone but OK to be shared w/the Cooking Zone. The Prep Zone should be next to a water source and near the Cooking Zone. Oh, and it should contain the trash pullout (if you have one) or at least have the trash pullout very close by (trash pullouts are most useful in the Prep Zone and near the Cooking Zone but also accessible from the Cleanup Zone). If the Prep Zone will be sharing the sink with the Cleanup Zone, then aim for at least 42" of workspace on the Prep Zone side of the sink. To make up for the loss of counter space for the Cleanup Zone on the prep side, I recommend 30" to 36" of counterspace on the other side of the sink. Be sure the DW is not in the Prep Zone or b/w the range and sink or b/w the refrigerator and range and/or b/w the any of the three: refrigerator/range/prep sink (if separate sink). Keep in mind the workflow is: Refrigerator/Pantry --> Prep Zone --> Cooking Zone --> Serving or Cleanup Zone. So, try to have the Prep Zone flow into the Cooking Zone without crossing the Cleanup Zone (or DW). The goal is to have no zone-crossing so more than one person can work in the kitchen at one time. Realize that the counter in front of those to-the-counter cabinets is useless. Not only will it be too shallow a space to do much on it, but it will need to be completely clear to access the drawers or doors that are at the counter level. The only way to avoid this is to get a "tambour" or garage-style door. Any other style door or drawer will......See MoreIf you have no uppers, how do you light your counters?
Comments (4)I have a 13 foot run of counter with no uppers. We don't move in until next week but we are there every night and I am pleasantly surprised with our lighting. We have vaulted ceilings and used put lights pointing directly at the counter. We have lights over the island and under cabinet lighting on the other run of cabinets. We also wired for a pendant to hang directly in front of the sink but we decided to cap it for now as I don't feel like it is needed and I haven't found the perfect light yet. I absolutely love our windows. I will attach a pic taken during the build, it is hard to photograph because there is so might light!...See MoreWhat needs to match/how do you do it - counter, walls, cabinets?
Comments (13)This is a pic of the door to my dining room, which is the wood all throughout the house. I can never get good shots of this wood. It looks a little yellower here than it really is. I know "birch" isn't quite right, but it's my non-KD shorthand for lighter wood. The cabinets will be on the opposite wall from the door, so we may be able to make them just a tad lighter in color....See Morenew countertops tomorrow, what prep do I do today/tonight?
Comments (1)My installers took car of everything. They taped canvas runs to my wood EVERYWHERE & took out all of the top drawers. They just told me to take everything off of the countertops before they arrived. They also told me i could cover anything in my lower drawers/cabinets that I didn't want to get dusty. They also removed everything from under my sink as well. I would just make sure everything is cleaned off of the countertops & anything in the kitchen or around the kitchen is picked up. Good luck!...See MoreMrs Pete
6 years agopalimpsest
6 years agolast modified: 6 years ago PRO
PROAnglophilia
6 years agoToronto Veterinarian
6 years ago
jhmarie
6 years ago
Milly Rey
6 years ago
sherri1058
6 years agoChessie
6 years agolast modified: 6 years agoBuehl
6 years agolast modified: 6 years ago
oldbat2be
6 years ago
3katz4me
6 years agoBeth
6 years ago
Related Stories
KITCHEN CABINETSGet More Kitchen Storage With Counter-Depth Upper Cabinets
We give you the lowdown on expanding your upper-storage capacity
Full Story
KITCHEN CABINETSHow High Should You Hang Your Upper Kitchen Cabinets?
Don’t let industry norms box you in. Here are some reasons why you might want more space above your countertops
Full Story
KITCHEN DESIGNHow to Lose Some of Your Upper Kitchen Cabinets
Lovely views, display-worthy objects and dramatic backsplashes are just some of the reasons to consider getting out the sledgehammer
Full Story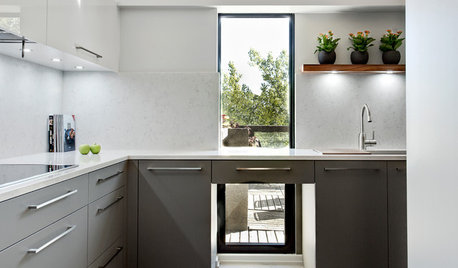
KITCHEN CABINETSThe Pros and Cons of Upper Kitchen Cabinets and Open Shelves
Whether you crave more storage or more open space, this guide will help you choose the right option
Full Story
REMODELING GUIDESWhere to Splurge, Where to Save in Your Remodel
Learn how to balance your budget and set priorities to get the home features you want with the least compromise
Full Story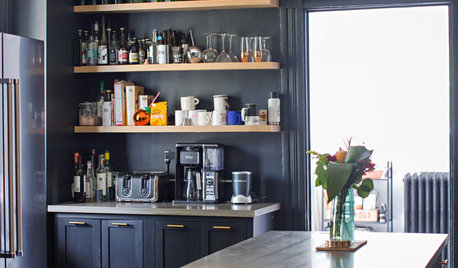
MY HOUZZ9 Kitchens Where Open Shelving Rules
Find out why these homeowners ditched their upper cabinets
Full Story
KITCHEN DESIGNNeed More Kitchen Storage? Consider Hutch-Style Cabinets
Extend your upper cabinets right down to the countertop for more dish or pantry storage
Full Story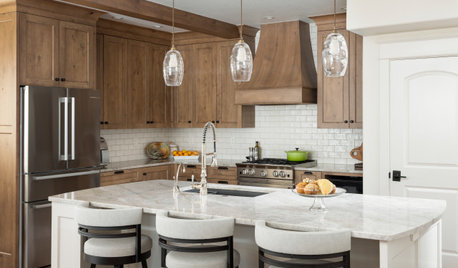
KITCHEN BACKSPLASHESWhere to Start and Stop Your Backsplash
Consider these designer tricks to work around cabinets, windows and other features for a finished look in your kitchen
Full Story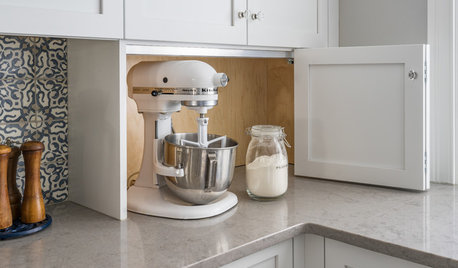
KITCHEN STORAGEWhere to Stash the Stand Mixer in Your Kitchen
Stand mixers aren’t huge, but they’re heavy. See storage ideas for keeping them accessible and easy to use
Full Story
KITCHEN STORAGEWhere to Carve Out More Pantry Storage
Find more space for kitchen essentials in closets, niches and adjacent rooms
Full Story
Sammy