Need Help with Self-Leveling, Backer Board & Engineered Bamboo Floor
LaTonya
6 years ago
last modified: 6 years ago
Featured Answer
Sort by:Oldest
Comments (23)
LaTonya
6 years agoLaTonya
6 years agoRelated Discussions
3/4 T&G wood over backer board, concrete
Comments (3)Invented installs can be risky. I once recommended a customer use cementious backer panels to inexpensively raise the level of a room prior to installing a laminate floating floor and it worked perfectly. The key to success with any floor installed over concrete is to maintain moisture vapor transmission from the slab at acceptable levels. If the recommendation was from an experienced floor person and this person knows about moisture vapor transmission and how to control it, then I would not dismiss the recommendation out of hand....See MoreHardwood vs engineered vs bamboo vs ???
Comments (11)I'm having the same concern. I originally went to lumber liquidators and found a nice hand scraped strand bamboo flooring. I then went online and researched a load of companies. So far, I like Cali bamboo. My biggest concern was the formaldehyde in the products. Cali bamboo has little to no formaldehyde added in there product. I've read those same reviews about Morning star, but they were outdated. I was emailed a material safety data sheet on Morning Star brand, but no one could tell me how much formaldehyde content was in the morning star product. At the bottom of the sheet there was a disclaimer: "The information and data herein are believed to be accurate and have been compiled from sources deemed to be reliable. It is offered for your consideration, investigation and verification. Lumber Liquidators makes no warranty of any kind, express or implied, concerning the accuracy of completeness of the information and data herein. Lumber Liquidators will not be liable for claims relating to any party's use of or reliance on information and data contained herein regardless of whether it is claimed that the information and data are inaccurate, incomplete or otherwise misleading. It is incumbent upon the user to obtain the most up-to-date information". So I guess what they mean is that the info on the safety data sheet is BS. I'd like to know. Cali bamboo is great, but I actually prefer the hand scraped look they have from Morning Star at lumber liquidators. Does anyone know if Morning Stars 2011 line has added formaldehyde?? (That's the lovely odor you smell from the floors). I can't seem to be able to get a solid answer. This is what the safety data sheet states for Morning Star: 3000 John Deere Road Toano, VA 23168 Emergency phone: 1 800-HARDWOOD Fax: 1 757 259 7295 IMPORTANT NOTICE: This material Safety Data Sheet (MSDS) is issued by LUMBER LIQUIDATORS. LUMBER LIQUIDATORS flooring will issue a new MSDS when there is a change in product specifications and/or regulations. LUMBER LIQUIDATORS will not accept any responsibility for any change to its MSDS in content by other person or organization. IDENTIFICATION Product name: Prefinished Strand Bamboo Flooring Trade name: Morning Star Bamboo Flooring Other Names: Various Manufacturer Information: Lumber Liquidators Inc 3000 John Deere Road Toano, VA 23168 Tel: (757) 259-4280 Fax: (757) 259-7295 www.lumberliquidators.com Description: This product is composed of bamboo fibers bonded together with urea formaldehyde (UF) resins. The fibers are mixed and pressed together to give a unique shade blend and increase hardness. The wear layer is finished by 7 coats of polyurethane with aluminum oxide coating manufactured by Treffert or Klumpp UN number: Not applicable Dangerous goods class: Not applicable Product Use: Building Materials � Commercial or Residential MSDS Morning Star Strand Bamboo Flooring, Revision 3, April 2009 Page 2 of 7 Hazardous ingredients/identity information: Name CAS #2 % Agency Exposure Limits Comments Bamboo1 None 89-90 OSHA3 OSHA ACGIH4 ACGIH PEL5-TWA6 15 mg/m3 PEL-TWA 5 mg/m3 TLV7-TWA 3 mg/m3 TLV-STEL8 10 mg/m3 Total dust Respirable dust fraction Respirable dust fraction Inhalable particles Urea Formaldehyde resin solids 9011- 05-6 10-11 OSHA OSHA ACGIH PEL-TWA 0.75ppm PEL-STEL 2 ppm TLV - Ceiling 0.3 ppm Free gaseous formaldehyde (contains less than 0.1% free formaldehyde) UV Finish Polymerized polyurethane None 0-1 OSHA ACGIH PEL-TWA none TLV-TWA none None None 1 CAS # = Chemical Abstract System. 2 OSHA = Occupational Safety and Health Administration. 3 AGCIH = American Conference of Government Industrial Hygienists. 4 PEL = Permissible Exposure Limit. 5 TWA = Time Weighted Average. 6 TLV = Threshold Limit Value. 7 STEL = Short Term Exposure Limit Note: Bamboo is a member of the grass family which has distinct anatomical differences from that of wood. Therefore, bamboo would be regulated as an organic dust in a category known as "Particulates Not Otherwise Regulated" (PNOR), or Nuisance Dust by OSHA. The ACGIH classifies dust or particulate in this category as "Particulates Not otherwise Specified". Physical data: Physical State: Solid Boiling Point: Not applicable Freezing Point: Not applicable Specific Gravity: 0.58 g/ml Vapour Density: Not applicable % Volatiles By Volume: 0 Melting Point: Not applicable Vapour Pressure: Not applicable Percent Moisture 5% - 9% Solubility in H20 (% by wt.): Evaporation Rate (Butyl Acetate = 1): Not applicable pH: Not applicable MSDS Morning Star Strand Bamboo Flooring, Revision 3, April 2009 Page 3 of 7 Appearance and odor: Bamboo fibers mixed creating a shade blend unique to each plank (light yellows for natural, light browns for carbonized or a mix of lights yellows and light browns shades). This product can also be stained with various colors. Low-fuming urea formaldehyde resins have a slightly aromatic odor. Fire and explosion data: Flash Point: Not applicable Auto ignition Temperature: Not available, however, it is usually accepted that the ignition of bamboo begins when the temperature reaches 204-260�C (400�500�F). (Depends upon duration of exposure to heat source and other variables). Explosive Limits in Air: Not applicable. See below under "Unusual fire and explosion hazards" Extinguishing Media Water, Carbon dioxide, Dry chemical, Sand. Special Fire Fighting Procedures None Unusual Fire and Explosion Hazards Sawing, sanding or machining can produce bamboo dust as a by-product which may present an explosion hazard if a dust cloud contacts an ignition source. An airborne concentration of air is often used as the LEL for bamboo dust. Reactivity data: Conditions Contributing to Instability Stable under normal conditions Conditions to avoid Excessive moisture, condensation or water vapor; Open flame or conditions above 400 F. Incompatibility Avoid contact with oxidizing agents. Avoid open flame. Product may ignite when temperature reaches in excess of 204�C (400�F). Hazardous Decomposition Products Thermal and/or thermal oxidative decomposition can produce irritating and toxic fumes and gases, including carbon monoxide, hydrogen cyanide, aldehydes, organic acids and polynuclear aromatic compounds. Hazardous Polymerization Not applicable MSDS Morning Star Strand Bamboo Flooring, Revision 3, April 2009 Page 4 of 7 HEALTH HAZARD INFORMATION Carcinogenicity Listing: (X) NTP1: Group 2, A & B Formaldehyde, Wood dust NTP-Group 2: Reasonably anticipated to be a carcinogen. A) Limited evidence of carcinogenicity from studies in humans which indicates that causal relationship is credible. B) Sufficient evidence of carcinogenicity from studies in experimental animals (X) IARC2 Monographs; Formaldehyde, Group 2A, Wood dust, Group 1 IARC-Group 1: Carcinogenic to humans; sufficient evidence of carcinogenicity. This classification is primarily based on studies showing an association between occupational exposure to wood dust and adenocarcinoma of the nasal cavities and paranasal sinuses. (X) OSHA3 Regulated: Formaldehyde IARC-Group 2A: Probably carcinogenic to humans; limited human evidence and sufficient evidence in experimental animals. Studies of cancer incidence among workers in a wide variety of occupations have failed to convincingly show carcinogenic activity of formaldehyde in humans. Gaseous formaldehyde has been shown to cause cancer in certain laboratory animals after long-term exposure to very high concentrations (14+ ppm); concentrations which are far above the levels of formaldehyde gas emitted by this product. 1 NTP = National Toxicology Program 2 IARC = International Agency for Research on Cancer 3 OSHA = Occupational Safety and Health Administration Exposure hazard: Eye Contact Wood dust can cause mechanical irritation such redness and watering. Skin Contact Not applicable for this product in its purchased form, however various species of wood dust may evoke allergic contact dermatitis in sensitized individuals. High concentrations of gaseous formaldehyde may cause allergic contact dermatitis. Ingestion Not likely to occur under normal use. If ingested, may cause gastrointestinal tract irritation. MSDS Morning Star Strand Bamboo Flooring, Revision 3, April 2009 Page 5 of 7 Inhalation Not applicable for this product in its purchased form, however, wood dust may cause nasal dryness, irritation and obstruction. Coughing and sneezing; sinusitis and prolonged colds have also been reported. Wood dust, depending on species, may cause respiratory sensitization and/or irritation. However, gaseous formaldehyde may cause respiratory difficulties for sensitized/allergic individuals. Emergency and first aid procedures: Eyes Flush eyes with large amounts of water. Remove to fresh air. If irritation persists, get medical attention. Skin Wash affected areas with soap and water. Get medical advice if rash or persistent irritation or dermatitis occurs. Inhalation Although not applicable for this product in its purchased form. However, if inhalation of bamboo dust, remove to fresh air. Get medical advice if persistent irritation, severe coughing or breathing difficulty occurs. Ingestion Not applicable under normal use. PRECAUTIONS FOR USE Accidental Release Measures Not applicable for product in purchased form. Dust generated from sawing, sanding, drilling, or routing of products may be vacuumed or shoveled for recovery or disposal. Avoid dusty conditions and provide good ventilation. A NIOSH-approved dust respirator should be worn if dust exposure limits are exceeded. Handling and Storage No special handling precautions are required for products in purchased form. Keep in cool, dry place away from open flame. This product will release small quantities of gaseous formaldehyde (≤0.12 mg/m3, which is below the E1 classification in accordance with EN 717-1:1998 test methods). Store in well ventilated area. MSDS Morning Star Strand Bamboo Flooring, Revision 3, April 2009 Page 6 of 7 Personal Protective Equipment: Respiratory Protection Not applicable for product in purchased form. A NIOSH-approved dust respirator is recommended when allowable exposure limits are exceeded. Protective Gloves Not required. However, cloth, canvas, or leather gloves are recommended to minimize potential mechanical irritation slivers from handling and machining product. Eye Protection Not applicable for product in purchased form. Goggles or safety glasses are recommended when machining this product. Other Protective Clothing or Equipments Not applicable for product in purchased form. Outer garments may be desirable in extremely dusty areas. Work/Hygiene Practices Follow good hygienic and housekeeping practices. Clean up areas where wood dust settles to avoid excessive accumulation of this combustible material. Minimize blowdown or other practices that generate high airborne-dust concentrations. Local Exhaust Provide local exhaust as needed so that exposure limits are met. Special / other None OTHER INFORMATION Disposal Consideration If disposed of or discarded in its purchased form, incineration is preferable. Dry land disposal is accepted in most states. It is, however, the user�s responsibility to determine at the time of disposal whether your product meets RCRA criteria for hazardous waste. Follow applicable federal, state, and local regulations. Transport and Regulatory information Not regulated as hazardous material by the U.S Department of Transportation and the Canadian Transportation of Dangerous Goods (TDG). Not a controlled product by WHMIS...See MoreEngineered Hardwood Floor Installation 2nd level
Comments (5)Have you checked the subfloor rigidity for the deflection rating? Do you know which way the joists run? How level is it? Have you used a 10ft level to determine the issues that need resolution? Who's doing the installation? Technically you can use an uneven T-molding at the tile/wood interface....but your height variation is more than what most uneven T's offer. You might have to look at a reducer. You will need to purchase such a thing from the engineered hardwood manufacturer. Of course the EASIEST way to deal with this = 3/4" thick engineered. Almost all tile installs have a height of 3/4" - 1.5". Your 3/8" (which is very thin) hardwood doesn't even make up the thickness of the backer board....let alone the height of the tile. You are missing 5/8" (15mm) of floor height. That's A LOT. The solution to both the leveling and the floor height variation = 1/2" (12mm) plywood with shims used to offer the flatness level required by the hardwood. If you were FLOATING the hardwood you could use 1/2" cork underlay (12mm) to make up most of that height. The cork would 'float' (no adhesive) and then the wood wood 'float' over top (adhesive only on the edges) = done like dinner. But you are gluing so the plywood is the option I would go with. Of course your well trained flooring installer could walk you through this quite easily....See MoreLeveling Large Room with Cracked Concrete Floor
Comments (11)Flattening concrete (repair and floating new concrete over top) is EXPENSIVE. It is super expensive. In fact it will cost more than the flooring - guaranteed. A slab like yours sounds like: A. It does NOT have a vapour barrier underneath it. If it is 50 years old, it won't have the plastic underneath it = BIG problem with new concrete sticking to old. Getting anything to stick to this is going to be a BIG job...just to stop the water from moving up from the ground to the adhesive. B. It needs big repairs...if cracks are showing gaps then you need to repair/fill and then add more concrete. That just added a few more days and a few more dollars to this. Not to mention the technical knowledge you will HAVE to pick up...as in you will have to learn the ENTIRE concrete slab business just to do DIY. C. Your slope is going to be TOO MUCH for anything other sheet products (carpet or vinyl). So long as the concrete is smooth and the cracks are filled you can use SHEET vinyl...Yep. Sheet vinyl. It is fast, and it is tough. And it is water resistant (to people dripping wet....not a flood...nothing survives a flood). The BIGGEST issue I see is the vapour barrier is missing. This changes EVERYTHING. A glue down tile = lifting in a year. New concrete must be bound to the old. That requires SOOOO MUCH more work than you know. If you had a pro do it, it would cost you $5/sf just to get the slab ready for new concrete. The concrete = $2/sf....but it you do not PREPARE it with water barrier products (grinding and cleaning and filling and water barrier and primer) you are just asking for a whole bunch of crumbling stuff. I know you want to DIY....but save yourself the effort. Use the sheet product and be done with it. The cost you would spend on the flattening (even the way you are thinking of) will go towards the install costs. At the end of the day it could be in within a few days (cracks still must be filled)....See MoreLaTonya
6 years agolast modified: 6 years agoLaTonya
6 years agothatsmuchbetter
6 years agolast modified: 6 years agoLaTonya
6 years agoLaTonya
6 years agothatsmuchbetter
6 years agolast modified: 6 years agoLaTonya
6 years agoLaTonya
6 years agoLaTonya
6 years agoLaTonya
6 years agoUser
6 years agolast modified: 6 years agoLaTonya
6 years agobry911
6 years agolast modified: 6 years ago
Related Stories
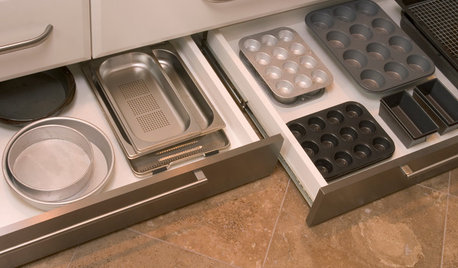
KITCHEN DESIGNThe Kitchen Storage Space That Hides at Floor Level
Cabinet toe kicks can cleverly house a bank of wide drawers — or be dressed up to add a flourish to your kitchen design
Full Story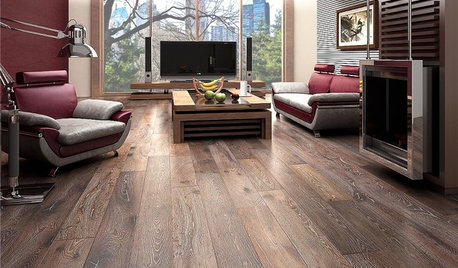
REMODELING GUIDESWhen to Use Engineered Wood Floors
See why an engineered wood floor could be your best choice (and no one will know but you)
Full Story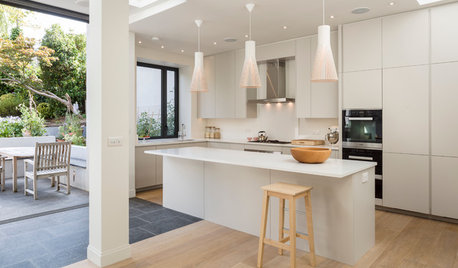
FLOORSHow to Care for Engineered Wood Flooring
Keep your wood floor looking its best with these tips and tricks from the experts
Full Story
REMODELING GUIDESWhat to Know About Engineered Wood Floors
Engineered wood flooring offers classic looks and durability. It can work with a range of subfloors, including concrete
Full Story
REMODELING GUIDESWhat to Know About Bamboo Floors
Learn about the 3 types of bamboo floors, their costs, and bamboo’s pros and cons as a flooring material
Full Story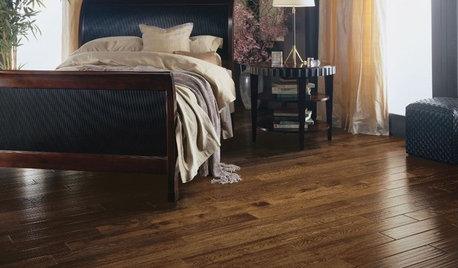
REMODELING GUIDESYour Floor: An Introduction to Solid-Plank Wood Floors
Get the Pros and Cons of Oak, Ash, Pine, Maple and Solid Bamboo
Full Story
MATERIALSWhat to Ask Before Choosing a Hardwood Floor
We give you the details on cost, installation, wood varieties and more to help you pick the right hardwood flooring
Full Story
REMODELING GUIDESDesigner Confessions: Torn Between Wood Floors
19 Photos to Help You Choose a Wood Floor Finish
Full Story
KITCHEN DESIGNKitchen Flooring 101: Find Your Material Match
From cork to concrete, our guide will help you pick the perfect surface for your kitchen floor
Full Story
REMODELING GUIDESWood Floor Care: Polish Your Skills
Help your wood floors stay gorgeous by learning how to keep stains, dullness and warping at bay
Full Story


User