


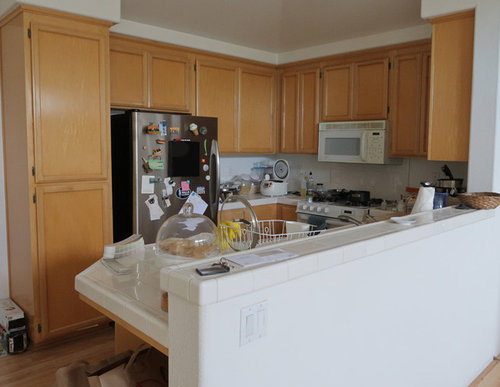
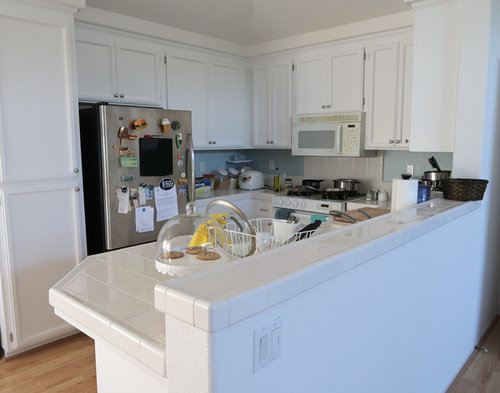
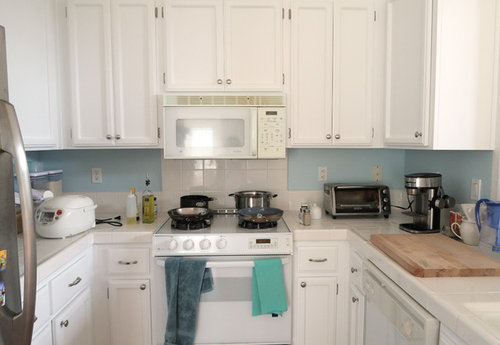
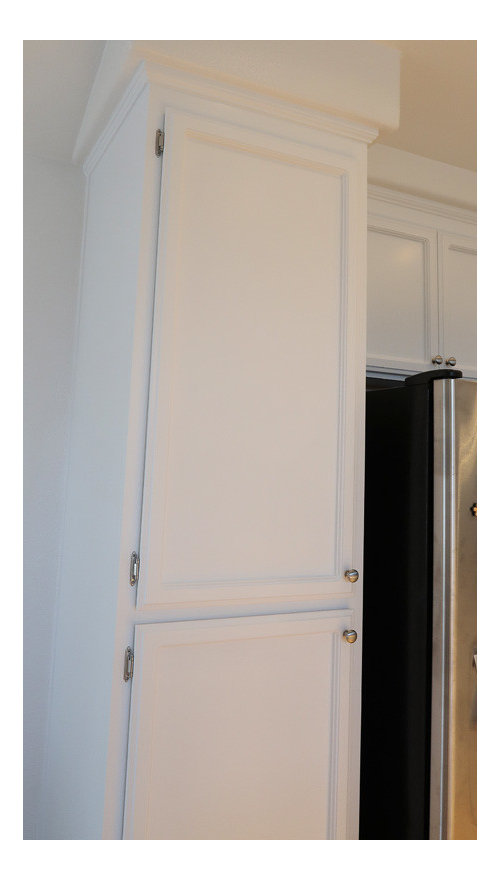
Kitchen Cabinet Repaint with Cabinet Coat
funwithpaint
7 years ago


Featured Answer
Sort by:Oldest
Comments (23)

rob333 (zone 7b)
7 years agoRelated Discussions
How to repaint kitchen cabinets ?
Comments (12)You know it's funny. I don't have a license to paint because it's not required in my state. I also do not have any references because I certainly do not want potential customers calling my previous customers and bothering them. I'm the best painter around. If you are looking for great painters, please try and find a friend that has used a painter and was happy. If you don't have any friends that have used painters then go into a real paint store and get some names. They will give you names of painters that have been around a while and pay their paint store bills. These are 2 good signs. Whether the cabinets should be stripped or removed and sprayed will depend on many factors. If the paint is in good condition, it may be okay to just paint over it. If there are brush marks on the cabinets that you want removed, then sanding down to raw wood may be a good idea, but this will be expensive. Two coats of high quality washable paint is standard, but painting over a green color may take a third coat....See Morerepainting kitchen cabinets
Comments (4)I'm in the process/purgatory of this project right now. blfenton is right - you don't need to sand down to the wood. Just scuff sanding with 120 grit paper to give the old finish tooth for the new finish to stick to. Due to some issues along the way (I foolishly stacked up some completed doors and they ended up sticking) I did sand some parts to completely remove some finished paint. When I did this I got down to bare wood in some places. Unfortunately, when I primed and painted again the sheen appears somewhat different where I got down to bare wood. Anyway, I'm just suggesting that it could be more headache/heartache than it's worth to sand so much. If you happen to find old streaks or runs I would make the effort to get those sanded out now. A few other words of advice that I've picked up from reading or wish someone had told me before I started - Don't use TSP to clean as it leaves a residue that can interfere with adhesion if not cleaned off properly. Vacuum off all dust and use a tack cloth. For dust in corners use a paintbrush to get small particles of dust out. Sometimes it's good to do two coats of primer. I wish I'd done this on my entire project - especially when I had some bare wood showing. Add flowtrol or penetrol to extend the open time and help enhance the leveling. Wipe up any paint that gets into areas that you're not currently working on - say you're working on the inset area and some paint gets onto a stile - wipe it off so that you're not painting into drying paint. Maintain a wet edge - I never really understood this one until I got started. I find rather than trying to stretch the brush strokes from one end to another it's better to lay down the paint in a couple of passes and then tip off and do one long brush stroke. Sometimes it's also easier to lay down paint with a roller and then tip off with a brush. Be careful not to thin too much or apply too much paint because you can experience runs or sags. When mistakes happen wipe up particles, remove hairs, etc. right away. If you wait too long it's my preference to actually wash off drying paint completely from the piece rather than trying to sand it out later (this is my personal preference). I also prefer to tape off and remove tape while paint is still very wet and then tape off again when I recoat. This has allowed me to catch bleed through on my hardwood floors. When I didn't do this for my drawer faces/boxes despite cutting the tape the tape did pull in some areas. If you're installing new hardware consider drilling holes before you paint to avoid damaging your finish coat. Also consider taping over where hinges go especially if they are inset hinges (probably not the correct term), I didn't do this and I'm dreading possibly scraping/sanding out such a small area. A dumb mistake I've made is not to move the paint closer to where I'm currently working and I've dripped on finished work - try not to move a wet brush over finished work. Don't paint out of the gallon but pour what you think you'll use into a smaller container. Your brush picks up dust as you go so it's best not to contaminate the whole gallon. Also, don't pour any remaining paint back into the container unless you strain it. Don't forget to stir well and close up the gallon asap. Another mistake I made was not to caulk the doors before I painted and paint has some microcracks where the inset panel is. Honestly I'm not great at caulking and I'm not positive how exactly you execute this properly but if you're doors are an inset style I'd look into it. Sorry if I dumped all of this here and you already know all of it. I've found this to be a really long and painstaking process so I'd write a book if I thought I could save anyone from some of my mistakes! Best of luck to you!!...See MoreKitchen Cabinet (re)Paint
Comments (6)Even if you could figure out the technical finesse to touch up so the cabinets look good, the color might be a challenge. If it's been a few years, fresh-out-of-the-can touch ups are probably not going to blend nicely/match the white that's been in service for a few years -- same with the new cabinets - they probably won't match....See MoreCABINET COAT VS ADVANCE - BENJAMIN MOORE FOR KITCHEN CABINETS
Comments (3)I haven't used the Cabinet Coat product, but I have used Advance. I used Advance on a nightstand and a desk ... and on the desk again when it changed rooms. When I was planning on painting the desk after we finished stripping and sanding it (we got it in a half painted state), I went into the paint store and told them I wanted to paint furniture, and they recommended the Advance. The Advance was super easy to use. I brushed it on, and it came out nice and even. Great coverage in two coats (I did not prime, though it might be wise to do so with kitchen cabinets), and no issues with the cure or durability. When I redid it (going from Wisteria to Temptation), I sanded lightly to remove the finish and repainted. It again went on beautifully and has had no issues, though it is not in as high traffic a situation as a kitchen cabinet. The nightstand was sanded and scrubbed to remove a bunch of awful paste wax, and I had painted it with one coat of a light grey sample paint because it was being a test piece for the color, and we thought we were getting rid of it. It went from awful to still awful in the new color, so we thought it might be more give awayable in the Temptation we still had from the desk. I lightly sanded the light grey paint and applied the Advance. Two coats later, and the piece is working great and holding up well as my nightstand. It's unfazed by being whapped with remotes or glasses. It hasn't been given the three-year-old-child test, but it seems to be doing well in regular use. For comparisons: https://www.paintingrochester.com/blog/cabinet-coat-and-benjamin-moore-advance-review https://www.houzz.com/discussions/2494522/bm-advance-vs-bm-cabinet-coat...See More
graywings123
7 years ago
nosoccermom
7 years ago
LynnNM
7 years ago
Bunny
7 years agohappilady
7 years ago
ghostlyvision
7 years ago
Laurie Gordon
7 years ago
laughablemoments
7 years agolam702
7 years agofunwithpaint
7 years agoUser
7 years agoUser
7 years agopatty_cakes42
7 years agoenchantedrosez5bma
6 years agofunwithpaint
5 years agoLaura Holland
4 years ago
Aglitter
3 years agoLaura Holland
3 years agolast modified: 3 years agoAglitter
3 years agoAglitter
3 years agolast modified: 3 years ago
Related Stories
KITCHEN CABINETSKeeping Cabinet Color on the Down Low
Give just base cabinets a colorful coat for a kitchen sporting character and a spacious look
Full Story
COLORCrazy for Color? Your Kitchen Cabinets Want In
Make over your kitchen in spectacular fashion with just colorful cabinet paint? Now there's a bright idea
Full Story
MOST POPULAR8 Great Kitchen Cabinet Color Palettes
Make your kitchen uniquely yours with painted cabinetry. Here's how (and what) to paint them
Full Story
KITCHEN DESIGNPopular Cabinet Door Styles for Kitchens of All Kinds
Let our mini guide help you choose the right kitchen door style
Full Story
MOST POPULARFrom the Pros: How to Paint Kitchen Cabinets
Want a major new look for your kitchen or bathroom cabinets on a DIY budget? Don't pick up a paintbrush until you read this
Full StoryKITCHEN CABINETSKitchen Cabinet Color: Should You Paint or Stain?
Learn about durability, looks, cost and more for wooden cabinet finishes to make the right choice for your kitchen
Full Story
KITCHEN CABINETSPainted vs. Stained Kitchen Cabinets
Wondering whether to go for natural wood or a painted finish for your cabinets? These pros and cons can help
Full Story
MOST POPULARHow to Reface Your Old Kitchen Cabinets
Find out what’s involved in updating your cabinets by refinishing or replacing doors and drawers
Full StoryBEFORE AND AFTERSGray Cabinets Update a Texas Kitchen
Julie Shannon spent 3 years planning her kitchen update, choosing a gray palette and finding the materials for a transitional style
Full Story
KITCHEN CABINETSColorful Ways to Make Over Your Kitchen Cabinetry
Try these inspiring color updates to spice up your kitchen a little — or a lot
Full Story


enchantedrosez5bma