


Minor kitchen update plans after botched renovation
Roberta Long
7 years ago
last modified: 7 years ago
Featured Answer
Sort by:Oldest
Comments (8)

Stan B
7 years agolast modified: 7 years agoRelated Discussions
Update - 6 months after renovation
Comments (1)Why not cover the electrical panel in the living room. Here are some pictures of new recessed light conversion kits that convert incandescent or spiral CFL lamp to new look, energy efficient LED Diamond lamp. It never get hot, only as warm as body temperature. Also convert PL straight G24q-2 tube to CFL ceiling. I enclose two types for the member for view. =++++++++++++++++++++++++++++++++++++++++++++++++++++++++++------------------------------------------------------------ ------------------------------------------------------------ ------------------------------------------------------------- By the way, these are my inventions. Post to let member know there is new recessed light. My site should live next week....See MoreWhat kind of countertop/flooring for a minor kitchen update?
Comments (7)Hi, pinch: I'm 55 with 8 years left to go on the mortgage, so I can relate. Sometimes I wish I'd taken the thirty grand "equity" loan and remodeled the kitchen, but I just had a sense that there was no way my house was "worth" almost a half-million dollars and that something had to give. So now I am eight years to free and clear -- with an old kitchen. The most serious problem with this kitchen is that it has no dishwasher -- and no place to put one other than losing a cabinet to a hard-to-find 18" dishwasher. I don't miss it, there are just 2 of us and I'm used to washing dishes. Another reason why a buyer would want to rip out the whole kitchen, and I would either price accordingly at sell time or offer a "remodeling allowance" in the form of cash at closing. So where I am right now is laminate for the countertops. That high-end Formica 180FX is nice, but it still looks like laminate, albeit very nice laminate. On the other hand, it doesn't show dirt, which is a plus or minus depending on how good a housekeeper you are (I am not a great one). I would want either a wood or ogee edge; I think it just looks more finished. Probably something mid-range in color; the kitchen is somewhat dark. Not sure what to do about the floor; I'm leaning towards a stone look because with all that oak, the risk is looking too "woody." That's another reason I'm leaning towards cream painted for the wall o'cabinets I posted about elsewhere. The walls are a very pale buff, which I would want to keep (close to the Benjamin Moore Ylang-Ylang color, only a bit less yellow); the trim is painted cream. I have soffits with plumbing and wiring in them, so I can't rip them out, unfortunately. If I had it to do over again, I'd have just painted the cabinets and gotten new doors and painted them...but I am well into this reface job and I've done such a whiz-bang-up job that this veneer is probably NEVER coming off. When I can I'll post some before, during, and maybe even after pix once I get it done. Not wanting to rain on the parade of those lucky enough to be able to do a full remodel, but I keep hoping that someday granite will be as harvest gold is today. :-(...See MoreMostly-DIY renovation update (with pics)
Comments (27)Well, here are some updated pics/narrative of our progress... BAD NEWS UPDATE...VERY BAD MOLD: We had a bummer of a weekend. The master bathroom (right next to my bed) started filling up with a horrendous mold smell when it got warm last week and the snow started melting. I am massively allergic to mold. I broke out in hives and my throat closed up so I could barely swallow. The contractor was demolishing the masonry wall so we had plastic sheeting up and I basically could not leave my mold-filled bedroom (where I am working.) The contractor was pushing us to do our demo part every day so he could finish up and move on to the next job, so DH and I were frantic and exhausted. And could not even begin to address the mold! So now that bathroom is sealed off with tape. Thank goodness we have another bathroom! We were worried it was the crawl space, which is only about 8-10 inches to the dirt, so any changes or waterproofing in there would entail removing ALL THE FLOORING to joists in the MBR wing, and excavating the dirt. Major, major, major $$$$$. BUT then last night DH made a discovery that someone had put insulation on the OUTSIDE of the sheathing, under the vinyl siding. Perhaps in an attempt to stop the pipes from freezing (which they still do, we discovered in January...) and that insulation is filled with mold. So- we are HOPING that is the only problem. He is planning to investigate it this week. THE HAPPIER PROGRESS UPDATE: The framers are finished, just some minor framing left for DH and I to do: for instance, I could not decide how wide to make the doorway between the new mudroom and the kitchen/pantry area, so I had them frame it to 5 feet. Then we stapled up rosin paper (that pink stuff) on the framed walls to get a feel for the space. I think we're settled on the 36" opening in the pics... it makes the mudroom more a seperate space which I think it wants to be. Blocks a little more light, though. Also when you come in the door, the first thing you see is the pantry area, and narrowing the opening a bit helps direct your view into the house instead... (no door is planned for that opening.) This weekend we finished pulling down the plaster in areas we needed to add blocking for cabinets. DH continued removing old ceiling tiles and knotty pine from the basement, since we had room for it in the dumpster and he's going to tackle the basement next winter. We set up a little temporary kitchen in the pantry area. I know... we won't use the right-hand burners! Here are two shots of the kitchen space. That piece of cardboard on the shopvac represents the island. The 2x4s next to it are the post we can't decide how to detail. The two left-hand openings out to the sunroom (what used to be window and door) will be filled in up to 42" with kitchen counter and backsplash. the right-hand opening is two steps down to DR and LR. We're also going to add a header over the opening into the patry area. This week: 1) investigate Bad Mold. 2) finish designing electrical and run new electrical circuits 3) (hopefully) patch in oak hardwood flooring in the area we ripped up the old kitchen floor. We'll cover it with rosin paper and cardboard and sand/finish it after the drywallers are done....See MoreHow much would it cost for a "minor" kitchen remodel - no appliances?
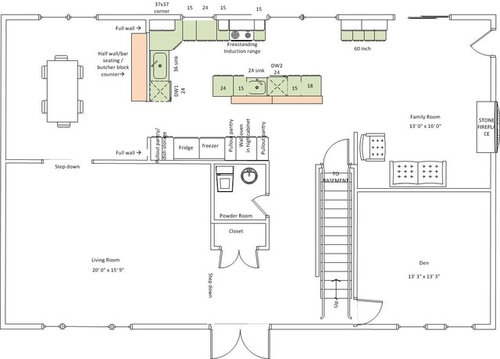
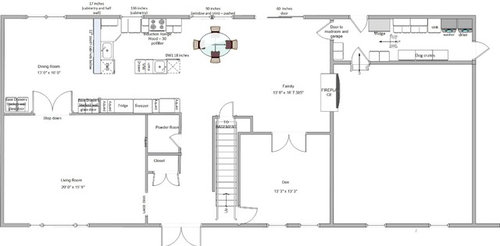
Comments (11)Did the floors go down first? It looks like they did, but if not that would be a potential issue with moving the island. Any electrical on that island? Looks like you have a column at the end of the kitchen/bar area. What is in there? Your drawings kind of ignore it, and it looks like you're adding to the length of the kitchen. Can you really? Or were you ending the counters at the column? Is your house built on a slab? Are you adding any sinks to the mudroom or just a wall and cabinets?...See More
Roberta Long
7 years agolast modified: 7 years agoStan B
7 years agolast modified: 7 years ago
cpartist
7 years agoRoberta Long
7 years ago
Lavender Lass
7 years agoemilyam819
7 years ago
Related Stories
BEFORE AND AFTERSGray Cabinets Update a Texas Kitchen
Julie Shannon spent 3 years planning her kitchen update, choosing a gray palette and finding the materials for a transitional style
Full Story
FARMHOUSESKitchen of the Week: Modern Update for a Historic Farmhouse Kitchen
A renovation honors a 19th-century home’s history while giving farmhouse style a fresh twist
Full Story
REMODELING GUIDESPlan Your Home Remodel: The Interior Renovation Phase
Renovation Diary, Part 4: Peek in as the team opens a '70s ranch home to a water view, experiments with paint and chooses tile
Full Story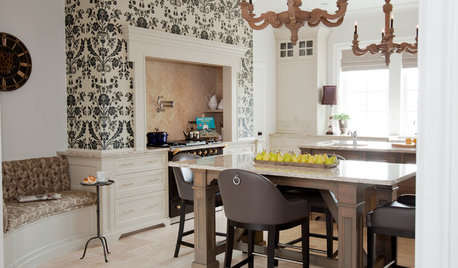
KITCHEN DESIGNKitchen of the Week: Updated French Country Style Centered on a Stove
What to do when you've got a beautiful Lacanche range? Make it the star of your kitchen renovation, for starters
Full Story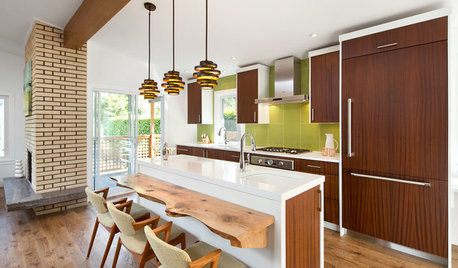
HOUZZ TOURSHouzz Tour: Dancing to the 1970s in an Updated Vancouver Home
The open floor plan and updated appliances have modern moves, but the lime green and wood paneling still do the hustle
Full Story
HOUZZ TOURSMy Houzz: Thoughtful Updates to an Outdated 1900s Home
Handmade art and DIY touches bring a modern touch to a classic Boston-area home
Full Story
BEFORE AND AFTERSHouzz Tour: A San Diego Townhouse Gets a Bright Update
Savvy shopping and warm bamboo accents help California architects give their home a fresh, high-end feel
Full StoryRANCH HOMESMy Houzz: Warm and Airy Kitchen Update for a 1980s Ranch House
A dark and cramped kitchen becomes a bright and open heart of the home for two empty nesters in Central California
Full Story
KITCHEN DESIGNCouple Renovates to Spend More Time in the Kitchen
Artistic mosaic tile, custom cabinetry and a thoughtful layout make the most of this modest-size room
Full Story
BEFORE AND AFTERSModern Function and Simplicity in an Updated 1970s Kitchen
Goodbye to retro appliances and wasted space. Hello to better traffic flow and fresh new everything
Full Story
Sunnysmom