


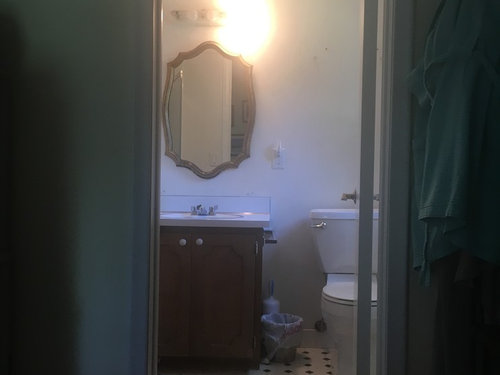
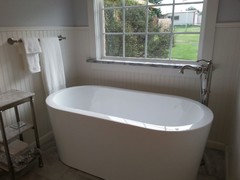
Remodeling small master bathroom, oodles of questions
purrus
7 years ago
Featured Answer
Comments (19)

purrus
7 years agoRelated Discussions
Master Bath Remodel - 4 questions
Comments (2)By "minimum square footage for a walk-in shower" do you mean a doorless shower? Because the minimum size for a shower stall is only 32x32". :-) IIRC I have seen doorless showers as small as 3x4' in magazines and it seems to be a popular retrofit for the replace-tub-with-shower scenario because it can be fitted in a standard 32x60" space. The location of the plumbing bits in relation to walls and openings is potentially more important than the size. Think about having the crack in the tub repaired; now would be better so that the little crack does not become a big crack, but at the very least do it when you plan to put the house on the market. As a buyer it would be a red flag for me. Bath showrooms, auto-body specialists, and marine suppliers can all point you toward someone who can repair fiberglass or acrylic and do it pretty much invisibly. And yes, you can replace the tub filler as long as you can get access to it from underneath. I'll put the fourth question about adding a second sink here instead of last since third question's answer is long. This can be very easy or rather difficult depending on where the sink is going and where the existing plumbing lines are in both bathrooms. You're going to gut to the studs, right? That will make it easier to see what you have where for rough plumbing; your plumber is likely to tell you that unless money is no object, you can't really make the firm decision until you can see what's where. Demo... demo is pretty easy and can be lots of fun - talk about getting rid of your stress! It does take some physical strength and endurance though, so couch potatoes or people with physical issues like arthritis may have a difficult time of it. It's good to have friends come help, if you can, especially a friend who knows what s/he is doing! Promise them pizza or steaks on the grill :-) and buy a few cases of Gatorade and beer if you/they drink it. (It goes without saying that no one gets beer until afterward!) Although I almost entirely supervised (since I was the only one who knew what we were doing LOL), three of us demolished an 8x8' bathroom to the studs and the subfloor in 3 hours. You will need to borrow or buy some tools if you don't have them already, and I've listed what we found useful below. Buying them will reduce your savings, but you'll have them for the next project, or you can resell them on Craigslist or eBay and get back a little of what you paid. Useful tools include: *a three- or five-pound sledgehammer with a short handle (easier to control where it goes), whichever size is more comfortable to handle. This may be called a "drilling hammer" or "engineer hammer" in some stores. 10+ pound sledges with long handles feel more macho but they are harder to control and the user gets tired faster. *a short wrecking bar (24" was good for us), the kind with one hooked end and one straight end. *reciprocating saw with more blades than you think you will need (save the recipt so you can return the extras; it'll cost a bit more but get the individually packaged ones rather than the bulk pack), because it seems like you always break a blade or it goes dull just when you're eyeballs deep in something and can't take the time to go get more. Try to borrow this if you don't have one, because good ones are expensive. *a wide tile or masonry chisel for getting up the floor tiles (the kind with the wide plastic collar at the top of the handle are safest) and a hard rubber or wooden mallet - If you have large amounts of floor tile and it's being a real beyatch to remove, hie thee to the tool rental place and rent an air-powered chisel and compressor. It'll be about fifty bucks a day. Yee-hah! What we did was bashed at the tiles with the sledgehammer and used the chisel to break the pieces off the subfloor. We were able to get the subfloor clean enough to put the new underlayment right over it, which saved money. *the usual selection of screwdrivers, wrenches, etc. for disassembly. When you can, disassemble and recycle rather than destroy! *heavy leather work gloves that actually FIT - write your name on the backs or cuffs with a Sharpie marker. If they don't fit you will get blisters. If you have ethical objections to leather, there are some good non-leather ones out there like these Work Crew gloves but the thin cotton ones don't do much for you. *dust masks (the ones with the valves are most comfortable and won't fog up glasses as much) *safety goggles (crucial! conventional eyeglasses are not enough) *earplugs or sound-proof earmuffs *kneepads - try on a bunch at the store and get the ones that are the most comfortable *even if it's hot wear jeans to protect your legs and workboots if you have them. If you don't have workboots, wear sturdy sneakers for better footing. Do not do as my friend did and attempt to demo a kitchen in Birkenstocks. :-) *a rented dumpster and a bunch of trash cans to get stuff out to it It is best IMO to have an electrician and plumber come in and disconnect everything before you start so you don't accidentally punch through a pipe or hit a live wire. Our electrician just disconnected the bathroom's two circuits at the box and everyone involved used heavy-duty extension cords run in from the next room. If the toilet is being reused it should be taken out of the bathroom and moved to a safe place, because it is very, very easy to break a toilet. Don't ask me how I know this because I will start swearing. :-( By the way, if your walls are drywall and you're doing major tear-outs, we discovered that it was easier/cheaper to strip the drywall off the entire wall so that the drywall guy could use full (or as close to full as possible) sheets instead of cutting smaller pieces to fill in holes here and there. It cost more in materials but a LOT less in labor. A bit of unsolicited advice - if you are planning on selling the house in 5-10 years, do not do ANYTHING that is currently trendy. It will be dated by then and your potential buyers may not want to have to embark on a renovation! Not everyone thinks remodeling is fun. :-) Think about staying on the plain side for stuff that is hard to replace, like tile and major fixtures, and getting your groove on with easy-to-replace items like lighting fixtures, accessories, cabinet hardware, paint, etc....See MoreFinishing up "attic master" remodel, looking for bathroom pointer
Comments (4)"1st question, since I have bought CBU for the walls but all the how-tos for kerdi have them using it on sheet rock. Im still leaning toward CBU, but figured it was worth asking. " Good instincts to use CBU. For several reasons I recommend you stick with stick with the CBU. Here's a Kerdi over CBU ditty, it might help if you've never used Kerdi before. 2) "2 The ceiling in the shower. Initially, i was going to tile the ceiling, but my wife thinks it would look like a cave...I had several people suggest to me PVC Beadboard. Any other thoughts? " If a beadboard ceiling will fit the style, you can go in that direction. If you want beadboard but want to avoid the sterile look of PVC, how about teak beadboard? Or a teak plank ceiling. Wood can go well with marble/travertine. Then you can always fake wood on the ceiling with wood-look tile. Or go for a lighter look with glass tile on the ceiling, though plain glass can look cold and modern. Of those I listed, I'd consider teak boards. Natural stone and a natural wood? Why not? 3) L/1100 is plenty good for travertine. But you have to consider deflection in two directions; deflection along the length of the joist (your L/1100), and the often overlooked across deflection fo the plywood that spans the joist bays, in your case, across the 19.2" space between the joists. I recommend you consider two layers of plywood (3/4" subfloor and then 1/2" underlayment if able. If not 1/2", then 3/8" minimum. Ditra (or equivalent) over that. Then tile. Large format travertine demands a protective floor beneath it. 4) Your last photo shows a 1/4" thick to 3/4" thick sloped bed of "sandmortar and membrane". I presume "sandmortar" is deck mud? Mud generally requires a 1-1/4" thickness at the drain. You can go thinner, some guys ust an admix and go 1", some push hard to 3/4" thick. . But going to 1/4" thick, it may not provide a durable base to the shower; cracks, etc. Deck mud just doesn't have any structural integrity when placed that thin. Have you considered QuickSlope or one if its derivatives to establish your slope. I mention QS because it pretty much feathers down to nothing. I think it's an 1/8" thick at the drain end, it's honeycomb structure gives the bed structural integrity. which fits your low-profile requirements. Going hybrid? It can be done. But I generally recommend staying within a company's product line and avoiding "hybrid showers" unless the hybrid version has been warranted, ie, Laticrete's Hydroban membrane with Schluter's Kerdi Drain. Enough for now. Got to go. I'll try to check in tomorrow...Oh, and I'm glad I didn't have to do that drywall. Fun fun fun!!...See MoreSmall 1950's Master Bath Remodel
Comments (12)Superb! Love the homage to the original, and (I mean this in the best way possible) your remodel looks as if the bath was always there. Beautifully fitted into the vibe of the place. Would you share details? (BTW - love the new home you found for those three art pieces - perfect complement to the Turkish tile!) Cheers!...See MoreSmall master remodeling cost
Comments (29)As far as materials go, you might be surprised what Home Depot sells. I'm not talking about what is immediately available in the stores, although I have used the Daltile subway tile before and it worked out great. They sell a huge number of tiles and other things online that they don't carry in-store. They buy from manufacturers such as Emser and Daltile and it's exactly the same tile as if you go to ProSource or to the manufacture directly. For 3 upstairs bathroom remodels, we ordered all of the tile and most of the rest of the materials off of HD online, to be delivered to the store for pick up, including the toilets, lights, shower tile, floor tile, etc. I had to immediately return some of the tiles, right there at the pick up desk, because it's sometimes hard to see exactly what something looks like online, but only a couple times. My tile pro approved all the choices and if he didn't I returned it. I bought my tubs and chrome Delta fixtures from Fergusons because their prices were almost exactly the same as HD and I like their customer service. One of the reasons we decided to do this is that our Amex points no longer work on the airline that is hubbed in our city, so the points were just sitting there unused. We bought a bunch of HD gift cards to buy almost all of the materials to ease the cash-flow situation. So, if you have Amex points, that might be a nice use for them. About the skills of the tile professional: IMO the tile pro is the most important person on the worksite. You've got to have an experienced, skilled pro for a tiled shower who will build it and waterproof it properly. That skill costs money. If your GC, or the person in the bathroom showroom you talked to, hires a cheap hack to do the tile work, you can't even be assured of proper waterproofing. Ask them to explain to you what methods and materials they use for building and waterproofing the shower. They should be able to explain it to you clearly (and it should be detailed in the contract). If you're unsure of what they tell you (and the language in the contract), you can post on here to ask the pros is it s correct. A skilled tile pro can make low and mid-priced materials look like a million bucks just as a hack can ruin your expensive materials....See Morepurrus
7 years agolast modified: 7 years ago
SirJohn
7 years agopurrus
7 years agoSirJohn
7 years agolast modified: 7 years ago
sheloveslayouts
7 years agopurrus
7 years agopurrus
7 years agoSirJohn
7 years agopurrus
7 years agoSirJohn
7 years agosheloveslayouts
7 years agoSirJohn
7 years agolast modified: 7 years agopurrus
7 years agomelnnoa
7 years agotsth5236
7 years agopurrus
7 years ago
YMM
7 years ago
Related Stories
REMODELING GUIDESSurvive Your Home Remodel: 11 Must-Ask Questions
Plan ahead to keep minor hassles from turning into major headaches during an extensive renovation
Full Story
WORKING WITH PROS9 Questions to Ask a Home Remodeler Before You Meet
Save time and effort by ruling out deal breakers with your contractor before an in-person session
Full Story
MOST POPULAR8 Questions to Ask Yourself Before Meeting With Your Designer
Thinking in advance about how you use your space will get your first design consultation off to its best start
Full Story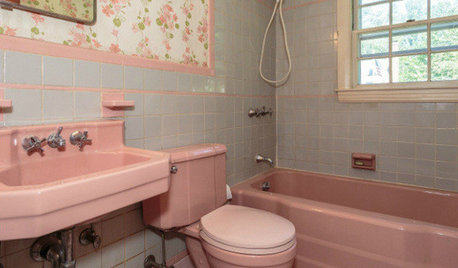
BATHROOM COLOR8 Ways to Spruce Up an Older Bathroom (Without Remodeling)
Mint tiles got you feeling blue? Don’t demolish — distract the eye by updating small details
Full StoryREMODELING GUIDESConsidering a Fixer-Upper? 15 Questions to Ask First
Learn about the hidden costs and treasures of older homes to avoid budget surprises and accidentally tossing valuable features
Full Story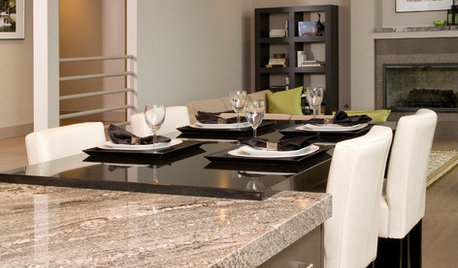
REMODELING GUIDES9 Hard Questions to Ask When Shopping for Stone
Learn all about stone sizes, cracks, color issues and more so problems don't chip away at your design happiness later
Full Story
BATHROOM DESIGN14 Design Tips to Know Before Remodeling Your Bathroom
Learn a few tried and true design tricks to prevent headaches during your next bathroom project
Full Story
BATHROOM DESIGNBath Remodeling: So, Where to Put the Toilet?
There's a lot to consider: paneling, baseboards, shower door. Before you install the toilet, get situated with these tips
Full Story
BATHROOM DESIGN10 Things to Consider Before Remodeling Your Bathroom
A designer shares her tips for your bathroom renovation
Full Story
CONTRACTOR TIPS6 Lessons Learned From a Master Suite Remodel
One project yields some universal truths about the remodeling process
Full Story


SirJohn