


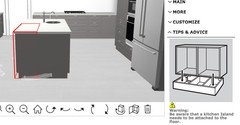
Quick IKEA cabinets question
sjhockeyfan325
7 years ago
Featured Answer
Sort by:Oldest
Comments (9)

Lisa
7 years agolast modified: 7 years agochicagoans
7 years agoRelated Discussions
quick ikea question for ikea experts
Comments (25)Remodelfla, yes you can make a 12" pullout per amberly's description. You don't necessarily have to use the pieces from a 12" cab to make the pullout, though-- you can trim the pieces from a 15" cab instead, and assemble the cab with deck screws. Either way will work, though it may be a little easier to make the cab square using the 12" cab parts. Since you are making your drawer and door fronts, you can make one tall door to use as the pullout. I would stick to Ikea's design of having one tall door as a pullout on the bottom and a shorter door on hinges on top-- pullouts up high are hard to see into without a stool. With custom drawer fronts you should not have to use any trim pieces. Moccasinlanding: Yes, you must purchase side panels for exposed sides, though you may substitute beadboard. The door and drawer fronts you use depend on how you want to configure the tall cab space. Several standard configurations are in the Ikea catalog, and if you order a standard configuration, the salesperson will tell you what you need in terms of add-ons like legs, hardware, etc. I think the planning software does that as well. However, I think two tall cabs flanking a DR window could be a bit overwhelming. How about doing base cabs with glass-fronted wall cabs stacked on top, to make each unit look like a hutch? The glass-fronted cabs could have lights inside, and hold your glassware and china....See MoreQuick LED Under Cabinet question
Comments (2)I have xenon under-cabinet lights, which create light similar to what you're planning to use, and we used to have Uba Tuba granite. The lights create a reflection in the granite and show everything underneath the upper cabinet .. this is why we used to have granite. I changed to Corian, and I'm a happy camper. Connie...See MoreQuick questions on Ikea Cabinets
Comments (1)You're right: the cabinet boxes themselves (and the drawers and interior fittings) are all identical. There are two colors of cabinet box: white and birch effect. So you choose the one that goes best with your door choice. If you're considering an IKEA kitchen, I really recommend heading over to the IKEA fans site (no connection to IKEA, just a bunch of very helpful people who are extremely knowledgeable about IKEA, particularly kitchens). Good luck! Here is a link that might be useful: IKEA fans...See MoreNeed help quick! Question about your painted/glazed cabinets
Comments (13)OP, please forgive this OT commentary to answer Julie. You can email me, too, if you click on My Page. Julie, thank you for the compliments. It's taking me so long to finish that no one notices anything I do get done anymore! :o) Anyway, I posted something in the forum below about type of paint. As for painting 'pure white', I wouldn't do bright white, but something on the order of Behr's Swiss Chocolate, which is just a perfect, subtle white that will compliment your granite. I painted cabinets as described on the link below. After drying several days, I then took a small palm hand sander with 220 grit and sanded off the corners, edges, and high profile parts on the doors and other areas of the doors to show wearing away of paint. I then took a small 1" black foam brush and used Minwax stain on all of the exposed newly sanded wood, cleaning off excess stain off the paint and doors in about five minutes. You will have to choose a stain to compliment your granite and wood floors. This can be a messy process, so by a couple of boxes of disposable medical gloves. This is the best, easiest way to keep a messy job 'clean'. Especially if you work in the house like I do. Once stained, let it dry a day. Then I mixed the glaze as I described on the web address in this paragraph, except I painted it around all of the edges of the door profile to accent and define the interior areas. (I mixed up about a pint of glaze at a time.) I wanted a more dramatic look to my doors, so I left a lot more product on my doors that the average pro painter. Use a 2.5" sash brush by Wooster. I love Purdy brushes, but for this job, only the Wooster works the best. I know, I tried them all. http://www.sherichase.com/progress/July2008Update.htm . After the glaze, I also did another technique to the doors using an oak colored stain on the raised, thickest part of the door to give it a more golden, rustic look. I have a similar pattern in my kitchen table, except it has a light grey glaze. I did dry-dragging of a large brush across the front face of the doors with the light oak stain. It's subtle, but gives dimension and character when you're up close. I can take a better photo if you like. Let this dry a day. Then I waxed the doors with clear Briwax. Ut takes about five minutes per door or so. Here's where I made a bit of a 'mistake'. I waxed with light brown, but I think it was a bit too yellow, so I'm removing some of it now. Half of the kitchen is waxed with clear, the other half I'm having to really work to get the wax off without messing up my paint job. So even on my photo above, you can see the uppers have brown wax and lowers have clear wax. It's all subtle. Well, I do have some of the brown wax off the upper in that photo. It's going to take some time and I have a lot to do right now. As always, wet sand BY HAND between every coat of anything you put on your doors: paint, glaze, etc. Just make sure the product has cured before you sand. Wet sanding is the best. I gradually work up to 600 grit. I am still working on my doors now and am not pass 320 grit, I believe. I still have to get off that brown wax. It's not coming off like I think it should with the clear wax. That being said, my kitchen photos show myriads of stages and mistakes. You can see my progress at: www.sherichase.com/progress to see where I started and am today. Email me and I'll give you my ph.# in case you need to call. FYI: Only use a hand palm sander to remove wood and paint. Do not 'wet sand' with any electrice machine. All wet sanding is done by hand. Light pressure with the grain, wetting the door with a fine mist spray bottle then wiping off excess with a microfiber cloth. Hope this helps. Here is a link that might be useful: Painting cabinets...See MoreLisa
7 years agoLisa
7 years agolast modified: 7 years agowritersblock (9b/10a)
7 years ago
Debbi Branka
7 years ago PRO
PROJoseph Corlett, LLC
7 years agowritersblock (9b/10a)
7 years ago
Related Stories
KITCHEN DESIGN9 Questions to Ask When Planning a Kitchen Pantry
Avoid blunders and get the storage space and layout you need by asking these questions before you begin
Full Story
REMODELING GUIDESPlanning a Kitchen Remodel? Start With These 5 Questions
Before you consider aesthetics, make sure your new kitchen will work for your cooking and entertaining style
Full Story
LIGHTING5 Questions to Ask for the Best Room Lighting
Get your overhead, task and accent lighting right for decorative beauty, less eyestrain and a focus exactly where you want
Full Story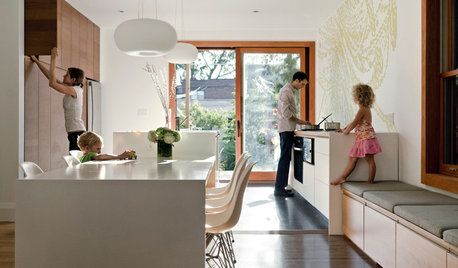
GREEN DECORATING8 Questions to Help You See Through Green Hype
With the ecofriendly bandwagon picking up some dubious passengers, here's how to tell truly green products and services from the imposters
Full Story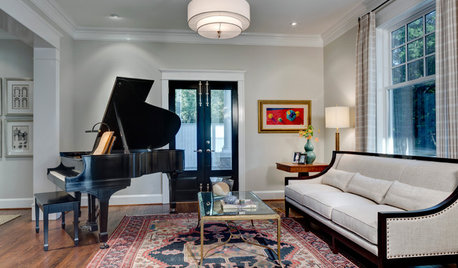
WORKING WITH PROS12 Questions Your Interior Designer Should Ask You
The best decorators aren’t dictators — and they’re not mind readers either. To understand your tastes, they need this essential info
Full Story
DECORATING GUIDESQuick Fix: Update Bookshelves With a Coat of Color
Hungry for quick color? Turn your shelves into a mini accent wall
Full Story
KITCHEN DESIGN15 Quick Kitchen Fixes
Little Changes Will Help You Love Your Kitchen All Over Again
Full Story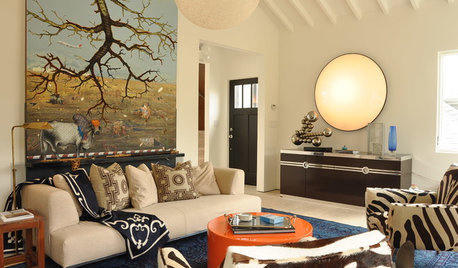
LIVING ROOMSRoom of the Day: Curiosities Bring Quick Intrigue to a Living Room
From blank box to captivating, exotic concoction, this room goes for the wow factor — and the whole house took just 4 days
Full Story
MONTHLY HOME CHECKLISTSYour Checklist for Quick Houseguest Prep
Follow these steps to get your home ready in a hurry for overnight visitors
Full Story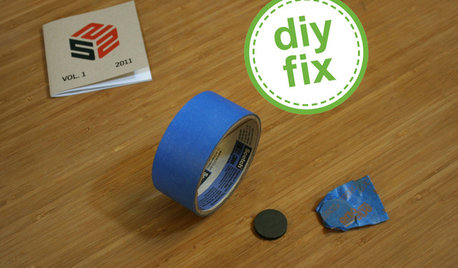
DECORATING GUIDESQuick Fix: Find Wall Studs Without an Expensive Stud Finder
See how to find hidden wall studs with this ridiculously easy trick
Full StorySponsored
Industry Leading Interior Designers & Decorators in Franklin County
Joseph Corlett, LLC