


Kitchen Reveal
tibbrix
8 years ago


Featured Answer
Sort by:Oldest
Comments (127)
Related Discussions
my kitchen reveal just posted to kitchen forum
Comments (0)over a year ago I spent a lot of time on this forum gathering information for appliances for my kitchen reno. We moved in just over a year ago and I finally just posted my kitchen reveal on the kitchen forum. all the details regarding my appliances are in the post! my posting...See Morekitchen reveal almost completed not staged kitchen-need tile help
Comments (96)This is my FAVORITE FAVORITE GW kitchen. It has soul and personality. I look at your pictures and just want to wander in there and linger, feeling the coziness and healing properties of that welcoming and nurturing space. It feels like a li'l ol' soft grandma with arms outstretched waiting to hug me. It does NOT remind me of so many cold, hard casket like fancy kitchens in the pictures. This one has a warm heartbeat throughout. Fantastic job, and I'm sure with the elbow grease/blood/sweat/tears you put into her you'll love her all the more over the years!!...See More2LittleFishies Yellow Kitchen Reveal !!! LONG!
Comments (161)Many of the longer Gardenweb kitchen reveal threads lost text and photo content when they were imported into Houzz. The good news is, Tamara says the data is not lost, but the threads will have to be repaired manually. No time frame yet, as they’re still working on other issues. We’re keeping up with the lost content issue in this thread: Kitchen Reveal Threads Missing Photos and Text Currently, you can still see 2LittleFishie’s intact threads by finding the cached version in Google. I have some info about how to do this in the above thread, about 20 posts down. (Feel free to message me if I can help.)...See MoreKitchen Reveal Before and After
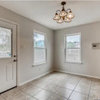
Comments (33)Thank you everyone, we are thrilled and very happy with the outcome, appliances, and design. The kitchen is very functional. And its amazing how it transformed our kitchen into usable space. Losing the load bearing wall was key and also adding the dining and mudroom. Everything flows so much better. We had a designer work with us. I'll answer some of your questions. We have another fridge in the garage. I am glad we spent a bit extra and got the Subzero. We were able to get floor model with a full 10 year warranty. We never have to worry about room and we like how it is counter depth. The doors are very heavy especially with the wooden panels so that's one consideration. Noise- the subzero is very quiet and food does last longer. to the left of the appliance lift are three shelves, one for silverware, dishes with peg board and another deep drawer below. For those of you interested in windows/ doors, they are all Anderson 400 series and the door is a Thermatru pre finished at a local distributor. We purchased Emtek hardware for the doors. I will have to get you measurements of upper. Little shelf to the left of dishwasher is a rev a shelf tray divider....See More
tibbrix
8 years agotibbrix
8 years agolast modified: 8 years ago
nosoccermom
8 years agotibbrix
8 years agotibbrix
8 years agotibbrix
8 years agotibbrix
8 years agolast modified: 8 years ago
dedtired
8 years agosunfeather
8 years agotibbrix
8 years agobeteacher
8 years agotibbrix
8 years agolast modified: 8 years agotibbrix
8 years agotibbrix
8 years agolast modified: 8 years agotibbrix
8 years agotibbrix
8 years agotibbrix
8 years agotibbrix
8 years agolast modified: 8 years ago


Related Stories

INSIDE HOUZZA New Houzz Survey Reveals What You Really Want in Your Kitchen
Discover what Houzzers are planning for their new kitchens and which features are falling off the design radar
Full Story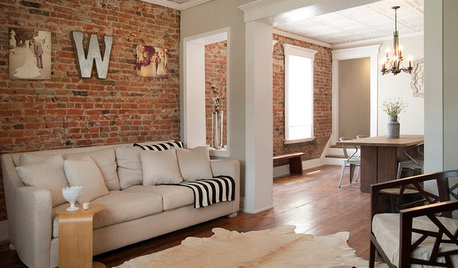
MY HOUZZMy Houzz: Surprise Revealed in a 1900s Duplex in Columbus
First-time homeowners tackle a major DIY hands-on remodel and uncover a key feature that changes their design plan
Full Story
MATERIALSRaw Materials Revealed: Brick, Block and Stone Help Homes Last
Learn about durable masonry essentials for houses and landscapes, and why some weighty-looking pieces are lighter than they look
Full Story
DECORATING GUIDESTop 10 Interior Stylist Secrets Revealed
Give your home's interiors magazine-ready polish with these tips to finesse the finishing design touches
Full Story
TRADITIONAL HOMESHouzz Tour: New Shingle-Style Home Doesn’t Reveal Its Age
Meticulous attention to period details makes this grand shorefront home look like it’s been perched here for a century
Full StoryREMODELING GUIDESBathroom Remodel Insight: A Houzz Survey Reveals Homeowners’ Plans
Tub or shower? What finish for your fixtures? Find out what bathroom features are popular — and the differences by age group
Full Story
BOOKS'Houses + Origins' Reveals an Architect's Process
How are striking architectural designs born? A new book offers an insightful glimpse
Full Story
GREEN BUILDINGCity View: Seattle Design Reveals Natural Wonders
Love of the local landscape, along with a healthy respect for the environment, runs through this city's architecture and interior design
Full Story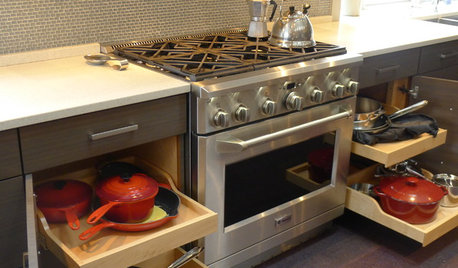
KITCHEN STORAGEKitchen of the Week: Bamboo Cabinets Hide Impressive Storage
This serene kitchen opens up to reveal well-organized storage areas for a family that likes to cook and entertain
Full Story
HOMES AROUND THE WORLDThe Kitchen of Tomorrow Is Already Here
A new Houzz survey reveals global kitchen trends with staying power
Full Story


Karenseb