


FAQ -- Kitchen work zones – what are they?
Buehl
8 years ago
last modified: 8 years ago
Featured Answer
Sort by:Oldest
Comments (8)

Buehl
8 years agoRelated Discussions
Aisle widths, walkways, seating overhangs, work and landing space, an
Comments (0)A few things to keep in mind: Aisles widths...are determined by measuring counter edge-to-counter edge, not cabinet-to-cabinet. If there are no counters (e.g., a tall pantry cabinet), then measure to/from the cabinet door...usually 1" past the cabinet box. For appliances, measure to/from the part that sticks out the furthest (usually the handle...this info is contained in appliance specs). Counter overhangs...Counters usually have an overhang of 1.5" beyond a cabinet box. So, with standard 24" deep base cabinets, the counter will extend another 1.5" beyond for a total counter depth of 25.5". This overhang is designed to protect cabinets, doors/drawer fronts, and the inside of drawers/cabinets from spills on the counter. By extending past the cabinet & doors, spills are directed away from the cabinet boxes/doors/drawer fronts/insides. 1" of that 1.5" overhang is to cover the doors & drawer fronts and protects the insides of the drawers & cabinets; the other 1/2" extends past the surfaces of the doors & drawer fronts & protects them from spills. Seating overhang & spacing... Counter-height seating (36" off the floor) - a minimum overhang of 15" of clear knee/leg space (i.e., no obstructions) Bar-height seating (42" off the floor) - a minimum overhang of 12" of clear knee/leg space Table-height seating (30" off the floor) - a minimum overhang of 19" of clear knee/leg space You should have a minimum of 24" of linear space per seat. E.g., a 4' wide island could seat up to 2 people; a 6' wide island could seat up to 3 people, etc. BTW...if you put decorative doors on the back of island or peninsula cabinets, they will take away approx 1" from the overhang, so add that 1" to the overall depth of the island or peninsula. E.g., if you have an island with seating and all one height at 36": 1.5" counter overhang in front + 24" deep cabinets + 1" decorative end panel or door + 15" seating overhang = 41.5" for the depth of the island....this is a minimum depth. Walkways....In a seating area, 36" of clearance from counter/table edge to wall/obstruction if no traffic passes behind seated diners. 65" of total clearance when this includes a walkway (i.e., traffic). [From the NKBA Kitchen Planning Guidelines With Access Standards] There are three primary work zones...Prep Zone (70% of kitchen work/time), Cooking Zone (10% of kitchen work/time), and Cleanup Zone (20% of kitchen work/time) Of these, the Prep & Cooking Zones work best when either next to each other or across from each other, but across no more than a 48" aisle. The Cleanup Zone usually works best if it's separated from the Prep & Cooking Zones. Sometimes that means different parts of the kitchen (usually with a prep sink in the Pep Zone), other times it means the only sink in the kitchen separates them...Prep & Cooking Zones on one side of the sink, Cleanup Zone with DW on the other side of the sink. [See the FAQ: Kitchen work zones, what are they?) for more information about work zones. Trash & recycle pullout...works best in the Prep Zone, near the Cooking Zone, and, if only one and possible, near the Cleanup Zone. Far more trash & recyclables are generated while prepping and cooking than while cleaning up. So, if you have to choose, put the trash & recycle in the Prep Zone instead of the Cleanup Zone. [That's the biggest mistake I made, I put it in the Cleanup Zone across a 6' aisle from the Prep Zone...it's my biggest regret by far in my kitchen.] Prep sinks...should be no smaller than 12" x 12"...and bigger is better - I recommend no less than 15" in each direction, 18" would be better, IMHO. Anything smaller is not very useful for prepping. Those smaller sinks are often called "bar sinks" b/c they're really only big enough for filling a glass with water or dumping a glass. They're not big enough to clean veggies/fruit or empty a colander. Zone protection...strive to protect the Cooking Zone from traffic - both through-traffic as well as in-kitchen traffic. While cooking, you are dealing with very hot pots/pans/food and you don't want to be tripping over or dodging traffic, open DW doors, etc. This usually means putting the Cooking Zone in the most "secluded" area...but not always, it depends on the workflow in your design. Work/Landing Space...Be sure you have adequate work and landing space near/around appliances and in zones. Sometimes skimping is required when it's a small kitchen. [The following items are from the NKBA Kitchen Planning Guidelines With Access Standards] Prep Zone...36" continuous countertop at least 16" deep for the preparation center, and be immediately adjacent to a water source. Cooking Zone...See Cooktop/Range Cleanup Zone...See "Sink (Only or Cleanup Sink)" Sink (Only or Cleanup Sink)...At least 24" of counter frontage to one side of the primary sink, and 18" on the other side (including corner sink applications) with the 24" counter frontage at the same counter height as the sink. The minimum allowable space from corner to the edge of the primary sink is 3". Sink (Prep)...At least 3" of countertop frontage on one side of secondary sinks, and 18" on the other side (including corner sink applications) with the 18" counter frontage at the same counter height as the sink. Refrigerator...At least 15" counter space on the latch side of the refrigerator or on either side of a side-by-side, or at least 15" of landing space no more than 48" across from the refrigerator. If an oven is next to refrigerator, refrigerator should be the one placed next to available countertop. Cooktop/Range...Open-ended kitchen: at least 9" of counter space on one side of the cooking surface and 15" on the other, at the same counter height as the appliance. Enclosed kitchen: at least 3" of clearance at an end wall protected by flame retardant material; 15" on the other side of the appliance, at the same counter height as the appliance. Countertop should extend a minimum of 9" behind the cooking surface, at the same counter height as the appliance, in any instance where there is not an abutting wall/backsplash. [Notes: Experiences here have shown some of us this is actually too little for an island or peninsula setup or when the cooktop/range is at the end of a cabinet run. For safety reasons, you need at least 18" on each side and 18" behind if there is no seating behind the cooktop/range, 24" behind if there is seating. For functionality, at least 24" on each side is better, regardless of location of cooktop/range. This space can be shared with the Prep Zone on one side; if it is, then there should be at least 36" on the side shared with the Prep Zone. In the case of a range/cooktop next to a door or wall, check your local Codes, they may dictate more space b/w the door or wall and cooktop/range.] Ovens (Wall)...At least 15" of landing space, at least 16" deep, next to or above oven if it opens into a primary traffic pattern. If it does not open into a traffic area, at least 15" x 16" of landing space needed [(i.e., it can be across or next to it)]. MW...At least 15" of landing space, a minimum of 16" deep, above, below, or adjacent to a microwave oven Combined countertop for 2 adjacent locations...For two adjacent work centers, determine the longest of the two required counter lengths and add 12"....See MoreWork zone and layout help, pt 2
Comments (17)Ah! Yes, I thought you meant range + 2 other ovens! That's better b/c now you have another 30" of storage and can add it to the 15" for 45" to be divvied up as needed (e.g., 24" + 21"). New layout - with tweaks: . Zone Map: . Regarding locating the refrigerator & pantry together - I would rather have the refrigerator convenient to the Prep & Cooking Zones than put them together just for the sake of putting away groceries. How often do you bring in large amounts of groceries to put away? How often do you need to use the refrigerator while prepping and cooking? If you're like most of us, you use the refrigerator while prepping & cooking far more often than you're bringing in large amounts of groceries. You can easily put the grocery bags for the refrigerator on the island and when you're done bringing the bags into the house, go to first the refrigerator and then the pantry to put the items away. No extra carrying of any bags. Why did I move the refrigerator? (1) To make it convenient to the Prep & Cooking Zones (2) Minimize zone-crossing (crossing through the Cleanup Zone to go b/w the refrigerator and Prep/Cooking Zones, for example) (3) To make it convenient to get to the refrigerator from the Dining Room, Screened Porch, Living Room, and Family Room (4) To allow everyone to access the refrigerator without getting in each others' way. It's even better now with the new information - see Layout #2. There is some overlap, but I think the aisles are wide enough that it won't be much of an issue. Note that I adjusted the aisle widths a bit. Visual of paths of refrigerator access: . To contrast the original refrigerator location: Notice the crisscrossing of the paths b/w the refrigerator and primary work zones. In particular, crossing through the Cleanup Zone repeatedly b/w the refrigerator and Prep and Cooking Zones. In addition, the island is a barrier b/w the island Prep Zone and the refrigerator. Another thing to look at is the very real possibility that people going to/from the LR and Screened Porch may be tempted to cut through the Kitchen if they think it will be a shorter path (human beings like the shortest distance!) It's represented by the green broken line below....See MoreFAQ: Kitchen Work Zones, What Are They?
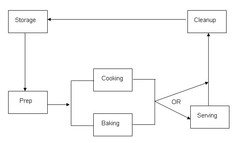
Comments (4)OK, now we know what the primary zones are. So, how do we design a kitchen keeping them in mind? . Prep Zone...works best when it contains a water source (sink) and is next to or across an aisle no more than 48" wide or so from the Cooking Zone. Trash & recycle bins should also be in the Prep Zone. More trash and recyclables are generated during prepping and cooking and for much longer work time than cleaning up, so place the trash/recycling in the Prep Zone and near the Cooking Zone. It should have a minimum of 36" of counter space (with at least 42" much, much better) that is next to a sink that is uninterrupted by the Cleanup Zone (dirty dish "storage"). If you have only one sink, then the Prep Zone is on the side of the sink opposite from the DW. (The DW side of the sink is the Cleanup Zone in this scenario.) . Cooking Zone...works best when next to/across from the Prep Zone (see Prep Zone). It's also nice to have a water source as well as trash & recycling nearby. Note that a pot-filler does not count as a water source since pot-fillers do not have a drain, a sink bowl, or access to both hot and cold water. . Cleanup Zone...works best when separated from the Prep & Cooking Zones. This can be on the opposite side of a one-sink kitchen from the Prep Zone or it could be in a completely separate location (the latter usually only works well if you have two sinks). Obviously, it also needs a water source and the DW. . . What else do we need to keep in mind regarding planning a kitchen and zones? . Dish Storage...works best when it's near the DW and near the serving/eating locations (island, DR, Nook, etc.) but out of the Prep and Cooking Zones. You don't want someone setting the table or unloading the DW to get in your way when preparing a meal. . Food Storage...works best when it's near the "action". It's nice to be able to store staples, etc. at their point-of-use, so food storage can be spread throughout the kitchen. E.g., flour, sugar, etc. in a "Baking Center", spices in the Prep or Cooking Zone, cereal close to where breakfast is eaten, etc. If you have a dedicated pantry, it's nice to have the pantry near the point where the groceries enter the house as well. Note that pantries should be near the Kitchen but not in the middle of the Kitchen where they interrupt work flow. Note: Be sure your pantry is in a cool, dry, dark location – that's the best setup for food storage. Heat (from a refrigerator or freezer or even a heat register), moisture, and sunlight (from a window) are enemies of food storage. If your pantry is completely open to the Kitchen – no door – then heat may not be an issue, but sunlight still is. . Refrigerator...works best on the periphery of the kitchen so it's easily accessed by people working in the kitchen as well as "outsiders" looking for a snack without the "outsiders" getting underfoot of those working in the kitchen. It should also be near the Prep & Cooking Zones and, if possible, near the main meal location(s) for ease of access during mealtime. . Microwave (MW)...this also works best on the periphery of the kitchen so it's easily accessed by people working in the kitchen as well as "outsiders" looking for a snack without the "outsiders" getting underfoot of those working in the kitchen. . Zone-crossing - avoid!...When planning zones, etc., try to minimize zone-crossing. For example, if you can avoid it, don't put the refrigerator such that you have to cross through the Cleanup Zone to go between the refrigerator and the Prep or Cooking Zone. . Protection...of all the zones, the Cooking Zone should be the most protected from through-traffic as well as general-kitchen traffic. The Cooking Zone contains the range/cooktop where you will be dealing with fire (if gas), hot foods, etc. You also do not want to have to cross a busy aisle when taking a pot of boiling water from the range/cooktop to the sink for emptying...or anything else hot, for that matter!...See MoreNew to Kitchens? Read Me First! (2020 Interim, Try #2)
Comments (3)All my other threads have now mysteriously re-appeared (i.e., I suspect the Houzz bug has been fixed). Let's use the first one I created and let this thread slowly fade away. Here's the one to go to: https://www.houzz.com/discussions/5972404/new-to-kitchens-read-me-first-2020-interim#n=1...See MoreBuehl
8 years agolast modified: 8 years agoBuehl
8 years agolast modified: 8 years agoBuehl
8 years agoBuehl
8 years agoBuehl
8 years agoBuehl
5 years ago
Related Stories
KITCHEN DESIGN8 Kitchen Sink Materials to Consider
Learn the pros and cons of these common choices for kitchen sinks
Full Story
MOST POPULARKitchen Evolution: Work Zones Replace the Triangle
Want maximum efficiency in your kitchen? Consider forgoing the old-fashioned triangle in favor of task-specific zones
Full Story
KITCHEN WORKBOOKNew Ways to Plan Your Kitchen’s Work Zones
The classic work triangle of range, fridge and sink is the best layout for kitchens, right? Not necessarily
Full Story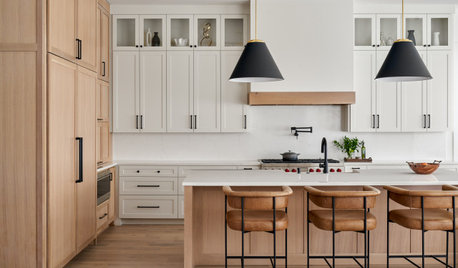
KITCHEN DESIGNStash It All: Know the 3 Zones of Kitchen Storage
Organize storage space around your kitchen’s main activities for easier cooking and flow
Full Story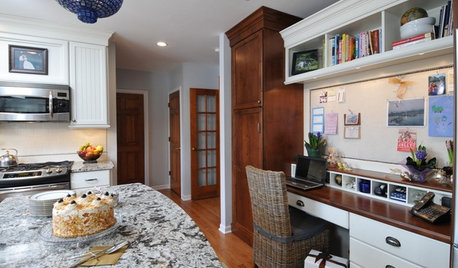
ORGANIZINGCreate a Family Landing Zone
Keep your kitchen table and counters clear with a place designed for mail, bags and keys
Full Story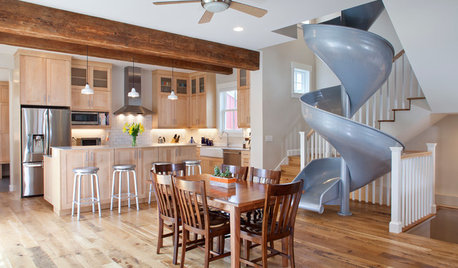
DINING ROOMSNew This Week: 6 Modern Dining Zones in Homes Big and Small
Look to splashy accent walls, right-sized tables and indoor slides to make the most of your open layout
Full Story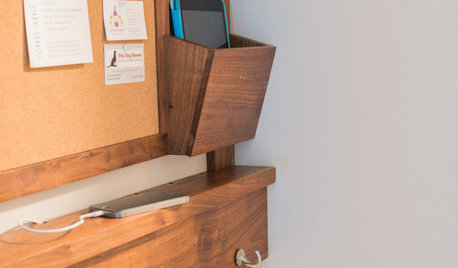
THE HARDWORKING HOMEA New Drop Zone Keeps the Clutter at Bay
The Hardworking Home: A clever wall-mounted station for keys, phones and more helps a family stay organized
Full Story
KIDS’ SPACES5 Ideas for a Great Home Learning Zone
Get your child off to a good start this school year with homework areas and strategies that reduce the frenzy
Full Story
HOUSEKEEPINGClean Up Your Cleanup Zones
Make chore time more pleasant by tidying up your laundry room and updating cleaning tools
Full Story
COLORTime to Step Out of Your Color Comfort Zone?
If you always seem to pick warm tones, or you stick to the cool ones, bucking your natural inclination could bring new energy to a room
Full Story

BuehlOriginal Author