


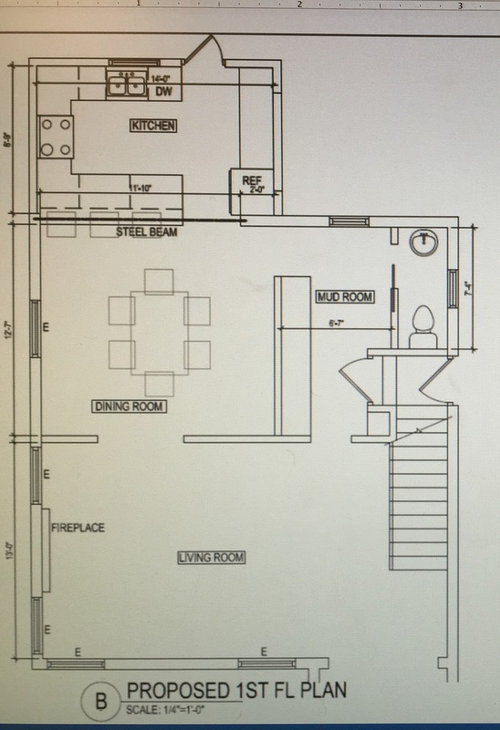
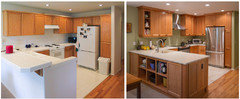
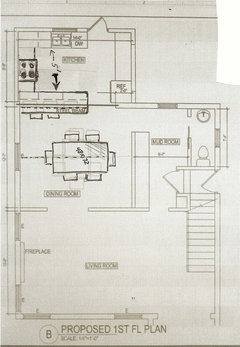
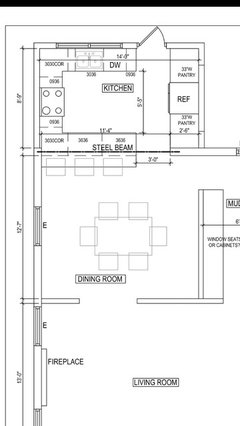
Thorn on overhang/no overhang, seating/no seating at peninsula
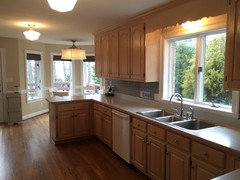
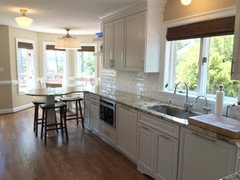
DC Reno
8 years ago
Featured Answer
Sort by:Oldest
Comments (39)
Related Discussions
Does your island seating overhang arched?
Comments (15)Our old kitchen had a peninsula with an arch. I really liked it. I may have over-arched it because it was a stretch to reach all the way across for cleaning. Our new kitchen layout didn't work with an arch in the island, but the old arch now lives on as a curved backsplash in our powder room. Arch on the old peninsula: Arch is now a backsplash:...See MoreShow me your counter overhang for seating
Comments (45)nellie820 Thanks! I am still working on my kitchen so I haven't posted yet. We still need to paint (any suggestions on colors is very welcome--I have 10 different swatches hanging in my kitchen right now!), change outlets (they are almond now so need to change to white), counter stools, accessories, new kitchen table and chairs and a banquette. I have posted a few pics lately asking for help with paint... but I still have a few months left before I post the finished project. If there area any other areas or angles you want to see just let me know:o). honey333-- I measured from the cabinet bases. From the cab base to the end of the drawer is just shy of 7/8". From the end of the cab base to the end of the drawer pull is: 1 5/8". It really doesn't seem like it is too much of an overhang I think because of the cab pulls. The only thing I may have done differently--but I am really nitpicking here--is on the island. On the cab side as I told you the overhang is 2". On the counter stool side, there is only a 1 1/4" overhang from the end of the apron. I don't notice it at all when in the kitchen but when I look at pics I notice the difference. I might have done a 2" OH on the counter stool side too just for symmetry sake (now my geeky science and math side is coming out:o)). Hope this helps and let me know if you have any other questions....See MoreAisle widths, walkways, seating overhangs, work and landing space, an
Comments (0)A few things to keep in mind: Aisles widths...are determined by measuring counter edge-to-counter edge, not cabinet-to-cabinet. If there are no counters (e.g., a tall pantry cabinet), then measure to/from the cabinet door...usually 1" past the cabinet box. For appliances, measure to/from the part that sticks out the furthest (usually the handle...this info is contained in appliance specs). Counter overhangs...Counters usually have an overhang of 1.5" beyond a cabinet box. So, with standard 24" deep base cabinets, the counter will extend another 1.5" beyond for a total counter depth of 25.5". This overhang is designed to protect cabinets, doors/drawer fronts, and the inside of drawers/cabinets from spills on the counter. By extending past the cabinet & doors, spills are directed away from the cabinet boxes/doors/drawer fronts/insides. 1" of that 1.5" overhang is to cover the doors & drawer fronts and protects the insides of the drawers & cabinets; the other 1/2" extends past the surfaces of the doors & drawer fronts & protects them from spills. Seating overhang & spacing... Counter-height seating (36" off the floor) - a minimum overhang of 15" of clear knee/leg space (i.e., no obstructions) Bar-height seating (42" off the floor) - a minimum overhang of 12" of clear knee/leg space Table-height seating (30" off the floor) - a minimum overhang of 19" of clear knee/leg space You should have a minimum of 24" of linear space per seat. E.g., a 4' wide island could seat up to 2 people; a 6' wide island could seat up to 3 people, etc. BTW...if you put decorative doors on the back of island or peninsula cabinets, they will take away approx 1" from the overhang, so add that 1" to the overall depth of the island or peninsula. E.g., if you have an island with seating and all one height at 36": 1.5" counter overhang in front + 24" deep cabinets + 1" decorative end panel or door + 15" seating overhang = 41.5" for the depth of the island....this is a minimum depth. Walkways....In a seating area, 36" of clearance from counter/table edge to wall/obstruction if no traffic passes behind seated diners. 65" of total clearance when this includes a walkway (i.e., traffic). [From the NKBA Kitchen Planning Guidelines With Access Standards] There are three primary work zones...Prep Zone (70% of kitchen work/time), Cooking Zone (10% of kitchen work/time), and Cleanup Zone (20% of kitchen work/time) Of these, the Prep & Cooking Zones work best when either next to each other or across from each other, but across no more than a 48" aisle. The Cleanup Zone usually works best if it's separated from the Prep & Cooking Zones. Sometimes that means different parts of the kitchen (usually with a prep sink in the Pep Zone), other times it means the only sink in the kitchen separates them...Prep & Cooking Zones on one side of the sink, Cleanup Zone with DW on the other side of the sink. [See the FAQ: Kitchen work zones, what are they?) for more information about work zones. Trash & recycle pullout...works best in the Prep Zone, near the Cooking Zone, and, if only one and possible, near the Cleanup Zone. Far more trash & recyclables are generated while prepping and cooking than while cleaning up. So, if you have to choose, put the trash & recycle in the Prep Zone instead of the Cleanup Zone. [That's the biggest mistake I made, I put it in the Cleanup Zone across a 6' aisle from the Prep Zone...it's my biggest regret by far in my kitchen.] Prep sinks...should be no smaller than 12" x 12"...and bigger is better - I recommend no less than 15" in each direction, 18" would be better, IMHO. Anything smaller is not very useful for prepping. Those smaller sinks are often called "bar sinks" b/c they're really only big enough for filling a glass with water or dumping a glass. They're not big enough to clean veggies/fruit or empty a colander. Zone protection...strive to protect the Cooking Zone from traffic - both through-traffic as well as in-kitchen traffic. While cooking, you are dealing with very hot pots/pans/food and you don't want to be tripping over or dodging traffic, open DW doors, etc. This usually means putting the Cooking Zone in the most "secluded" area...but not always, it depends on the workflow in your design. Work/Landing Space...Be sure you have adequate work and landing space near/around appliances and in zones. Sometimes skimping is required when it's a small kitchen. [The following items are from the NKBA Kitchen Planning Guidelines With Access Standards] Prep Zone...36" continuous countertop at least 16" deep for the preparation center, and be immediately adjacent to a water source. Cooking Zone...See Cooktop/Range Cleanup Zone...See "Sink (Only or Cleanup Sink)" Sink (Only or Cleanup Sink)...At least 24" of counter frontage to one side of the primary sink, and 18" on the other side (including corner sink applications) with the 24" counter frontage at the same counter height as the sink. The minimum allowable space from corner to the edge of the primary sink is 3". Sink (Prep)...At least 3" of countertop frontage on one side of secondary sinks, and 18" on the other side (including corner sink applications) with the 18" counter frontage at the same counter height as the sink. Refrigerator...At least 15" counter space on the latch side of the refrigerator or on either side of a side-by-side, or at least 15" of landing space no more than 48" across from the refrigerator. If an oven is next to refrigerator, refrigerator should be the one placed next to available countertop. Cooktop/Range...Open-ended kitchen: at least 9" of counter space on one side of the cooking surface and 15" on the other, at the same counter height as the appliance. Enclosed kitchen: at least 3" of clearance at an end wall protected by flame retardant material; 15" on the other side of the appliance, at the same counter height as the appliance. Countertop should extend a minimum of 9" behind the cooking surface, at the same counter height as the appliance, in any instance where there is not an abutting wall/backsplash. [Notes: Experiences here have shown some of us this is actually too little for an island or peninsula setup or when the cooktop/range is at the end of a cabinet run. For safety reasons, you need at least 18" on each side and 18" behind if there is no seating behind the cooktop/range, 24" behind if there is seating. For functionality, at least 24" on each side is better, regardless of location of cooktop/range. This space can be shared with the Prep Zone on one side; if it is, then there should be at least 36" on the side shared with the Prep Zone. In the case of a range/cooktop next to a door or wall, check your local Codes, they may dictate more space b/w the door or wall and cooktop/range.] Ovens (Wall)...At least 15" of landing space, at least 16" deep, next to or above oven if it opens into a primary traffic pattern. If it does not open into a traffic area, at least 15" x 16" of landing space needed [(i.e., it can be across or next to it)]. MW...At least 15" of landing space, a minimum of 16" deep, above, below, or adjacent to a microwave oven Combined countertop for 2 adjacent locations...For two adjacent work centers, determine the longest of the two required counter lengths and add 12"....See MoreFAQ -- Aisle Widths/Walkways/Seating Overhangs/Work/Landing Space/etc
Comments (7)Other considerations: . Trash & recycle pullout...works best in the Prep Zone, near the Cooking Zone, and, if only one and possible, near the Cleanup Zone. Far more trash & recyclables are generated while prepping and cooking than while cleaning up. So, if you have to choose, put the trash & recycle in the Prep Zone instead of the Cleanup Zone. [That's the biggest mistake I made, I put it in the Cleanup Zone across a 6' aisle from the Prep Zone...it's my biggest regret by far in my kitchen.] Prep sinks...should be no smaller than 12" x 12"...and bigger is better - I recommend no less than 15" in each direction, 18" would be better, IMHO. Anything smaller is not very useful for prepping. Those smaller sinks are often called "bar sinks" b/c they're really only big enough for filling a glass with water or dumping a glass. They're not big enough to clean veggies/fruit or empty a colander. Zone protection...strive to protect the Cooking Zone from traffic - both through-traffic as well as in-kitchen traffic. While cooking, you are dealing with very hot pots/pans/food and you don't want to be tripping over or dodging traffic, open DW doors, etc. This usually means putting the Cooking Zone in the most "secluded" area...but not always, it depends on the workflow in your design. Work/Landing Space...Be sure you have adequate work and landing space near/around appliances and in zones. Sometimes skimping is required when it's a small kitchen. Prep Zone...36" continuous/clear countertop and next to a water source. Experience has shown that 42" is much better. Cooking Zone...See Cooktop/Range Cleanup Zone...See "Sink - Only or Cleanup Sink" Sink - Only or Cleanup Sink...A minimum of 24" of clear counterspace on one side of the sink, and 18" on the other side with the 24" at the same counter height as the sink. Sink - Prep... A minimum of 6" of clear counterspace on one side of the prep sink and 36" of clear prep workspace on the other side (again, 42" is much better). Refrigerator...A minimum of 15" of clear counterspace on the handle side of the refrigerator or on either side of a side-by-side or no more than 48" across from the refrigerator. If an oven is next to the refrigerator, the refrigerator should be the one placed next to counterspace. Ovens (Wall)...A minimum of 15" of clear landing space next to or above an oven if there it is on an aisle with through-traffic If it's on an aisle with no through-traffic, then the 15" can be across from it. MW...A minimum of 15" of clear landing space above, below, or nest to the MW. Counterspace if two zones/appliances are next to each other…Take the longest of the two and add 12". Cooktop/Range -- If the range/cooktop is against the wall, a minimum of 9" of counterspace b/w the wall (protected by flame retardant material) and the range/cooktop. -- If the range/cooktop is on the end of a run that is open, a minimum of 18" of counterspace is needed for both emergency landing space and a safety zone/buffer b/w the range/cooktop and end of the counter. -- The other side of the range/cooktop should have a minimum of 24" for both emergency landing space and workspace. -- If the range/cooktop is in an island or peninsula with no seating behind the range/cooktop, then there should be a minimum of 18" b/w the back of the range/cooktop and the back counter edge of the island/peninsula. -- If the range/cooktop is in an island or peninsula with seating behind the range/cooktop, then there should be a minimum of 24" b/w the back of the range/cooktop and the back counter edge of the island/peninsula. -- Note: For functionality, at least 24" on each side is better, regardless of location of cooktop/range. This space can be shared with the Prep Zone on one side; if it is, then there should be at least 48" (36" + 12") on the side shared with the Prep Zone. -- Check your local Code. Some local Codes are more restrictive. If not, stick to these recommendations....See More
User
8 years ago
DC Reno
8 years ago
anitamo
8 years agojackaround16
8 years agollucy
8 years ago
Lily Spider
8 years agolast modified: 8 years agoMizLizzie
8 years agoBuehl
8 years agolast modified: 8 years agoBuehl
8 years agojpmom
8 years agoUser
8 years agolast modified: 8 years agoBuehl
8 years agolast modified: 8 years agoTexas_Gem
8 years ago
Karenseb
8 years agoAKJR
8 years ago
just_janni
8 years agoUser
8 years agolast modified: 8 years agoDC Reno
8 years agojohnsoro25
8 years ago
sheloveslayouts
8 years agoUser
8 years agoAndrew B
8 years agoDC Reno
8 years agoUser
8 years agoDC Reno
8 years ago PRO
PROJoseph Corlett, LLC
8 years ago
Home Girl
7 years agoDC Reno
7 years agoagk2003
7 years ago

Related Stories
KITCHEN DESIGNTake a Seat at the New Kitchen-Table Island
Hybrid kitchen islands swap storage for a table-like look and more seating
Full Story
KITCHEN DESIGNKitchen Layouts: Island or a Peninsula?
Attached to one wall, a peninsula is a great option for smaller kitchens
Full Story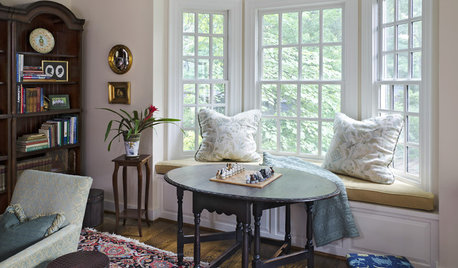
GREAT HOME PROJECTSHow to Add a Window Seat
Get a comfy, cozy spot with a view — and maybe even extra storage too
Full Story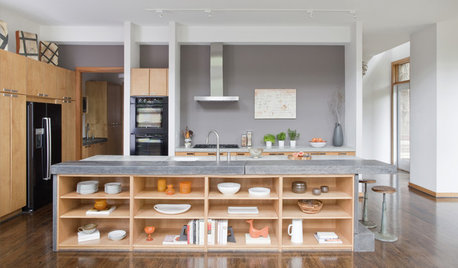
KITCHEN DESIGNHow to Design a Kitchen Island
Size, seating height, all those appliance and storage options ... here's how to clear up the kitchen island confusion
Full Story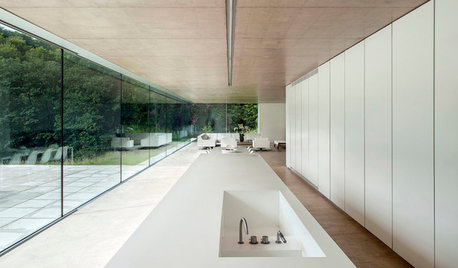
KITCHEN ISLANDSWhat to Consider With an Extra-Long Kitchen Island
More prep, seating and storage space? Check. But you’ll need to factor in traffic flow, seams and more when designing a long island
Full Story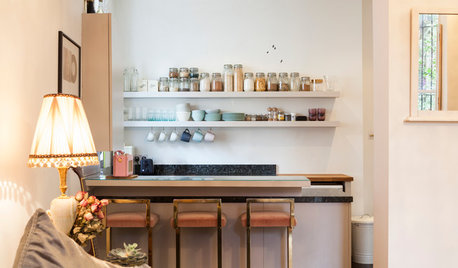
KITCHEN DESIGN12 Breakfast Bars With Coffee Shop Appeal
Give even a small kitchen a sociable vibe by inserting a stylish seating post
Full Story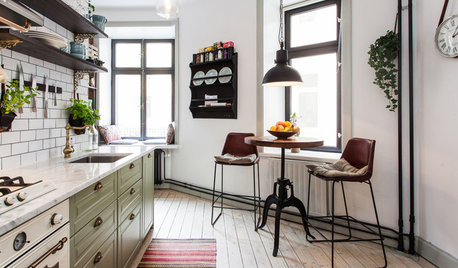
KITCHEN DESIGNFind Your Dining Style: 9 Strategies for Eat-In Kitchens
What kind of seating do you request at a restaurant? It may hold the key to setting up your kitchen table
Full Story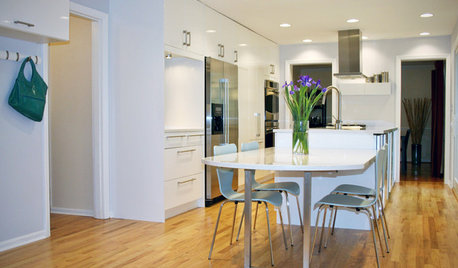
KITCHEN DESIGNGet More Island Legroom With a Smart Table Base
Avoid knees a-knockin’ by choosing a kitchen island base with plenty of space for seated diners
Full Story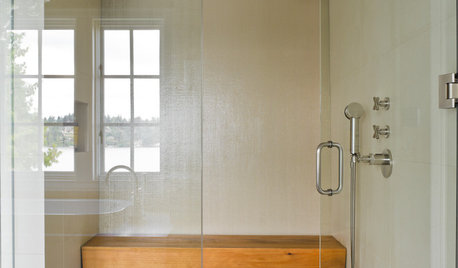
BATHROOM DESIGNOutfit Your Shower With the Right Bench for You
Whether you want a simple perch or a massive seat in your shower, our guide can help
Full Story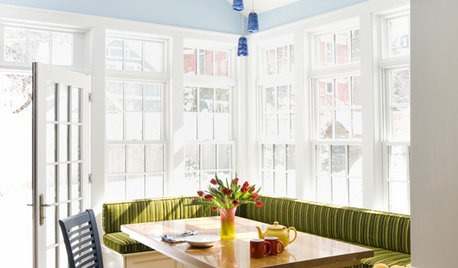
KITCHEN DESIGNRenovation Detail: The Built-In Breakfast Nook
On the menu: one order of cozy seating with plentiful sides of storage. For the kitchen or any other room, built-ins fit the bill
Full Story

scrappy25