


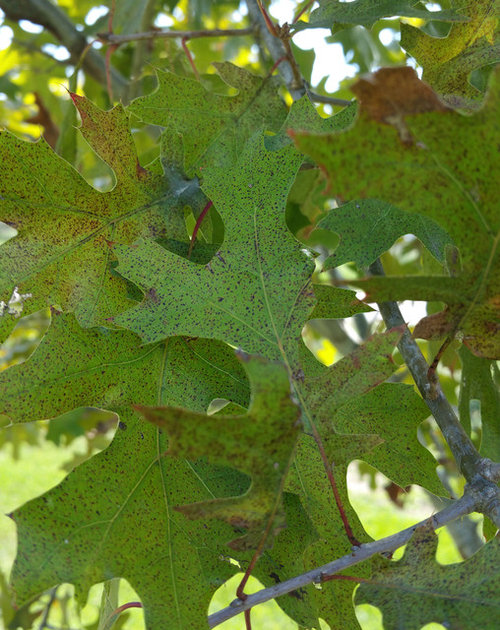
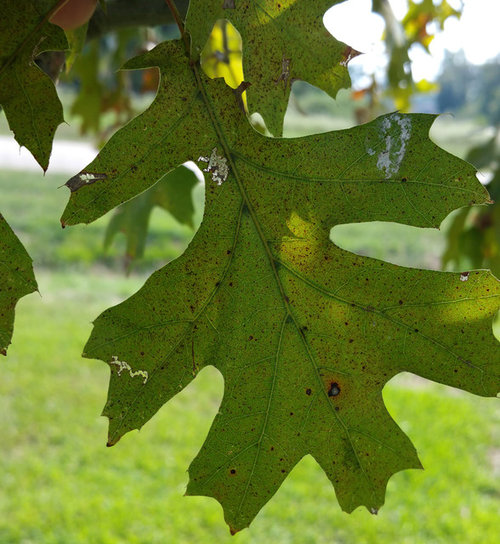
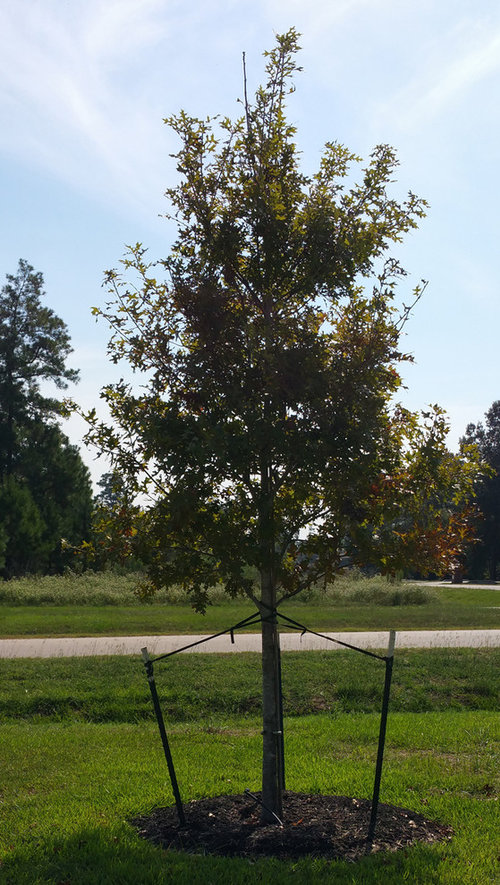
Red Oak problems. Not sure what to do.
Barry L
8 years ago


Featured Answer
Comments (7)
Related Discussions
Multiple problems ... not sure what to do to ...
Comments (3)Sunshine, You can spray them off real good with a hose also. Sort of clean them off, see what happens. Did the vinegar and water help? Some occasional yellowing of leaves is OK, but it sounds like you may have a little problem with brown stuff. Try washing the plants off every 4 or 5 days with a hose, especially on the undersides of the leaves and see if that helps....See Morehelp diagnose red oak problem
Comments (6)I am a bit surprised that any qualified arborist wouldn't recognize a leaf gall Yes - does this party market themselves as a certified professional? One with credentials that can be verified? Or when it gets down to it is this really just another guy with a truck and some saws etc.? Who's in it primarily for the money that can be made from topping, removals and the like? Jive talkers who sell themselves as "arborists" but are actually tree killers looking for big bucks quick are out there. The attraction is that because it's often hard and dangerous work they can make sometimes thousands a day wrecking trees....See MoreProblem with newly refinished red oak hardwood floor
Comments (13)I paid to have an independent, certified flooring inspector come in to evaluate my floors. His final report noted that the pinholes were caused by an improper finish. The flooring contractor applied 2 coats of polyurethane on the same day and did not allow sufficient time for the first coat to fully dry before they applied the second coat. The inspector noted a hazed appearance in numerous areas that were indicative of the previous coat not being fully dry before the second coat was applied. The wood was not a number 2 grade selection and the inspector contacted a technical adviser from the National Wood Flooring Associate and he said that there was nothing inherent to the red oak that would have caused the extensive pinholing in the finish that was observed and that this was due to either incompatible finish products being used or improper application procedures. I had a second company come in and redo the entire refinish - sanding down to bare wood and reapplying stain and 3 coats of poly and there are no pinhole visible on any floors in the house. The fact that the issue could be corrected by completing redoing the work lends credence to the original job having been poorly done. The original company tried applying a 4th coat of polyurethane but this did nothing to fix the pinholes. If you look at page 59 of this PDF, pinholes can appear in the finish of a floor if the previous coat was not fully dry (http://www.crescenthardwood.com/nwfa/ProblemsCauses.pdf). The bottom line was that I was out a lot of money from the first contractor, which was a large reputable company in my area, because they refused to fix the issue or even test to see if their finish job was the issue and had to go through the aggravation of having the entire job redone. The second company came out and sanded the floor of a closet and reapplied stain and 3 coats of poly to ensure that it was the previous finish and not inherent to the wood. The test area showed that when done correctly no pinholes in the finish formed....See MoreRed Oak Floors Super Grainy After Staining - What can I do?
Comments (16)@ Jayne...when you say '3 coats of sealer' do you mean 3 coats of POLYURETHANE FINISH or do you mean a sealant that is used before polyurethane is put down? Water popped floors have 'raised grain'. That's kinda the point. The raised grain is 'open' to more stain. Again...kinda the point - the grain accepts MORE stain = stronger colour. That's fine. That's normal. But...and I mean a BIG BUT here...that grain is then 'knocked down' (screening process) after the FIRST COAT of polyurethane is applied. If a WATER BASED polyurethane has been applied the grain stands up ONCE MORE. Again...water based anything causes the grain to 'puff'. Not a problem...totally normal. A screening (very light sanding) happens between coats 1 and 2. Right. And if the grain is STILL PROMINENT then the professional takes the time, ONCE AGAIN, to screen the floor between coats 2 and 3. So the order of operations is (if done PROPERLY...ahem...you have to talk to your pro to find out the details): 1. Water pop 2. Stain application 3. First coat of poly 4. Screening (light sanding) 5. Coat #2 6. If needed...screening again 7. Coat #3 Whew! Now you see why water popping costs MORE? Right...it has not just ONE extra step...it might have 3 extra steps. And that's what you are paying for when water popping is done. Feel free to go back to your professional and ask the order of operations, the finish and then how many screenings they did once the stain was put down. If they look at you like you have two heads, you have your answer = none....See More
Barry L
8 years ago
wisconsitom
8 years ago

Related Stories

ECLECTIC HOMESHouzz Tour: Problem Solving on a Sloped Lot in Austin
A tricky lot and a big oak tree make building a family’s new home a Texas-size adventure
Full Story
HOUSEKEEPING10 Problems Your House May Be Trying to Show You
Ignore some of these signs and you may end up with major issues. We tell you which are normal and which are cause for concern
Full Story
WOODWoodipedia: Make a Solid Choice With Oak
Forget those low-end products of old. Red and white oak today are beautiful, versatile and relatively inexpensive
Full Story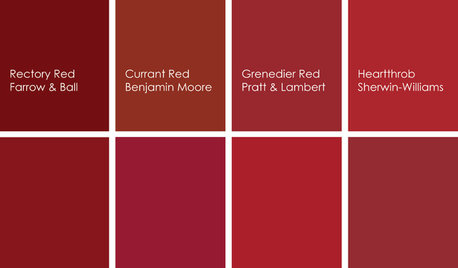
KITCHEN DESIGNCooking With Color: When to Use Red in the Kitchen
Candy Apple Red, Red Licorice and more for your kitchen walls, cabinets or island? The color choices are as delicious as they sound
Full Story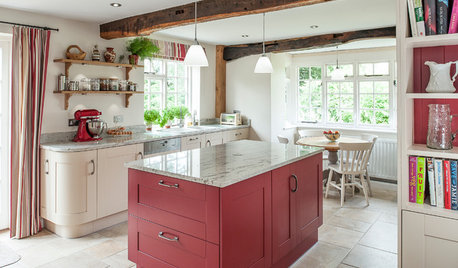
KITCHEN DESIGNKitchen of the Week: Splashes of Red for a Country Classic
Modern touches combine with traditional style in this warmly elegant kitchen in the English countryside
Full Story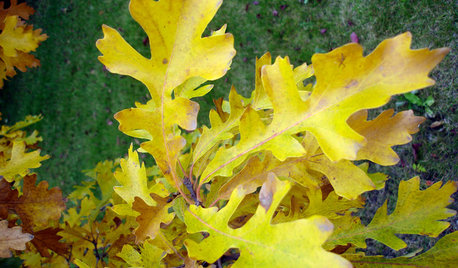
GARDENING GUIDESCelebrate Eastern Oaks for Wildlife, Longevity and Seasonal Interest
There might not be a more important tree to have in your eastern U.S. landscape — if you can fit one in
Full Story
KITCHEN OF THE WEEKKitchen of the Week: Goodbye, Honey Oak — Hello, Minty Green
After more than 30 years, the Kloesels revamped their space to reflect their rural country town and Victorian-style home
Full Story
TREESGreat Design Plant: Southern Live Oak Offers an Unbeatable Canopy
Keep it dense or prune it for more light. No matter how you grow Quercus virginiana, it’s a majestic addition to its native landscape
Full Story
REMODELING GUIDESRenovation Material: Cerused Oak
This traditional material adds welcome texture to the sleek surfaces of modern furniture, cabinetry and more
Full Story
COLORBathed in Color: When to Use Red in the Bath
Rev up your space and flatter all skin tones with bold, beautiful red on bathroom walls, floors and fixtures
Full Story
wisconsitom