


Storage cabinet in long, narrow bathroom
ascorsonelli
8 years ago
last modified: 8 years ago
Featured Answer
Sort by:Oldest
Comments (14)

ascorsonelli
8 years agoRelated Discussions
Bathroom Reveal, Thanks to the Bathroom and Remodel Forums! (pic
Comments (56)This old thread got revisited. @dani_m08 to answer the question about extra probe, I believe I ordered an extra one when I bought the set up. The probe wire is just setting in the junction box I think but honestly I cant remember. When I laid out the underfloor heating and the probe, I just ran another probe near the first probe, and it was then sealed into the floor self leveling compound as per instructions. then the end was just threaded into the wall like the one that would be live, and not connected, but just laying there in the box. Regarding the tile layout. I just decided to run it this way, after getting instructions on the 90Degree way, IIRC. The herringbone that I love is from my childhood and the side walks in my neighborhood that all ran at 45Degree. so that to me is herringbone. I know you posted on @sochi thread about her amazing bathroom and a wall mounted faucet. I would totally do it if I had the right sink for it. In my case I had made my sink out of soapstone and an integrated backsplash. The pictures of this bathroom reveal are no longer available because of the use of photo bucket, when it was Gardenweb. I did not keep my account with photo bucket. I'll add some of the reveal pictures so you can see the sink and floor. Regarding the sink there is no ledge for water to drip from my hands when using the faucet. The water drips right into the sink. In my other bathroom with a deck mounted faucet I am always wiping up drips and it is a nuisance. I much prefer the setup for this sink. Below: I love the flush finish from the faucet to the bottom of the sink. nothing drips on a counter or edge of a sink. Below: looking in from the doorway. Below: Here I am finishing up the sink. the backsplash was epoxied on as a separate piece. The whole soapstone install in the room took next to nothing to buy as they were all small pieces that I epoxied together with a 3 part stone epoxy. Below: this is the counter at the tub, and is in 2 long pieces but I was able to epoxy them together at there edges to make a wide slab for the top. All the soapstone was finished with a 60 grit sandpaper to be rough and this lovely soft tone of blue/green/gray/white. I did not oil it so this color tone would remain light. Below: If I recall correctly @sochi helped me decide on this Hubberton Forge Mirror. I have 3 different metals in this room, but they are all a cool silver to black color. Below: the center of this tower shares space with the kitchen on the other side of the wall. there is also some extra space that houses some electrical wiring. this is an old simple house. this bathroom was an add on when it got move to the farm in the 30s IIRC. The plumbing was all rearrange and some of the details that were orignially there I kept but updated it, such as this tower feature. The old one went and the carpenter did a wonderful job with this one. Below: This feature was another thing I kept from the old bathroom but flipped it from the other end and had the carpenter put drawers in it. Before it was a hell hole. things got lost and the build was soooo old and creapy I didn't like using it for storage. Now it is perfect for storage....See MoreMaximizing bathroom storage/vanity style - thoughts? Pics
Comments (10)Talley sue - of course you have a heat pipe, you're in NYC! LOL! Mine was rusted, peeling and thoroughly disgusting when I first moved in, so when I decided to paint the bathroom, I scraped all that nasty paint (and God knows what else) off with steel wool and then spray painted the pipe with heatproof paint. It has held up reasonably well, as you can see - this was 5 years ago. However, I hate the way it looks and I hate the fact that I occasionally bump against it when getting out of the shower (I've burned my unmentionables more than once, ouch!), so it needs to be covered. It's the only source of heat for the bathroom but our building is so overheated that I doubt it will bother me to have it covered/insulated. However, I don't know what my contractor has in mind - possibly just a sheet metal sleeve - that's one of the things we need to discuss. I love the idea of building a cabinet around it, but I'm not sure what I could store that close to a heat source. As for the vanity, I am considering white - I just wasn't sure how white would look against all that white tile. I haven't decided what color to paint the walls yet because I haven't decided on the mosaic accent, but it will likely have just about any blue or green imaginable in it so painting the vanity to match/coordinate should be a snap. There's just something I love about dark wood, though, and I wouldn't hesitate to use it if I didn't think it looked funny with the floor. I haven't ordered the floor tile, so I'm not married to the wood-look porcelain, but I also haven't seen any other floor tiles that really grab me. If you have any better suggestions for floor tiles that would coordinate with white subways, let me know!...See MoreHow Would You Transform This Super Narrow Bathroom?
Comments (13)You need to find out what the requirement in the building code is for toilets in your area. It is likely either 30" or 36" Now, put your tape rule end at the center of the toilet, going left to right. Measure either 15" (for 30" requirement) or 18" (for 36" requirement) to the left and right of the center. Mark this on the floor to the left and right of the toilet. Now, put the end of the tape rule on the front lip of the toilet seat and measure 21" in front of the toilet and mark that on the floor. Draw level, straight lines going from the wall behind the toilet through the right and left marks beside the toilet. Draw a level line that goes right and left in front of the toilet through the 21" mark. Extend your side lines to meet that front line. You now have a box around your toilet. Pretend that this is the bottom of a cube that goes to the ceiling. Nothing, including the vanity or even a wall-hung sink, can be in that cube. From here, it looks like your vanity may be in the cube, even for a 30" toilet clearance. Let us know how much room you have between this cube and the wall in front of the toilet. I am afraid you will be lucky to fit a wall-hung hand washing sink in this room. If you are lucky, you may be able to put in a corner wall-hung sink. When this becomes a rental, do you have city rental inspectors? How much do they check for building code violations?...See MoreNarrow Bathroom Sink
Comments (8)The distance from the wall (that the sink goes on) to the tub is 42". I tried an 18" vainity and it took up almost half of the space! So I think something around 12" deep would be better. As for storage, I think something as large as 36" would fit, but it of course doesn't have to be exactly 36". The sink would ideally be on the right side of the vanity. Here is a pic of the wall where the sink goes. The measurement from the left side of the mirror to the cabinet is 34.5”. From the right side of the mirror to the wall is 20”, and the mirror itself is 16”...See More
Ashley
8 years agoascorsonelli
8 years agolast modified: 8 years agoascorsonelli
8 years ago
Gracie
8 years agolast modified: 8 years agoascorsonelli
8 years agoGracie
8 years agolast modified: 8 years agoascorsonelli
8 years agoGracie
8 years agolast modified: 8 years agoGracie
8 years agoascorsonelli
8 years ago
kats737
8 years ago


Related Stories
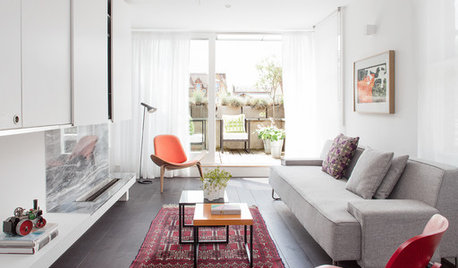
DECORATING GUIDESAsk an Expert: How to Decorate a Long, Narrow Room
Distract attention away from an awkward room shape and create a pleasing design using these pro tips
Full StoryDECORATING GUIDESDivide and Conquer: How to Furnish a Long, Narrow Room
Learn decorating and layout tricks to create intimacy, distinguish areas and work with scale in an alley of a room
Full Story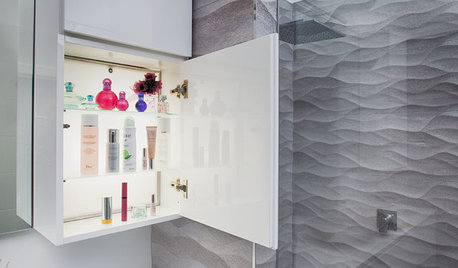
BATHROOM STORAGE10 Design Moves From Tricked-Out Bathrooms
Cool splurges: Get ideas for a bathroom upgrade from these clever bathroom cabinet additions
Full Story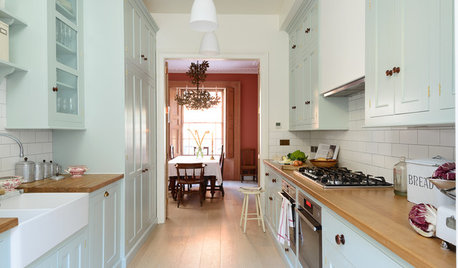
KITCHEN OF THE WEEKSmart Cabinet Arrangement Opens Up a Narrow London Kitchen
Elegant design and space-saving ideas transform an awkward space into a beautiful galley kitchen and utility room
Full Story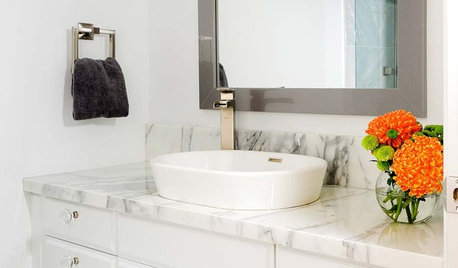
BATHROOM VANITIESAll the Details on 3 Single-Sink Vanities
Experts reveal what products, materials and paint colors went into and around these three lovely sink cabinets
Full Story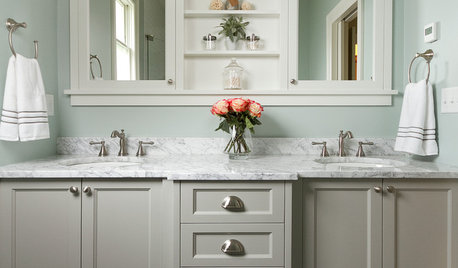
BATHROOM DESIGNShould You Get a Recessed or Wall-Mounted Medicine Cabinet?
Here’s what you need to know to pick the right bathroom medicine cabinet and get it installed
Full Story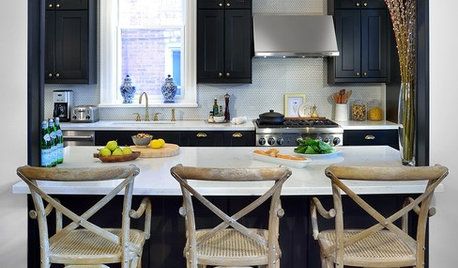
KITCHEN DESIGNKitchen of the Week: Galley Kitchen Is Long on Style
Victorian-era details and French-bistro inspiration create an elegant custom look in this narrow space
Full Story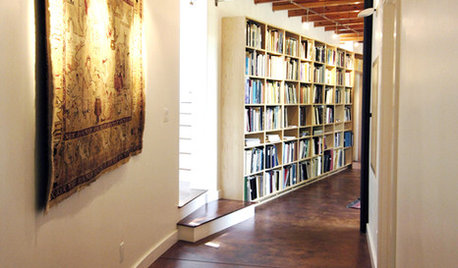
MORE ROOMSPut a Narrow Hallway to Work
Got a skinny, underused corridor? Try these tricks to tease out storage, style, artwork display and more
Full Story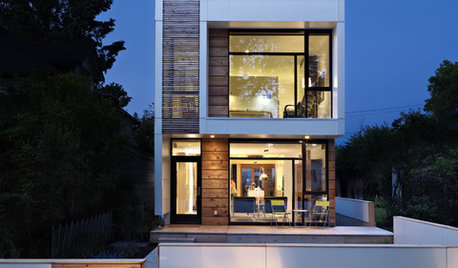
HOUZZ TOURSHouzz Tour: Wide-Open Views on a Narrow Canadian Lot
Expansive glass walls facing the street create openness, sun-filled rooms and closer relations with the neighbors
Full Story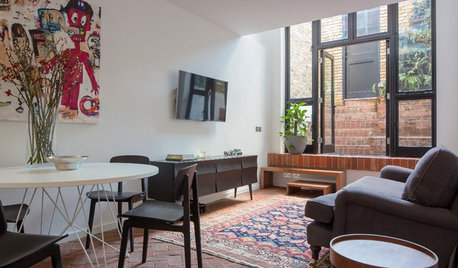
SMALL HOMESHouzz Tour: Thoughtful Design Works Its Magic in a Narrow London Home
Determination and small-space design maneuvers create a bright three-story home in London
Full Story
kats737