


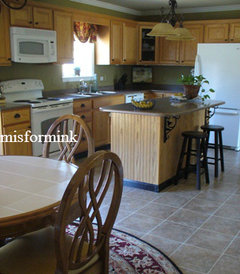
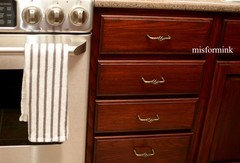
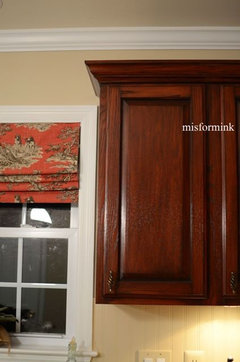
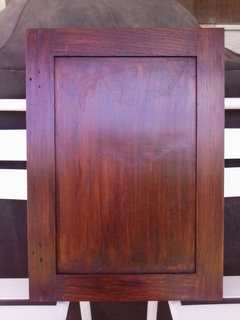
Finished kitchen with gel stain.
User
8 years ago
last modified: 8 years ago
Featured Answer
Sort by:Oldest
Comments (37)

User
8 years agolast modified: 8 years agojayferg
8 years agoRelated Discussions
Gel stain over existing finish - what top coat finish?
Comments (8)I had already bought the Minwax gel stain to try, so I did it on a piece of trim over the weekend (spare piece, not attached to cabinets). I did 2 coats, but it doesn't look very dark. Just stained. If you guys are leaving it on longer, are you just allowing that "coat" to harden enough where it won't wipe off? Does it not scratch easily? Even with the top finish? Hope the OP doesn't think of this as high jacking her thread. I've read the other threads, but still not convinced this is what DD2 needs in her home....See MoreHelp...! - General Finishes Gel Stain Kitchen Cabinets Gone Bad!
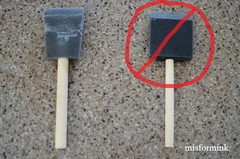
Comments (18)Ok- here is what I have, and what I've done.. 1- On a bathroom vanity that was standard oak. I used GF Georgia Cherry 4 coats 24+ hours dry time between each coat. Appling with sponge/foam brush- waiting just a few minutes then wiping.. then 3 ( 4-6 hour between coats)of GF high performance top coat.. I love love love them!!! (pic included) 2) mast bath vanity. the Mr. decided he wanted the java on first and then go back to our Georgia Cherry. No problems at all with the java coat - or the first coat of GA cherry on 1/2 the vanity.. Then the spots started showing up - and areas that looked like I wiped off too much.. After reading all the above comments. I now think it is because I didn't let the areas dry that I touched up... will sand a little and retouch...See MoreWhat General Finishes Top Coat is best for Gel Stain ?
Comments (7)I just called General Finishes. They are EXTREMELY HELPFUL ! I had already purchased the Polyacrylic Water Based top coat and he told me that was incorrect. He said their are so many people posting on Pinterest/internet ect about this top coat so everyone keeps using it but they never meant for the gel stain to be used with the Polyacrylic top coat. He said it will work out fine but it is not the best top coat for gel stain on KITCHEN CABINETS. He explained that the 3 choices were the Endurovar, High Performance Clear and Arm R Seal. He explained the difference in such great detail that honestly I was still a bit confused. I then just asked which one he would use and he said if you have the patience to WAIT A LONG TIME for the top coats to dry then he would choose/likes the Arm R Seal the best. He stressed over and over again the importance of DRY TIME. He discussed how everyone is using the Java Gel Stain like PAINT applying very thick coats and said that if you don't wait approximately 48 hours between EVERY SINGLE COAT of the stain itself and then ONE FULL WEEK before applying the top coat you will not get the best results. He said not waiting says between coats may seem okay when using the gel stain but when you apply the top coats you may get a cloudy film. ( also said all woods are different and people prepare the wood in so many different ways that it is possible for some to report good results WITHOUT waiting the proper dry time but that wont happen for everyone so it is just best to be patient and wait out the dry times ESPECIALLY if you are essentially PAINTING on the gel stain. ) Also mentioned NO sanding in between gel stain coats but YES sanding lightly with 400 grit between top coats ( and of course no sanding the final top coat. I just bought the Arm R Seal as he recommended and we will see how it goes. Guess its a good thing it will take a week to get shipped here so I am FORCED to wait out the appropriate dry time before starting :) still would like to know what everyone has been using as their top coat on kitchen cabinets to reinforce my choice to use Arm-R-Seal.... still so worried about picking the wrong one....See MoreCan I thin General Finishes oil-based Gel Stain?
Comments (5)General makes a poly gel varnish that would do what is suggested above. It would not necessarily make it easier to apply, though, since the viscosity will remain the same; it would just weaken the color; become more transparent. That gel stain sets very rapidly is a known issue. On doors, you want to begin with the panels, finish them to your satisfaction, then wipe down any overage onto the stiles and rails before staining them, and then keep any excess stain off the previously-done panels, because fresh stain will re-dissolve the bits you did earlier, and it is very hard to blend it back in. Casey...See MoreNothing Left to Say
8 years agolmgch
8 years ago
funkycamper
8 years agonancyjwb
8 years ago
mama goose_gw zn6OH
8 years agoTexas_Gem
8 years agotexasgal47
8 years ago
beth09
8 years ago
laughablemoments
8 years agoMizLizzie
8 years agonosoccermom
8 years agolam702
8 years ago
mudhouse
8 years agoUser
8 years ago
romy718
8 years agoybchat67
8 years agoUser
8 years agolast modified: 8 years agoUser
8 years agonosoccermom
8 years agoUser
8 years agonosoccermom
8 years agoUser
8 years agonosoccermom
8 years agoUser
8 years agolast modified: 8 years agoUser
8 years agonosoccermom
8 years agoUser
8 years agoUser
8 years agoUser
8 years agolast modified: 8 years agoUser
8 years agolast modified: 8 years agobeth09
8 years agoUser
8 years agoJeff P
7 years agoUser
7 years agolast modified: 7 years ago


Related Stories
REMODELING GUIDESPro Finishing Secret: Aniline Dye for Wood
Deeper and richer than any stain, aniline dye gives wood stunningly deep color and a long-lasting finish
Full Story
KITCHEN CABINETSKitchen Cabinet Color: Should You Paint or Stain?
Learn about durability, looks, cost and more for wooden cabinet finishes to make the right choice for your kitchen
Full Story
KITCHEN DESIGN3 Steps to Choosing Kitchen Finishes Wisely
Lost your way in the field of options for countertop and cabinet finishes? This advice will put your kitchen renovation back on track
Full Story
KITCHEN DESIGN8 Stunning Stain Colors for Kitchen Cabinets
Transform raw wood for custom-looking cabinetry with a stain that fills your need for color but lets the grain show through
Full Story
HOUSEKEEPINGHow to Clean Grout — Stains and All
If your grout is grossing you out, this deep-cleaning method will help it look new again
Full Story
KITCHEN DESIGNYour Kitchen: Mix Wood and Painted Finishes
Create a Grounded, Authentic Design With Layers of Natural and Painted Wood
Full Story
DIY PROJECTSCool Tip: Mimic Stain With a DIY Color Wash
Get the look of an oil-based stain without all the bother, using this easy wash made with paint
Full Story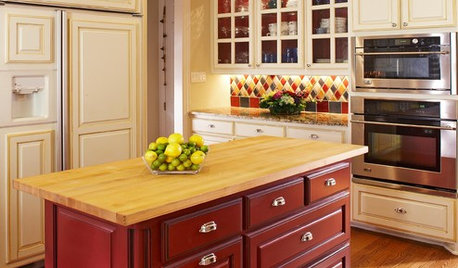
KITCHEN DESIGNTwo-Tone Cabinet Finishes Double Kitchen Style
Love 'em or not, two-tone kitchen cabinet treatments are still going strong. Try these strategies to change up the look of your space
Full Story
KITCHEN WORKBOOKWhen to Pick Kitchen Fixtures and Finishes
Is it faucets first and sinks second, or should cabinets lead the way? Here is a timeline for your kitchen remodel
Full Story


lisa_a