


Seed Germination Set Up Advice Please
centexan254 zone 8 Temple, Tx
9 years ago
Featured Answer
Comments (57)

thepodpiper
9 years agolast modified: 9 years ago
centexan254 zone 8 Temple, Tx
9 years agolast modified: 9 years agoRelated Discussions
1st time heat mat set-up...advice?
Comments (5)i want to build a frame to start seed outside. I plan to erect a small structure that will heat easily and equal across the growth platform.Using what ever is handy (I am retired and on limited income).The structure will be 8 foot long and 3 foot high and 3 foot wide the out sides will be used sheet iron covered inside with batted insulation the "heat tunnel" will be some sheet insulation I was given. I will have a flat piece of material covering the three segments with an entrance at the far end from heat source blowing down the "heat tunnel" exiting and returning up a 2 inch space between first material and black painted sheet iron.The top will have raised edges and lined with a plastic material covered with old blankets burlap or other to hold water I will have stiff wire bowed to cover all with adjustable heights to limit space above seed pots to aid in heating the soil. I will cover them with black material until seed sprouted.This structure will be placed in an open area with wind protection and plenty of sun am I wasting my time? Please e mail me at johnwm21@verizon.net with your comments btw the heat process will be much like a meat smoker where heat will be channeled to far end and then bought back to heat source via another small channel and plants will be watered by capillary action from the bottom of the top pan. Only a test run this year to see if applicable johngreenhand...See MoreNeed advice on seed germinating
Comments (9)Mugsie, sounds good to me! I use www.photobucket.com, you register for free, then upload the picture, then you will have a "page" where all your pictures and "codes" are visible. I usually check the ones I want to link via a clickable thumbnail and that brings me to another page so I've got all the pictures I want to share in one code. Then I copy the link and put it in the middle of the message box. Otherwise, you could use www.webshots.com. You can create "photo" albums (that can be private or public), upload your pictures, and then you copy the link and put it in the optional link URL. Personally, I like the pictures right in the message the best but also like to "see" other people's albums, and I guess alot of other people do too because sometimes my albums are viewed 30 times in a week...and I don't have that many pictures stored. Give it a shot, it's much, much easier than it seems and I would love to see your pictures!...See MoreNeed advice on helleborus seeds that are now germinating.
Comments (3)In my experience they will send root first and it will take a while until leaves will show up. I also have seeds just germinated from ETH- really looking forward to seeing it bloom... anyway I will leave mine for little longer in their pots and will transplant to individual cells when I see some signs of root development. Still will keep it covered and by that time they might go outside in the greenhouse....See MoreQuestion regarding indoor seed starting set-up?
Comments (13)I don't understand the purpose of the drop cloths, and like Larry, I'm concerned about the fire risk. Raising seeds indoors will lose its appeal really fast if your light-shelf set-up burns down the house. Tomato seedlings should be grown on at cool temperatures after the seeds germinate. The ideal temperature for them is 65 degrees. Leaving seedlings on a seed germination mat is risky and can damage them. I have a seed germination mat and rarely use it. If I'd known how easily 95% of the plants I grow from seed would germinate indoors without a germination mat, I never would have bought one. Some years I don't even dig it out of storage and use it at all. When I do use it, I move the entire flat off the mat once 50% of the cells in the 72-cell flat have germinated seeds in them. About the only vegetable seed I'll use the germination heat mat for is pepper seeds, particularly older seeds I've had a few years. I often germinate my tomato, pepper and other seeds in zip-lock bags like George mentioned. As long as I remove them from the zip-lock bag before the plant stems and roots become intertwined with one another, they don't mind being moved from the bags to the flats of soil-less mix. I find it very efficient because I'll have full flats with each cell filled with seedlings, instead of having flats with some empty cells because the seeds in them failed to germinate. I prefer to grow seedlings on for a few weeks in conditions that are fairly cool. Because the guest room where I put my light shelf faces the south and has big windows, I struggle to keep the room from getting too hot for them. To keep it cool, I close off the HVAC vent in that room so that it isn't getting any heat when the heater is on. I let them have a couple of hours of early morning sun and then close the drapes so that the room doesn't heat up too much. I keep a fan running 224/7. When you raise seedlings indoors in a room that is too hot, they quickly grow into monster plants, and that's not good for them. When they grow large quickly, they outgrow the available space under the plant lights. When that happens, what are you going to do with them? I used to move mine to my screened-in back porch, but once we built the greenhouse, that became the place I put them when I kick them out of the nice warm house. They might get warmer in the greenhouse than I'd like during the day, but then they get very close to freezing temperatures in there most nights, so that keeps them from growing rampantly like they would indoors. It is so early to be starting tomato seeds indoors that I get a headache thinking about it. You only need to start them 6 to 8 weeks before your recommended transplanting date. The OSU-recommended planting dates for tomato transplants are April 10-30, with the April 10th date being intended for folks in far SE OK and the April 30th date being intended for folks in far NW OK. The rest of us have to chose an appropriate transplanting date somewhere between April 10 and April 30, based on where we live in the state and on our local soil temperatures and air temperatures. Sometimes, in a really hot winter with an early last freeze, we can put tomato plants in the ground up to a month early and get away with it, but years like that are few and far between---maybe once or twice a decade, and it just happened in 2012, so I don't know if we'll have another year like that any time soon. I usually start my tomato seeds on Super Bowl Sunday, and that can be far too early for me in years when the air and soil temperatures stay cold deep into spring. And, it can be almost too late in a year like 2012 because it means my seedlings will barely be big enough to be transplanted early. So, I feel like it is the exact right time to start them since it isn't precisely right for long, cold springs or short, warm winters. It is right in the middle. If I started tomato seeds as early as you have, my husband would lock me in the cellar until the insane urge to start seeds now had passed. That is because he knows all too well how crazy it makes me to have big, healthy plants indoors that cannot go into the ground for another month or two. Because our weather is so erratic, even when I start them on time, I sometimes cannot put them into the ground for another 2-6 weeks beyond the preferred transplanting date. The last time we had a year like that, it just above drove me crazy, and I just about drove him crazy. So, since you started your seeds so early.....welcome to the insanity! Dawn...See Moreseysonn
9 years agolast modified: 9 years ago
northeast_chileman
9 years agolast modified: 9 years agowillardb3
9 years agolast modified: 9 years ago
lazy_gardens
9 years agolast modified: 9 years agoseysonn
9 years agolast modified: 9 years ago
garretds7
9 years agolast modified: 9 years agogarretds7
9 years agolast modified: 9 years agogarretds7
9 years agolast modified: 9 years ago
SoCarRob (Zone 7)
9 years agolast modified: 9 years agogarretds7
9 years agolast modified: 9 years agogarretds7
9 years agolast modified: 9 years agogarretds7
9 years agolast modified: 9 years agocentexan254 zone 8 Temple, Tx
9 years agolast modified: 9 years agoseysonn
9 years agolast modified: 9 years ago
grubby_AZ Tucson Z9
9 years agolast modified: 9 years agocentexan254 zone 8 Temple, Tx
9 years agolast modified: 9 years agoseysonn
9 years agolast modified: 9 years agocentexan254 zone 8 Temple, Tx
9 years agolast modified: 9 years agoseysonn
9 years agolast modified: 9 years agoCanadianLori
9 years agolast modified: 9 years agotomt226
9 years agolast modified: 9 years ago
Mecdave Zone 8/HZ 9
9 years agolast modified: 9 years agoCanadianLori
9 years agolast modified: 9 years agoSoCarRob (Zone 7)
9 years agolast modified: 9 years agoseysonn
9 years agolast modified: 9 years agoMecdave Zone 8/HZ 9
9 years agolast modified: 9 years agoscorpion_john
9 years agolast modified: 9 years agoseysonn
9 years agolast modified: 9 years agoMecdave Zone 8/HZ 9
9 years agolast modified: 9 years agocentexan254 zone 8 Temple, Tx
9 years agolast modified: 9 years agoMecdave Zone 8/HZ 9
9 years agolast modified: 9 years agoseysonn
9 years agolast modified: 9 years agocentexan254 zone 8 Temple, Tx
9 years agolast modified: 9 years agocentexan254 zone 8 Temple, Tx
9 years agolast modified: 9 years agonortheast_chileman
9 years agolast modified: 9 years ago
SouthCountryGuy Zone 4b-5 SE BC
9 years agolast modified: 9 years agosmokemaster_2007
9 years agolast modified: 9 years agoSouthCountryGuy Zone 4b-5 SE BC
9 years agolast modified: 9 years agogarretds7
9 years agolast modified: 9 years agoSouthCountryGuy Zone 4b-5 SE BC
9 years agogarretds7
9 years agoSouthCountryGuy Zone 4b-5 SE BC
9 years agogarretds7
9 years ago
Lena Hall
8 years agoLena Hall
8 years agocentexan254 zone 8 Temple, Tx
8 years agosmokemaster_2007
8 years ago


Related Stories
HEALTHY HOME12 Ways to Set Up Your Kitchen for Healthy Eating
Making smart food choices is easier when your kitchen is part of your support team
Full Story
HOME OFFICESQuiet, Please! How to Cut Noise Pollution at Home
Leaf blowers, trucks or noisy neighbors driving you berserk? These sound-reduction strategies can help you hush things up
Full Story
TASTEMAKERSBook to Know: Design Advice in Greg Natale’s ‘The Tailored Interior’
The interior designer shares the 9 steps he uses to create cohesive, pleasing rooms
Full Story
SHOP HOUZZShop Houzz: Setting Up Your First Kitchen
Fill your kitchen cupboards and drawers with these top-notch tools, pots, pans and more from the Houzz Shop
Full Story
KITCHEN DESIGNHow to Set Up a Kitchen Work Triangle
Efficiently designing the path connecting your sink, range and refrigerator can save time and energy in the kitchen
Full Story
PRODUCT PICKSGuest Picks: Set Up a Comfy Guest Room
Soft and warm, these neutral-toned furnishings and accessories will make guests feel welcomed with open arms
Full Story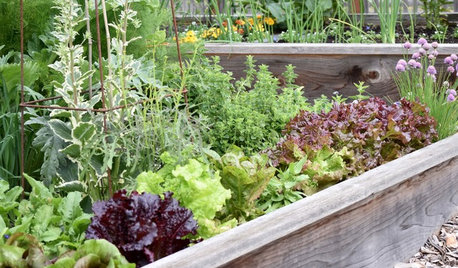
GARDENING GUIDESSeeds or Seedlings? How to Get Your Garden Started
Growing delicious herbs and vegetables starts with knowing your goals and when you want to plant
Full Story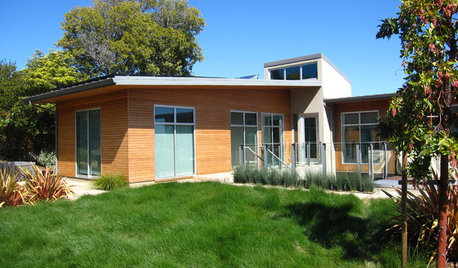
GARDENING GUIDESHow to Plant a New Lawn From Seed
Choose from more grass varieties and save money over sod by starting your lawn from seed
Full Story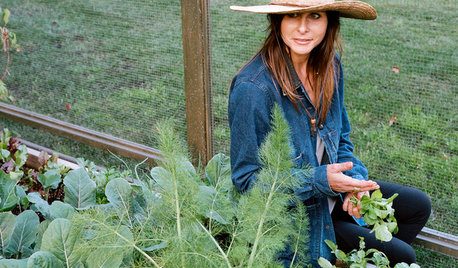
FARM YOUR YARDAdvice on Canyon Farming From L.A.'s Vegetable Whisperer
See how a screened garden house and raised beds help an edible garden in a Los Angeles canyon thrive
Full StorySponsored
Custom Craftsmanship & Construction Solutions in Franklin County
More Discussions
Big Kahuna