


Templating methodologies...just measuring tape?!
berryjam
9 years ago
Featured Answer
Comments (12)
 PRO
PROJoseph Corlett, LLC
9 years agoRelated Discussions
DIY Countertop Templating
Comments (8)vwwhippiechick: have you ever done anything like this before? If not, (in my opinion) here's a few things to keep in mind: 1. READ EVERYTHING (I'm presuming you're not a guy like me who'd "skim" over the instructions...HA!) READ ALL of the instructions completely - BEFORE you do ANYTHING ELSE... I'm sure that the company you are working with spent alot of time and effort to come up with a consise and cojent means of giving you direction, so use the tools they provide - then, if you are still scratching your head - post here on GW or e-mail me at kevin@azschoolofrock.com - I will help where I can. 2. TAKE YOUR TIME (again, don't be like me and "blow and go" so you can watch the Packers - oh yeah... that's right - they have a "bye" this week... ;-) ) DO NOT be in a hurry - lives are not depending upon your speed, so GO SLOW 3. REMEMBER YOUR OVERHANGS - typical front overhang is 1 1/2" from the face of the cabinet. Overhangs adjacent to slide in ranges will depend on the space available - measure your stone width to confirm what you'll need to allow - I usually allow 30 1/4" for the stove- flat polish the egdes that go up against the stove sides 4. SINK SET BACKS & CENTERLINES - most kitchen sink set backs are 4" from the front of the finished edge -NOT the cabinet face also, check your inside cabinet dimensions to make sure that your sink will fit - side to side and frnt to back. Center lines are usually the center point between the two front dors of the sink base cabinet. 5. SPACE BEHIND YOUR FAUCET & ACCESSORIES - is your project goinG to be fabbed out of 3CM material? if so, I'd do a simulation that will allow you to visuallize where the sink is, where the faucet will go, And how much space will be left behind the faucet - ESPECIALLY if you are using 3CM back splash - many jobs go into crisis mode because this gets overlooked until it's too late - usually on the day of install - which is way too late in my opinion. This is compounded when there are escutcheons (trim rings)that are used with the faucet and accessories... 6. SEAM PLACEMENT - remember that the slabs are only so long, and that seams will probably be part of the project - the only place that I try to NOT put a seam at - is over a dishwasher - just my personal preference... 7. SCRIBING TO YOUR WALLS - your walls are NOT square or even, so remember that you will want to check the points where the stone meets your walls - DO NOT ASSUME that your walls run straight 8. DOUBLE CHECK EVERYTHING - you are giving info to someone that will never be in you home and can't see what you want, let alone see your "vision"... you ar essentially telling somone how to BLINDLY create a series of objects that YOU will be istalling in your HOME.. remember the old "garbage in-garbage out" analogy, and give as much relevant intel as you can. Include pohots and diagrams of special areas, that can be used as reference... Thomas Edison used to use a two word reference that I love: "MAKE THIS" Remember that is what you'll be doing too... Worst case scenario, you could hire a Fabricator to do the templating - or at least - hold your hand "on site" while you do it... just a thought.... hope that helps kevin Kevin M. Padden MIA SFA Fabricator, Trainer & Consultant to the Natural Stone Industry www.azschoolofrock.com...See Moregranite template being done today - many questions...
Comments (8)Stolen from a previous post I think it dropped off this past week or so...the last post to it was 10/31. I have it saved. Here's a summary of it: When deciding on a fabricator: - See the installer's work, especially the seams; - Talk about what they do to make the seam really tight and smooth. Before Fabrication - Mock up the location of the faucets, soap dispenser, air switch, air gap, etc. before they come to fabricate. Be sure to account for clearances behind the sink as well as b/w each item. -- Make sure you have your sink/faucet templates (all sinks & faucets!) -- Make a list of all your appliances and the required clearances (sides, back, front, top). This applies to both appliances w/cutouts (e.g., cooktop, etc.) and stand alone (e.g., refrigerator, range, etc.). - Make sure you have enough of your lighting installed and functional - Make sure you have everything that requires a cutout before they fabricate. You want to have all of these on hand when they come for templating. - Post pictures for the TKOed of your slabs! Fabrication/Pre-Install - Be present for the template process. - Be there when they place the templates on your slabs, but if you can't be there then have a lengthy conversation about seam placement, ways to match the movement, and ways to color-match the counters that will be joined at the seam - Double check the template. - Make sure that the measurements are reasonable. - Measure the opening for the range. - Be sure you test your faucet for clearances not just between each fixture, but also between the faucet and the wall behind the faucet (if there is one). You need to be sure the handle will function properly. - Make sure the cabinets are totally level (not out by more than 1/8") before the counter installers come in. Saves big headaches. - Make sure they have the sink/faucet templates to work from. - Check how close they should come to a stove - Make sure you have your garbage disposal air switch on hand or know the diameter Installation - If you have wood floors--especially if you're in the process of staining or finishing them--make sure they don't spill or drip granite sealer on the wood floors. Apparently the sealer interferes with the stain or finish process. Possibly consider brown kraft paper to protect your floors. - Make sure your appliances are protected during the installation process. - Make sure you have a pretty good idea of your faucet layout--where you want the holes drilled for all the fixtures and do a test mock up to make sure you have accounted for sufficient clearances between each fixture. - Somewhere you will have a seam by your sink because they cannot carry the small pieces after cutting out for you sink without breaking. Ask them to show you where it will be and if you are ok with it. Should be covered in the appropriately colored caulk. - Check the seams for evenness and smoothness. - Make sure the seams are neat and clean. - Make sure the seams are not obvious. - Make sure there are no scratches, pits or cracks - Make sure the granite has been sealed - Ask which sealer has been used on the granite. - Make sure the sink reveal is consistent all the away around - Check the gap of the granite at the wall junctions. - Keep an eye out for inconsistent overhangs on the counter edges - Make sure all your edges are identical - Make sure the laminate edge (if you have it) is smooth. - Check for chips. These can be filled. - Make sure the seams are butted tight. - If a cut-out or a seam is worked on OVER a drawer, be sure to remove the drawer and tape the glide. There have been instances where the granite dust destroyed the drawer glide. - Make sure that the top drawers open and close - Make sure the stove sits up higher than the counter - Make sure you can open your dishwasher - Make sure you have proper clearances for all of your appliances. - Make sure you have the appropriate clearances for your appliances. - Make sure all your cabinets are still in the right place. - Watch when they apply the sealer, so that you know how to do it later. Post Installation - Post pictures for the TKOÂed - Enjoy your kitchen!...See MoreTemplating today-using digital, everyone else do this 2?
Comments (10)They did the digital method to measure for our countertops, but they then produced a semi-transparent plastic template from those measurements. The templates were then taped on the slabs. I'm really glad they did it this way because I'm a visual person and we ended up moving the templates around - not in the kitchen because that stone is fairly uniform but in some of the other rooms. The granite folks had placed the templates to emphasize the movement in the stone, and we are 'less is more' kind of people so we often moved them to the quieter end or side of the slab. I'm sure they though we were nuts. The downside was that in transferring those digital measurements to the templates, they forgot to add 2 inches for the panel ends and overhang on the peninsula so it was too short. They didn't have a big enough piece left to do the entire peninsula again so they had to cut the existing piece and seam another piece in. I was bummed because the first piece looked so good and now the seam is in a place where the light will hit it just right and highlight the seam even though they did a great job on it. So that's where the fruit bowl is going....See Moremaking templates from graph paper
Comments (10)the only way i know to transfer from monitor to paper is , get tracing paper, graph paper, masking tape, pencil , a ruler to measure the monitor and one for the paper and a hard flat surface. tape the graph paper down flat. cut the tracing paper a little larger and tape over the graph paper . you need a point on the image for a reference point to the paper. this point will be at the intersection of the two widest points on the image, one line from top to bottom the other left to right. from that point you can measure to other parts of the image and transfer to scale on the paper. measure enough points so you will feel confident in drawing the curves. when it's done you can cut the tracing paper and use it as a template. it's kind of like doing a dot to dot picture but you must first lay down the dots. if anyone knows of an easier way please send it to me....See More
jellytoast
9 years ago
lavender_lass
9 years agokevdp4
9 years agosevrm
9 years ago
suzanne_sl
9 years agoberryjam
9 years agokevdp4
9 years agosuzanne_sl
9 years agosnoonyb
9 years agojoygreenwald
9 years ago


Related Stories

LIVING ROOMSKey Measurements for Your Living Room
Learn the basic dimensions that will allow good circulation, flow and balance as you fit in all the furnishings you want
Full Story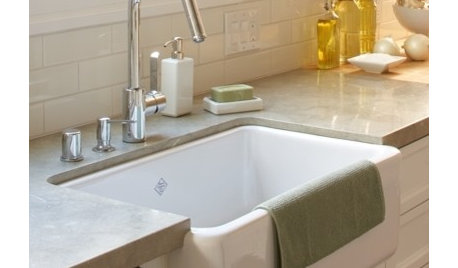
CONTRACTOR TIPSContractor Tips: Countertop Installation from Start to Finish
From counter templates to ongoing care, a professional contractor shares what you need to know
Full Story
DECORATING GUIDES9 Planning Musts Before You Start a Makeover
Don’t buy even a single chair without measuring and mapping, and you’ll be sitting pretty when your new room is done
Full Story
DIY PROJECTSHigh-End Look for Less: Make a Layered Headboard for $20
No sewing and sawing means no hemming and hawing; just gather some inexpensive materials and get going
Full Story
DESIGN PRACTICEDesign Practice: How to Pick the Right Drawing Software
Learn about 2D and 3D drawing tools, including pros, cons and pricing — and what to do if you’re on the fence
Full Story
DECORATING PROJECTSDIY Project: Pizza-Box Stencil Wall
Treat your wall to a giant graphic using paint and a pizza box
Full Story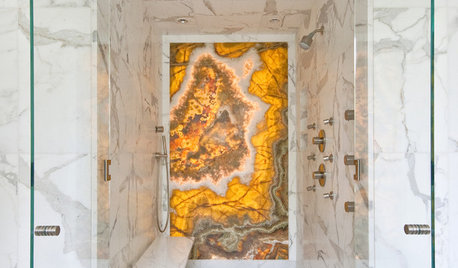
BATHROOM DESIGNHow to Build a Better Shower Curb
Work with your contractors and installers to ensure a safe, stylish curb that keeps the water where it belongs
Full Story
BUDGETING YOUR PROJECTConstruction Contracts: What to Know About Estimates vs. Bids
Understanding how contractors bill for services can help you keep costs down and your project on track
Full Story
HANUKKAHDIY Dreidel Wall Hanging Puts a New Spin on Hanukkah Decor
Create a custom silkscreen-like decoration with this playful pattern, fabric and freezer paper — no sewing machine required
Full Story
DECORATING GUIDES5 DIY Decorating Projects Perfect for the Holiday Weekend
Spend that free day making something new and creative for your home, to admire long after the weekend is over
Full Story


snoonyb