


Our Thanksgiving week total kitchen remodel
weedyacres
16 years ago


Featured Answer
Comments (124)

ilanab
16 years agolast modified: 9 years agoclaybabe
16 years agolast modified: 9 years agoRelated Discussions
My first ever post, thanks to total kitchen remodel!
Comments (13)Hi florantha, I know exactly what you mean by lots of space but no space! That exactly describes my home. In fact, I don't really have a space for a desk right now because of that. I wish I had my computer so I could upload some pictures (I'm using my iPad right now), but I will just have to use words to describe my space for now: When you walk into my house, you walk right into my kitchen, which is 13ft x 12ft. So if you think of a square, the front door is on the bottom side at the far right. The right side is a wall, along which is the recessed pantry, and this wall stops at the end of the 12ft. There is a walkway in front of you, and the rest of the bottom side (to the left of the door) has the fridge and a short counter. The left-hand wall has that counter continuing from the corner, then a sink under a window, then a counter over the dishwasher, and then a wall oven with microwave and short cabinets over it. There is no fourth wall ahead of you - the tile just transitions to wood floor and there is a wood beam overhead to divide the rooms. So if you walk to the end of the tile, you are in the left half of a rectangular room, and our dining set is in the same room at your right. So, the dining room is a 15ft 7" by 24ft rectangle, and my current kitchen is like a square under the long left side of that rectangle. The dining set fits into the right-hand 12ft stretch of dining room, and the left-hand side (that my current kitchen opens onto) is useless empty space right now. So I'm pushing my kitchen straight backwards into that space, and my current kitchen will be the mudroom/entry. That was probably clear as mud, but it's the best I can do for now, sorry! The place where my wall oven and microwave are, will house a tall cabinet which will contain the stacked washer/dryer. The sink und the window will be replaced with a utility sink and keep the short counters at either side - I'm hoping to make that all soapstone. So the will be both top and bottom cabinets at either side of the sink (and under it), and I was thinking of having those cabinets and the tall one housing the W/D similar to the kitchen cabinets. The fridge and short counter, to the left of the front door, will be replaced by the coat stand. So that's where I'm agonizing over having the different stains. They would be right up again each other in that corner... Would it look terrible if they were different, as I described in my post above? I'll be putting in a long countertop between the two rooms to separate the mudroom from the kitchen, leaving a 4th walkway from the door straight to the kitchen, and adding an open shelf right under the ceiling beam as well, to separate the spaces. I figure that can be a handy folding area as necessary, or we can use the dining room table. I don't sort, really, and my pantry is big (7th x 2.5th) so if need be, I can shove the hamper in there out of sight when company comes. Hampers stay in rooms/closets until I do laundry, so I don't think it will be a big deal? And the ironing board can go in the pantry too, with one if those wall retainers which holds the iron up above. I never hang clothes and I suppose I could always use the coat hooks and a hnagerrs for rare occasions, too? Does this all make sense or have I created mass confusion by now?...See MoreWeek 80: Thanksgiving!!!
Comments (57)Well, the GC told me he could get me in my house by Thanksgiving this year (he started last April), but I didn't quite expect this to happen, and it didn't. I figure I should be in by March... I'd also hoped to order a heirloom turkey (small) through Whole Foods -- more flavor and better dark to white meat ratio, and it would only be a once a year at the very most splurge. Then I broke the leg, and decided manhandling a turkey in and out of the oven was going to be a bad idea, even if it were small. BUT I am thankful that my house IS coming along, and that me and GC still get along, and that I'll be retiring sometime the first half of 2016, and that I now have my first ever great-nephew - who, unfortunately lives in Florida so I haven't seen him in person yet -- I probably won't meet him until early-mid-spring now. But I am grateful he's around and he looks a lot like my brother! I'm thankful for the wonderful people who've been helping me and dropping off Asian (and other) dishes, and taking me to the doctors when I need to go, and dealing with kitty litter... I was able to make myself an excellent braised turkey thigh recipe, and I stuffed some delicate squash with a sweet potato / cranberry / apple mixture -- and I didn't have to decline any desserts because I didn't make any! I hope everybody has had, and is still having, a great Thanksgiving weekend!...See MoreWeek 127 - Thanksgiving meal and BF score
Comments (12)Wishing your dad and you a smooth recovery. That's a hard way to spend Thanksgiving! I hope this is good food porn for you. We decided to have a multicultural Thanksgiving menu with prayers for all who feel vulnerable these days. I'll say a prayer for your dad and other medically fragile folks as I eat my enchiladas made from leftover turkey molè today! From the top of the picture: Rainbow Salad, Wild Rice with Mushrooms, Mashed Potatoes, Herb-Roasted Turkey, Mama Stamberg's Cranberry Relish, Roasted Squash with Lemon-Tahini Sauce, Turkey Molè, Cornbread Stuffing with Green Chiles, Gravy. Then there were the Collard Greens, Chocolate-Pepper Pie (chocolate pie with cayenne, SOOO good), and Pumpkin Pie that somehow didn't make it into the picture! We started off with a Baba Ganoush, Hummus, Olives, and assorted cheeses. Wishing you a wonderful season of good foods soon!!...See MoreKitchen remodel with a 18k total budget. How would you spend the $?
Comments (41)@Beth wow - what slab of quartz did you use for your island? A 3 cm i assume. @mhcooper : Looks well done for 12k. I would change the island hardware to gold to offset the white and black of the surrounding area. The only other change i would have made would be to remove the cabinets (with 4 doors) above that nook so you can have a full view when looking at your dining table and realllly open up the space. I always disliked that obstruction. It always shock me when people spend so much money refacing cabinets, just a pay a guy to sand, prime, sand, paint, sand, paint your cabinets a color of your choosing, or buy brand new cabinets (there are so many options out there for under 5k w/ install)....See Moreamicus
16 years agolast modified: 9 years agoBuehl
16 years agolast modified: 9 years ago
weedyacres
16 years agolast modified: 9 years agonatesgramma
16 years agolast modified: 9 years agopcjs
16 years agolast modified: 9 years agotxgal06
16 years agolast modified: 9 years agoweed30 St. Louis
16 years agolast modified: 9 years agopcjs
16 years agolast modified: 9 years agoweedyacres
16 years agolast modified: 9 years agobuckingham
16 years agolast modified: 9 years agolovetorenovate
16 years agolast modified: 9 years agolynninnewmexico
16 years agolast modified: 9 years agobklyn2pok
16 years agolast modified: 9 years agohouseful
16 years agolast modified: 9 years agoweedyacres
16 years agolast modified: 9 years agoalku05
16 years agolast modified: 9 years agoweedyacres
16 years agolast modified: 9 years agoHappyladi
16 years agolast modified: 9 years agoFlowerchild
16 years agolast modified: 9 years agobklyn2pok
16 years agolast modified: 9 years agofnzzy
16 years agolast modified: 9 years ago
Vivian Kaufman
16 years agolast modified: 9 years agoweedyacres
16 years agolast modified: 9 years agotxgal06
16 years agolast modified: 9 years agopcjs
16 years agolast modified: 9 years agoraehelen
16 years agolast modified: 9 years agoweedyacres
16 years agolast modified: 9 years agopcjs
16 years agolast modified: 9 years agoHappyladi
16 years agolast modified: 9 years agodcwesley
16 years agolast modified: 9 years agoraehelen
16 years agolast modified: 9 years agoweedyacres
16 years agolast modified: 9 years agopickles_ca
16 years agolast modified: 9 years agoweedyacres
16 years agolast modified: 9 years agoweedyacres
16 years agolast modified: 9 years agopcjs
16 years agolast modified: 9 years agojesemy
16 years agolast modified: 9 years agomommycooks
16 years agolast modified: 9 years agoweedyacres
16 years agolast modified: 9 years agomls99
16 years agolast modified: 9 years agojayav
16 years agolast modified: 9 years agoweedyacres
16 years agolast modified: 9 years agoaprilshowers_grow
16 years agolast modified: 9 years agopcjs
16 years agolast modified: 9 years agoweedyacres
16 years agolast modified: 9 years agofnzzy
16 years agolast modified: 9 years agojanwad
16 years agolast modified: 9 years agoweedyacres
16 years agolast modified: 9 years ago


Related Stories
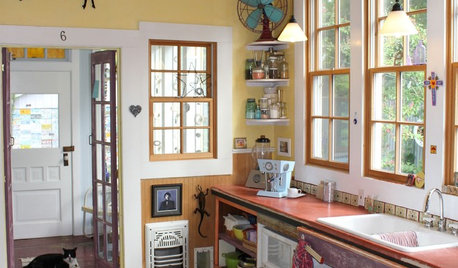
KITCHEN DESIGNKitchen of the Week: Quirky Texas Remodel
Playful Remodel Amps Up the Personality of 130-Year-Old Kitchen
Full Story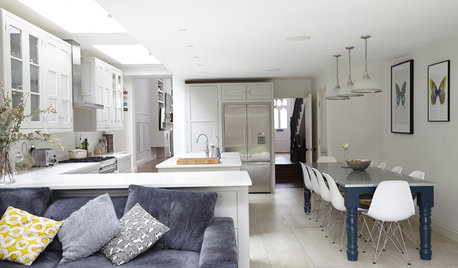
KITCHEN DESIGNKitchen of the Week: A Fresh Take on Classic Shaker Style
Quality craftsmanship and contemporary touches in a London kitchen bring the traditional look into the 21st century
Full Story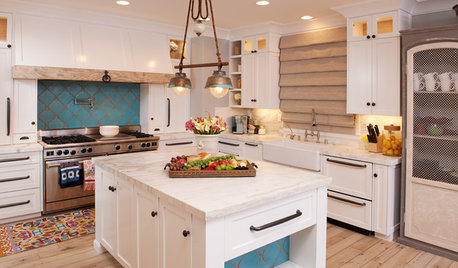
KITCHEN DESIGNKitchen of the Week: Turquoise Tile and a Dining Nook for 16
Entertaining is a piece of cake in this remodeled beauty with an extra-large stove and seating for a crowd
Full Story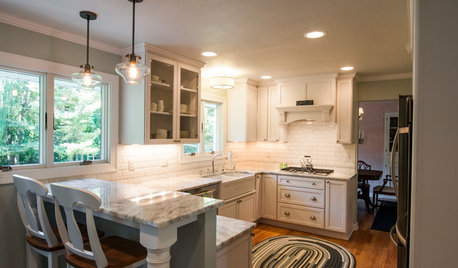
KITCHEN OF THE WEEKKitchen of the Week: 27 Years in the Making for New Everything
A smarter floor plan and updated finishes help create an efficient and stylish kitchen for a couple with grown children
Full Story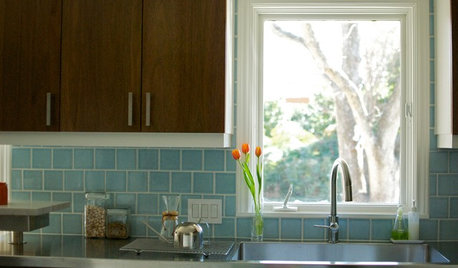
KITCHEN DESIGNKitchen of the Week: Practical, Budget-Friendly Beauty in Dallas
One month and a $25,000 budget — see how a Texas homeowner modernized her kitchen beautifully working with those remodeling constraints
Full Story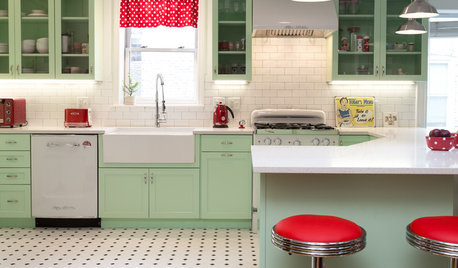
KITCHEN OF THE WEEKKitchen of the Week: A Minty Green Blast of Nostalgia
This remodeled kitchen in Chicago gets a retro look and a new layout, appliances and cabinets
Full Story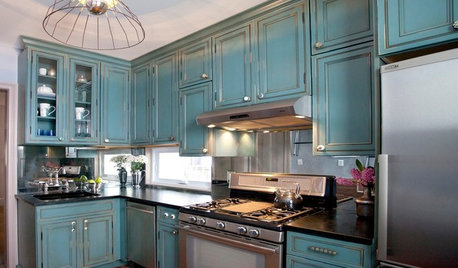
KITCHEN DESIGNKitchen of the Week: Turquoise Cabinets Snazz Up a Space-Savvy Eat-In
Color gives a row house kitchen panache, while a clever fold-up table offers flexibility
Full Story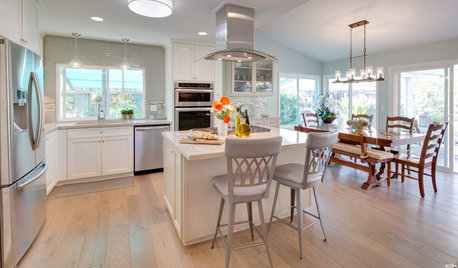
KITCHEN OF THE WEEKKitchen of the Week: Coastal Kitchen Honors a Beloved Husband
This Southern California kitchen makeover includes a touching story of a couple who faced a much bigger challenge during their remodel
Full Story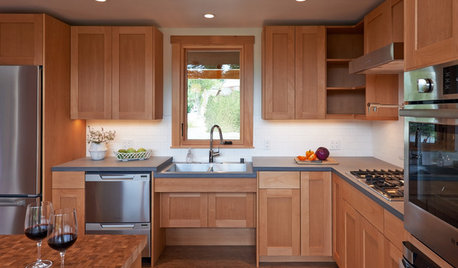
UNIVERSAL DESIGNKitchen of the Week: Good Looking and Accessible to All
Universal design features and sustainable products create a beautiful, user-friendly kitchen that works for a homeowner on wheels
Full Story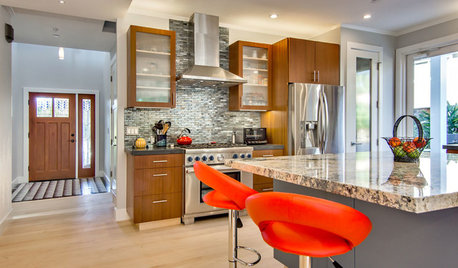
KITCHEN DESIGNKitchen of the Week: Breathing Room for a California Family
Wide-open walkways and generous storage give a couple who love to host all the kitchen space they need
Full StorySponsored
Industry Leading Interior Designers & Decorators in Franklin County


socalthreems