


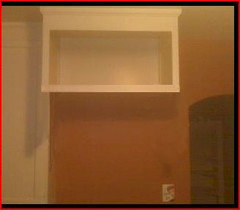
Best way to remove part this upper cabinet . . . (pics)
oldalgebra
14 years ago
Featured Answer
Sort by:Oldest
Comments (10)

callie8799
14 years agoRelated Discussions
When to remove upper part of rootsock
Comments (8)i am no professional on this ... but let me try to explain .. as simple as i can.. so language does not get in the way ... lol.. hopefully .... your scion has few needles ... it needs the needles of the understock ... to feed the roots.. to add vigor to the plant ... conifers hold their needles.. 1 to 3 years ... the understocks needles will provide vigor during that period .. if your scion flushes out ... and makes its own needles... i would NOT allow the understock to bud out next spring.. perhaps cutting off the buds in fall .. but i would leave the rest of the understock there.. for the needles on the trunk ... by next fall ... 2014 .. it will probably be vigorous enough.. that you could make the final cut ... there is no hurry to get the feeder needles of the understock off the scion ... but dont let it overgrow the scion ... make any sense?? ken...See MoreBest way to remove part this upper cabinet . . . (pics)
Comments (5)Maybe you didn't understand my original response. The right tool for the job is the Fein Multimaster. It costs a couple hundred dollars; they could try to rent one. The blades for the tool are expensive and wear out quickly, for cabinet work I always start with a new sharp blade. The tool does flush cutting and plunge cutting with excellent accuracy. Follow the bottom edge of the shelf as a guide to make the cut. For the left side, where you don't want to cut too deep into the other cabinet, mark the blade with masking tape to guage the depth of cut. I was just offering to help out if they are local. It would take me about 10 minutes. Here is a link that might be useful: Fein Multimaster...See MoreUpper cabinet questions - best look to the eye
Comments (23)My U-shaped kitchen isn't that big, so I wanted to make efficient use of all my storage space. I replaced two angled uppers with Easy-reach, and I am a believer! I can actually see and get to the things I put in them! And the piano hinges do not show when the doors are closed (to address Johnsoro25's comment). Mawizz, there is a difference between "enough storage" and "most functional storage". Since you will have a corner in your primary prep space (between your sink and range), you may find that you store things there that you use during food prep. Just because you have a big pantry doesn't mean that you want to truck back and forth to it while preparing a meal. Much of my kitchen design was centered around putting things where they made the most sense. I started with things that needed to go near their point of use: cooking utensils, spices, potholders near the stove; knives and cutting boards in the prep zone; dishes near the cleanup zone. Then I moved on to bulky items: cake pans, cookie sheets, pots and pans, small appliances. Meanwhile, I addressed things that bugged me about our old kitchen (that we'd used for 20 years). For example, we don't have a pantry, so we always had boxes of beer and pop stacked next to the fridge. Now I have a cabinet dedicated to beverages - and the shelf was placed so pop cans fit on the top, and beer bottles underneath (a shelf in the middle of the cabinet would not have worked). We also use a lot of large water bottles (we do a lot of hiking). I dreamed of a shelf dedicated to just those. I also planned for a cabinet for my purse and small briefcase, which used to end up on a kitchen chair, for lack of a place to put them. I put outlets inside a cabinet that I use as my "command center", so we can charge devices out of sight - instead of on the kitchen counter. I bucked the trend and went with an angled base cabinet in one of my corners. My cabinets were custom built, so I could get whatever I wanted - and I had them build a super susan in an angled cabinet, with a drawer above. One of the goals of my remodel was to get stuff off the counters, and to get as many drawers as possible, so the angle allowed me to put a knife drawer above the SS. But there is an easy-reach above it....See MoreDesign feedback needed on window to upper cabinet size (pic included)
Comments (23)That was a little rough but, I do appreciate everyone's feedback! Two changes in particular I'm taking to heart: 1) 42" vent instead of the planned 36": While some say matching the vent to the stove width is adequate, many more say to go +3" on each side. 2) Not enough wall space for 22" window framing with 24" cabinets and 42" vent (thanks GD): I can address this by both reducing the cabinets to 21" AND mounting them on the side wall instead of the back wall (yes, the upper back shelf will be hard to reach, we'll also need door restrictors to avoid hitting the wall). While #2 above gives me ~24" more back wall space, I lose ~6" to the wider vent so, I end up with 18" more back wall space. I spoke the the window supplier and he said there's a 4 1/4" (!!!) overall space from window edge to actual glass for a vinyl casement windows. I may consider an aluminum frame as the frame is much smaller (but, it only has a 10YR warranty). The window guy mentioned the GC can bury much of the new construction vinyl frame in the drywall so I could get more glass (and the frame won't look as big). Has anyone ever heard of that before? Here's the new elevation:...See Morenkkp
14 years agodesertsteph
14 years agooldalgebra
14 years agosevenecho
14 years agojdesign_gw
14 years agojdesign_gw
14 years agooldalgebra
14 years agonkkp
14 years ago

Related Stories
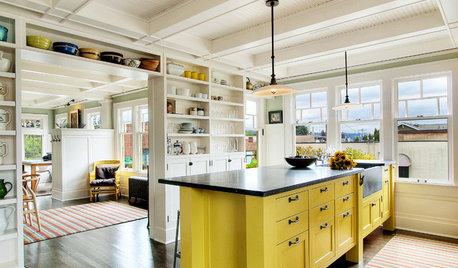
KITCHEN DESIGNHow to Lose Some of Your Upper Kitchen Cabinets
Lovely views, display-worthy objects and dramatic backsplashes are just some of the reasons to consider getting out the sledgehammer
Full Story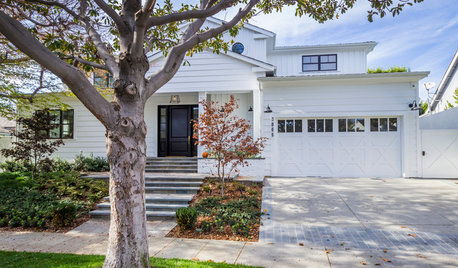
TRANSITIONAL HOMESHouzz Tour: Part Traditional, Part Modern and All Family Friendly
With clean lines, vintage touches and durable surfaces everywhere, this Los Angeles home balances tastes and needs beautifully
Full Story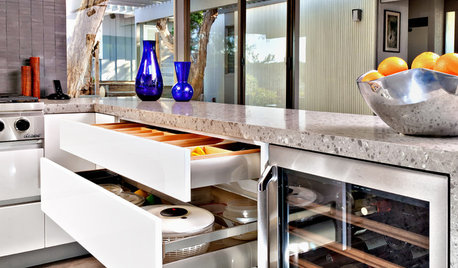
KITCHEN CABINETS9 Ways to Configure Your Cabinets for Comfort
Make your kitchen cabinets a joy to use with these ideas for depth, height and door style — or no door at all
Full Story
REMODELING GUIDES5 Ways to Protect Yourself When Buying a Fixer-Upper
Hidden hazards can derail your dream of scoring a great deal. Before you plunk down any cash, sit down with this
Full Story
KITCHEN CABINETS9 Ways to Save Money on Kitchen Cabinets
Hold on to more dough without sacrificing style with these cost-saving tips
Full Story
BEFORE AND AFTERSHouzz Tour: New Life for a Historic Georgia Fixer-Upper
Renovation restrictions didn't limit a couple's enthusiasm for this well-sited Decatur home
Full Story
ECLECTIC HOMESMy Houzz: Eclectic Bohemian Style in a 1976 Fixer-Upper
These Southern California homeowners patiently added color, style and function to their outdated home
Full Story
DOORSKnow Your House: Interior Door Parts and Styles
Learn all the possibilities for your doors, and you may never default to the standard six-panel again
Full Story
STANDARD MEASUREMENTSKey Measurements for a Wine Cellar, Part 1
Find out the best ways to store your stash and how much space you need for wine refrigerators, racks and other storage
Full Story
HOUSEKEEPINGHow to Remove Water Rings From Wood Tables
You may be surprised by some of these ideas for removing cloudy white water marks from wood surfaces
Full Story

morgne