


Polyurethane over oil based stain?
barnold4
9 years ago
Featured Answer
Sort by:Oldest
Comments (13)

User
9 years agolast modified: 9 years agoklem1
9 years agolast modified: 9 years agoRelated Discussions
Oil-based polyurethane question
Comments (2)The stain's already done, and they are staring the poly now. After researching on a few more forums, we asked the floor guy to do gloss for the first 2 coats. After that's done we'll take a look at it and decide on what the final coat should be....See Moreoil based polyurethane over oil based stain?
Comments (1)Minwax will work. I would seal it first. Get the Minwax sanding sealer. This will make it a bit easier to sand before you apply the poly and the sealer helps you arrive at a smoother surface with fewer coats. I have used Old Masters stains a million times and have topcoated with all different brands of clears and never had issues....See MoreBest Finish over Oil Based Stain
Comments (4)Assuming you're using clear poly, generally oil based poly will bring out the wood color somewhat which is the opposite of what you seem to have observed. The finish will yellow over time but I doubt you would have observed this in a short period of time. I'm not sure what you consider shiny. Satin oil poly is not shiny but if it's too shiny for your taste there are duller oil based finishes. It's important to stir the poly thoroughly because the flatting agent settles to the bottom. You can also pour some of the poly off the top before stirring to get a duller result. I like the oil finish since it's tough, easy to use and dries slowly allowing time to apply uniformly. The downside is that the longer drying time can allow time for dust to settle in the finish....See MoreWhat type of cleaner for oil-based polyurethane wood floor surface?
Comments (0)Hi there, we recently had our red oak hardwood floors refinished with an oil-based polyurethane stain/finish. It was recommended to use Bona's cleaner for oil-based wood floors, but i cant find it in my area anywhere. Most retailers just carry the regular Bona wood floor cleaner. Would this still be safe for my floors? Is there something else I can use? Thanks!...See Moreklem1
9 years agolast modified: 9 years agorwiegand
9 years agolast modified: 9 years agomdln
9 years agolast modified: 9 years agobarnold4
9 years agolast modified: 9 years agorwiegand
9 years agolast modified: 9 years agobarnold4
9 years agolast modified: 9 years agoRocksAndRoses
9 years agolast modified: 9 years agomdln
9 years agolast modified: 9 years agoRocksAndRoses
9 years agolast modified: 9 years ago
Vinny Simkin
3 years ago
Related Stories
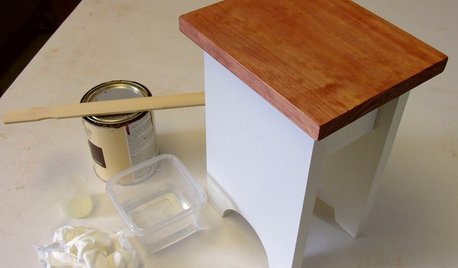
DIY PROJECTSCool Tip: Mimic Stain With a DIY Color Wash
Get the look of an oil-based stain without all the bother, using this easy wash made with paint
Full Story
KITCHEN CABINETSKitchen Cabinet Color: Should You Paint or Stain?
Learn about durability, looks, cost and more for wooden cabinet finishes to make the right choice for your kitchen
Full Story
KITCHEN CABINETSPainted vs. Stained Kitchen Cabinets
Wondering whether to go for natural wood or a painted finish for your cabinets? These pros and cons can help
Full Story
KITCHEN DESIGNUsing White Marble: Hot Debate Over a Classic Beauty
Do you love perfection or patina? Here's how to see if marble's right for you
Full Story
HOUSEKEEPINGDon't Touch Another Stain Before You Read This
Even an innocent swipe with water may cause permanent damage. Here's what to know about how rugs and fabrics react
Full Story
HOUSEKEEPINGOut, Darn Spot! Tips for Removing Carpet Stains
Know the right solutions and when to use them to prevent stains from pets, soda, chocolate, blood and more
Full Story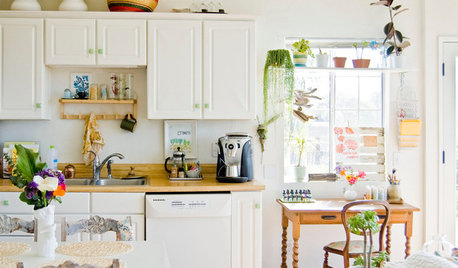
KITCHEN CABINETSColorful Ways to Make Over Your Kitchen Cabinetry
Try these inspiring color updates to spice up your kitchen a little — or a lot
Full Story
REMODELING GUIDESConcrete Driveways: Poring Over the Pros and Cons
Concrete adds smooth polish to driveways and a sleek look to home exteriors, but here are the points to ponder before you re-surface
Full Story
HOUSEKEEPINGHow to Clean Grout — Stains and All
If your grout is grossing you out, this deep-cleaning method will help it look new again
Full Story
MOST POPULARDesign Debate: Is It OK to Hang the TV Over the Fireplace?
In the spirit of the upcoming political debates, we kick off a series of conversations on hotly contested design topics
Full Story

rwiegand