


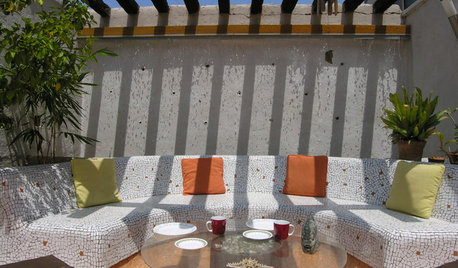
mosaic bench
klinger
16 years ago


Sort by:Oldest
Comments (48)
Related Stories
LANDSCAPE DESIGN13 Extra-Cool Things to Do With a Backyard
Sure, you could just plop down on a blanket. Or you could create a dragon’s lair, a mosaic gallery, a party in a jungle ...
Full Story
BATHROOM DESIGNWhat to Use for the Shower Floor
Feeling Good Underfoot: Shower Tiles, Mosaics, Teak Slats and Pebbles
Full Story
LANDSCAPE DESIGNDream Spaces: 10 Secluded Garden Nooks
Sometimes dreaminess is a single bench or a romantic table for 2 tucked amid greenery. See for yourself
Full Story
DREAM SPACESNew This Week: 4 Modern and Spacious Dream Bathrooms
For the ultimate bathroom experience, cozy up to heated shower benches, large soaking tubs and high-end tile
Full Story
REMODELING GUIDESTop 10 Tips for Choosing Shower Tile
Slip resistance, curves and even the mineral content of your water all affect which tile is best for your shower
Full Story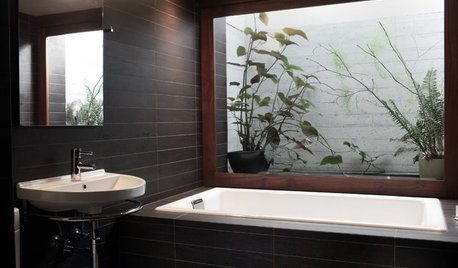
BATHROOM DESIGNPersonal Style: 50 Bath Designs From Creative Owners and Renters
Ideas abound in bathroom styles ranging from upcycled vintage to sleekly modern
Full Story
KITCHEN DESIGNThe 20 Most Popular Kitchens on Houzz
See the cool features that made these kitchens stand out from all the rest
Full Story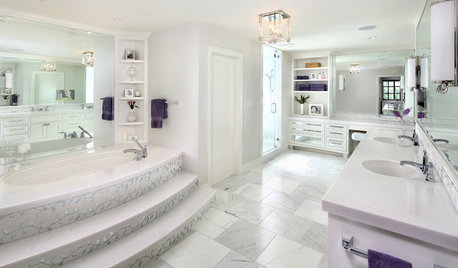
BATHROOM DESIGNRoom of the Day: Luxe Hotel Look for an All-White Master Bath
A ‘beauty bar,’ marble-lined steam shower and laundry chute are a few of the amenities in this glamorous spa bathroom
Full Story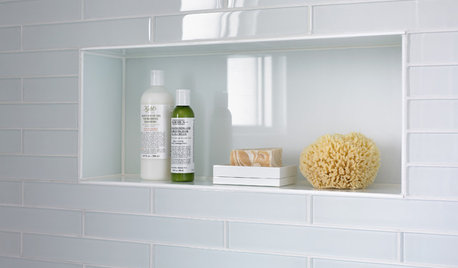
SHOWERSTurn Your Shower Niche Into a Design Star
Clear glass surrounds have raised the design bar for details such as shampoo and soap shelves. Here are 4 standouts
Full Story
BATHROOM DESIGNWhy You Might Want to Put Your Tub in the Shower
Save space, cleanup time and maybe even a little money with a shower-bathtub combo. These examples show how to do it right
Full StorySponsored
spiceyart
texaswild
Related Discussions
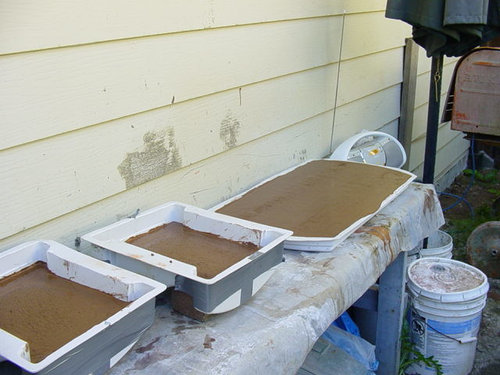
patio and mosaic bench WIP
Q
old screen door
Q
I can play again!!
Q
Recycling old mosaic tile bench top
Q
Calamity_J
shrty411
klingerOriginal Author
crackpotannie
rosemarythyme
madhabitz
madhabitz
spiceyart
lyndalu
d3bbi
nicethyme
Calamity_J
klingerOriginal Author
klingerOriginal Author
texaswild
shrty411
d3bbi
spiceyart
lyndalu
spiceyart
klingerOriginal Author
lyndalu
spiceyart
lyndalu
shellybelly26
klingerOriginal Author
barbfrizzell1955
texaswild
squirrellycanadian
klingerOriginal Author
nicethyme
rosemarythyme
Calamity_J
texaswild
spiceyart
bianchi2
d3bbi
shrty411
klingerOriginal Author
hrsg
klingerOriginal Author
lyndalu
jaspersmommy
texaswild
madhabitz
klingerOriginal Author