


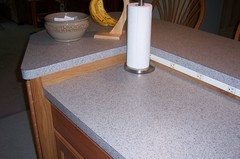
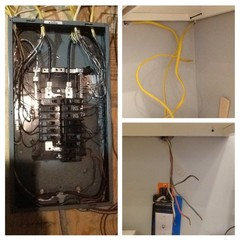
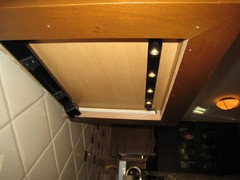
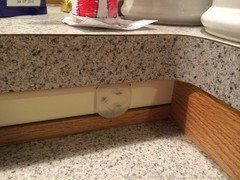
Frustrated...How to install multi-outlet strips
Mags438
9 years ago
Featured Answer
Comments (31)

2ajsmama
9 years agoMags438
9 years agoRelated Discussions
great anticipation; great disappointment; a month's delay
Comments (4)I am so sorry this has happened. I can only offer my empathy/sympathy having had similar situations with our master bath remodel. It's true that in the scheme of life it's small but then again it's also stressful and a lot of trouble that seems could have been avoided. It seems that the mistakes and poor quality in our bathroom remodel are causing me more upset as time goes by as more poor workmanship comes to light some additional failures have surfaced. There is nothing we can do about it except tear it out and start over. Some of the things are not fixable such as how the radiant heat was installed and the faux granite seams in the shower, the defective and poorly installed tile, the gloppy silicone. Now that it's cold it's irritating that the floor wasn't installed properly. I actually feel more stressed and upset about it as time goes on. We thought we were going with a reputable company but they are a franchise company more suitable for house flipping and lied about their capabilities. Sadly we believed them. They charge top dollar and we cannot easily recover from such a large monetary outlay to correct the mistakes. I really hope that you can get this resolved and I am so sorry it happened (((((big hugs)))))!!!...See MoreLove my rIxi crackle mandorla tiles! Should I get almond outlets?
Comments (8)I just bought some Levitron light almond outlets and light switches with screw less covers. I am very happy with how streamlined and modern they look. At first glance I thought they were white. My electrician told me about them, and said most people use them nowadays for off-white or cream subway backslashes. Hopefully this will help others in their decision. I also looked into the custom, online store , Columbia Jorge stoneworks since a few gw'ers used them. I was worried how the edges of the covers would looked chipped, since I have the crackle finish. They match the mondorla tiles soooo much better than the bright white. I did not know there was a new color, light almond vs the regular almond! I hope this helps others stuck on which covers to get....See MoreOutlet danger?
Comments (3)just to give you an example, in my office here i have 2 20 amp duplex outlets side by side. EACH of these feeds power strips that have up to 2 dozen outlets on them. no crap, last time i counted there was 48 devices plugged into these 2 circuits. most of them are very low current items, 10-20 watts at most, and then there are the 8-9 computers and monitors in here at at one time running. counting the other couple of 20amp circuits, i cannot run my office, and i mean JUST my office, on a 5kw Honda generator. i have to use a 5kw and a 3kw to run everything. as long as each circuit is not overloaded current wise, you are fine. you don't want to plug a strip into a strip that is plugged into a strip and so on, as each plug in connection does build heat. think of teh Dad plugging up the lamp in A Christmas Story, too many strips/multi outlet adapters plugged into strips/MOAs can be be a fire hazzard. but just pluggin in power cords into a coupel is fine for light loads....See MoreWhere/how can I learn these electrical questions
Comments (7)"How do I know if I have "one post" or "two post" outlets and light switches? " ... People are being a little tough on you. I believe that you mean to be saying [ one or two POLE outlets and switches ]. If your home was built in the 60s, odds are that the outlets and switches have a grounding wire attached to the screw in the back of the box. There should also be a threaded hole in the metal box (10-32). Buy grounding pigtails from Home Depot, Lowes or a supply house and they come with a 10-32 screw attached. Screw the pigtail into the threaded hole and attach the stripped end to the new 3 prong outlet or new single pole switch. As for the 3 way switches, better do a bit more reading on changing them before you start something that can get involved. If you do change them, do only one at a time and be sure that they work properly with the existing switches first, then replace only one at a time before moving on to the next one. As for the 20 amp circuit or outlet for the washer, Check which breaker controls the outlet. If it is a 15 amp breaker, then install a 15 amp GFI outlet (following installation instructions included with the outlet). If it has a 20 amp breaker, then use a 20 Amp GFI outlet. The book that Ronnatalie suggested above is a good starting point. Once again, you can find this book and others at the Big Box stores, supply houses and Sears to name a few....See MoreUser
9 years ago2ajsmama
9 years agoMags438
9 years ago
Lisa
9 years agoLisa
9 years agoMags438
9 years ago
a2gemini
9 years agoLisa
9 years ago2ajsmama
9 years ago2ajsmama
9 years agoa2gemini
9 years agoMags438
9 years ago2ajsmama
9 years agoandreak100
9 years ago2ajsmama
9 years agoMags438
9 years agoandreak100
9 years ago2ajsmama
9 years agoMags438
9 years ago2ajsmama
9 years agoandreak100
9 years agoangela12345
9 years agoandreak100
9 years agoMags438
9 years ago2ajsmama
9 years ago2ajsmama
9 years agoMags438
9 years agoandreak100
9 years ago


Related Stories
GREAT HOME PROJECTSPower to the People: Outlets Right Where You Want Them
No more crawling and craning. With outlets in furniture, drawers and cabinets, access to power has never been easier
Full Story
REMODELING GUIDESContractor Tips: Advice for Laundry Room Design
Thinking ahead when installing or moving a washer and dryer can prevent frustration and damage down the road
Full Story
KITCHEN DESIGNHow to Add a Kitchen Backsplash
Great project: Install glass, tile or another decorative material for a gorgeous and protective backsplash
Full Story
KITCHEN DESIGNA Stylist’s Secrets for Giving Your Kitchen the Wow Factor
There’s more to getting a fabulous kitchen than designing and installing it. It's the little details that elevate its look
Full Story
CHRISTMASHow to Light Your Christmas Tree Like a Pro
Give yourself frustration-free tree lighting this year — the trick is clever cord management
Full Story
WOODTry DIY Plywood Flooring for High Gloss, Low Cost
Yup, you heard right. Laid down and shined up, plywood can run with the big flooring boys at an affordable price
Full Story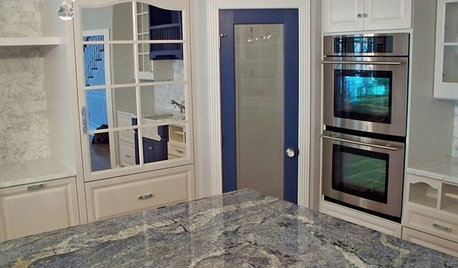
KITCHEN COUNTERTOPSKitchen Counters: Granite, Still a Go-to Surface Choice
Every slab of this natural stone is one of a kind — but there are things to watch for while you're admiring its unique beauty
Full Story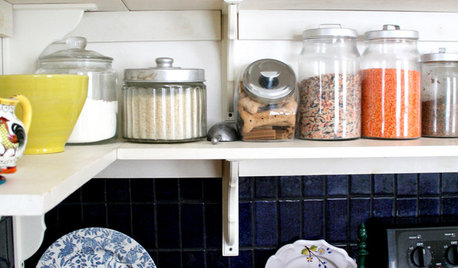
KITCHEN DESIGNDisplaying Kitchen Supplies — Hot or Not?
Do some kitchens just beg for a cozy row of canisters and gear for all to see? Have a look and let us know what you think
Full Story
KITCHEN DESIGNHouzzers Say: Top Dream Kitchen Must-Haves
Tricked-out cabinets, clean countertops and convenience top the list
Full Story
KITCHEN STORAGECabinets 101: How to Get the Storage You Want
Combine beauty and function in all of your cabinetry by keeping these basics in mind
Full Story


Lisa