


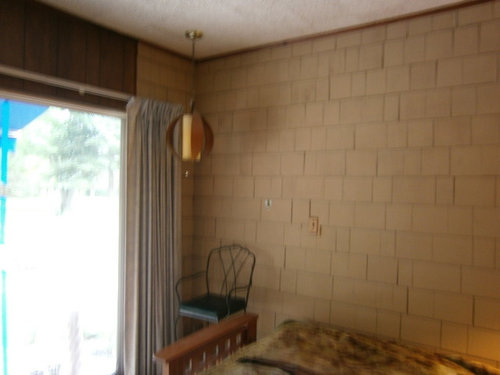
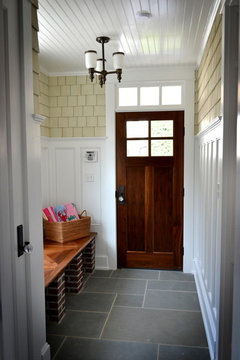
Redoing Cedar Shake Wall -- Advice Please
Pines Everywhere
10 years ago
Featured Answer
Sort by:Oldest
Comments (20)

Pines Everywhere
10 years agoRelated Discussions
Painting Interior Cedar Shake Wall
Comments (18)I think this is why we use oil based or shellac based primers to kill stains and tannin bleed. I'm not a big fan of the latex primers that claim they kill stains because I have tried many and they don't kill stains. It's just another example of manufacturers essentially lying with what they print on the cans by saying a primer will do something it doesn't. Then when you complain, of course they can say oh well it kills some stains but not all. However, from what I understand from painters using actual latex and acrylic primers to kill stains, you need to let them dry for 24 hours to perform their stain killing duties. I'm not saying this will work for you....just that some primers do work and this is the method. Another thing you can do if the stains are not widespread is buy an aerosol can or two of Kilz and just spot prime the areas that are bleeding and then go ahead with your topcoats. Of course, if the stains are all over the place then this could be a pain....See MoreBefore and After -- Cedar Shake Wall
Comments (4)After -- I am pleased with the results but it was a lot of work. What made the most difference was spackling every seam to close up the unsightly deep gaps between shakes (that didn't take paint) but still leaving a little groove between each shake. I also ran some spackling along the bottom rough edges so they didn't appear so choppy. And ... I even caulked between the layers when the overlap wasn't flush. It looks like my dream -- dipped in paint!! Thanks everyone for your coaching along the way! P.S. That yellowish shadow off to the right is just a cast off shadow from exterior light off that picture frame or the metal piece of furniture. The color is consistent and perfectly SW Beige Sand....See MoreLayout advice please? Scope of redo for 1949 ranch
Comments (37)You will never be satisfied unless you move the dining room doorway and the sunroom door. Sorry, but it's true - I have similar AWFUL doors / doorways in corners - they SUCK! Really, the solution is simple: close up the dining room and sunroom doors to create a solid wall for cabinets in that corner. Put in a 4 ft wide doorway next to your fireplace (where those tall cabs are now) - this is an EASY build! I did it all by myself to fix an old doorway - anything shorter than 6 ft is an easy DIY header - either use 2x6's with blocking above or 2x10's or 2x12's without blocking - 4 ft. is a short run. Then, put the door to the sunroom next to your laundry closet - enter from the DEN, NOT the kitchen! You can put a pass-thru over the sink if you want to, but WHY should you have to go through the kitchen to get to the sunroom? SO ANNOYING! Seriously, HAVING to walk ALL THE WAY through either the living room or dining room to get from the front door to the kitchen just DOES NOT WORK! If the doorway is next to the fireplace it is a straight run from the front door, it is still accessible to bring food into the dining room from the kitchen, AND you can even make the current mini-peninsula you have 2 feet longer so that your husband can comfortably sit there with his laptop. You can keep the sink and dishwasher in the same location (less cost for new plumbing). The new 4 ft. doorway will end approximately where your range currently meets the cabinets that will be gone, so shift the range 2 feet in towards the corner and put a 2 ft. cabinet next to the new doorway. Then you can use the existing hole in your roof for the vent by simply getting a new flexible duct and angling it from the new hood position through the attic to the roof at an angle. Framing costs - approx. $200 to frame out the new 4 ft. doorway, and a new 3 ft. door next to the laundry into the sunroom, add a few new studs to fill in the old dining room and sunroom doors in the kitchen for drywall. Use the old sunroom door in the new frame and you save more money. Cost of trim and other finishes is totally up to you. Seriously, as far as construction costs go, you can VASTLY improve the flow of your ENTIRE HOUSE by moving these two doorways for less than $500 (and that would be with really nice wood trim). I'd put a new window on the back wall of the now U-shaped kitchen, simply because you will get great light from all the south-facing windows in the sunroom. Again, a cheap and easy frame job. You can use stock off-the-shelf Anderson windows from Home Depot to save money. Your back wall is 128" wide so I'd run a blind corner cab (42" gives good play) opening along the range wall, then put the fridge on the back wall next to it with with a 3" filler space between them and a 27" corner upper cab and 27" corner appliance garage beneath it. This allows you to open the blind cabinet door and the fridge door without interference, and you can use that counter space when you pull things from the fridge. You can run a matching panel from floor to ceiling along the fridge with a deep cabinet above the fridge if you want. This means that your fridge will end about 63" (24"+3"+36") off the range wall. Your window can start about 6" from the fridge - this allows space for trim. You can fit a 30" wide window with trim starting 30" off the sink wall and install a 24" or 27" corner upper there as well (no appliance garage here - leave counterspace clear for prep). You can even install a small prep sink under this window as well (but that will add cost due to new plumbing). Get an over-the-range microwave / hood combo to save counter space. The sink wall will stay basically the same, and the range wall would go something like this: 4 ft. doorway to living room, 24" cabinet, 30" range, 18" or 21" cabinet (depending on size of trim around doorway), 45" space for 42" blind cabinet. Now you have plenty of counter space on each side of your range and next to your fridge. The new peninsula jetting out from the sink wall can be 5-6 ft. long and still allow 5 ft. walking space between it and the doorway (you save space by putting the doorway across from the peninsula instead of 24" deep cabs as exist now). At that length it might actually see more use than the small one you have now. Also, I'd actually change the height / counter material of the peninsula by extending the cabinets along the sink wall 12" into where the peninsula now is, then use 39" or 42" high wall cabs (12" deep) facing into your office area as the peninsula base and top it with 24" deep butcher block. That gives the cook 12" extra prep space on the D/W side of the sink (and avoids another corner cab), and allows people to dump their crap on the peninsula without it interfering with the cook. If you use two 24" wide wall cabinets as the base you can have 3 4" wide support pillars with brackets (one each end, one in center) to support the 10" counter overhang (butcher block should have a 2" lip on kitchen side of cabinets) and then curve the end that jets into the kitchen = 5 ft. base, 5-1/2 - 6 ft. counter. This is the cheapest and easiest way to go - you get a LOT more prep space in the kitchen and you don't lose any of your office space. It looks like you just have a table sitting in the space next to the laundry closet now, so it only makes sense to turn that into the sunroom entrance....See MoreHelp with exterior cedar shake color please!
Comments (2)If you can get a oil based stain that might be your best bet. But my house is cedar shake and I believe it has always been painted. The paint holds up well. I really like the green windows. I think you can highlight some of the trim with two shades of a brown gray like this house. The siding is a Cabot Stain, Bark color and the trim is a SW paint, semi-gloss, color not known. I really don't like the color of the front door. I think it would look better in the trim color on the sidelights and green on the door. I would do the foundation and the garage door the trim color as well....See More
palimpsest
10 years agoPines Everywhere
10 years agonosoccermom
10 years agonosoccermom
10 years agoPines Everywhere
10 years agoPines Everywhere
10 years agonosoccermom
10 years agoyayagal
10 years ago
Fori
10 years agoPines Everywhere
10 years agonosoccermom
10 years agoPines Everywhere
10 years agonosoccermom
10 years agoEMDesigns
10 years ago
Kelly M
last yearPines Everywhere
last yearKelly M
last yearKelly M
last year


Related Stories
TASTEMAKERSBook to Know: Design Advice in Greg Natale’s ‘The Tailored Interior’
The interior designer shares the 9 steps he uses to create cohesive, pleasing rooms
Full Story
DECORATING GUIDES10 Design Tips Learned From the Worst Advice Ever
If these Houzzers’ tales don’t bolster the courage of your design convictions, nothing will
Full Story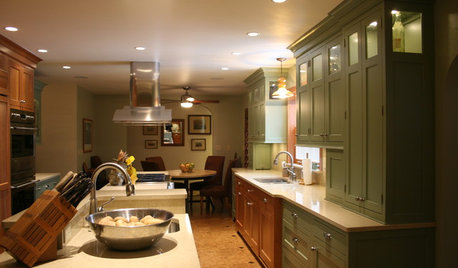
KITCHEN DESIGNSmart Investments in Kitchen Cabinetry — a Realtor's Advice
Get expert info on what cabinet features are worth the money, for both you and potential buyers of your home
Full Story
KITCHEN STORAGEKnife Shopping and Storage: Advice From a Kitchen Pro
Get your kitchen holiday ready by choosing the right knives and storing them safely and efficiently
Full Story
BATHROOM DESIGNDreaming of a Spa Tub at Home? Read This Pro Advice First
Before you float away on visions of jets and bubbles and the steamiest water around, consider these very real spa tub issues
Full Story
FARM YOUR YARDAdvice on Canyon Farming From L.A.'s Vegetable Whisperer
See how a screened garden house and raised beds help an edible garden in a Los Angeles canyon thrive
Full Story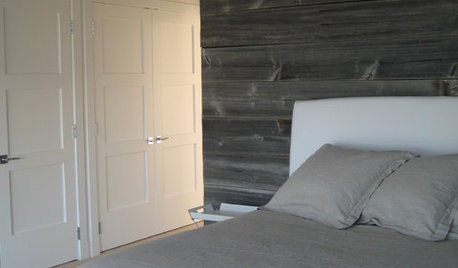
REMODELING GUIDESDesign Dilemma: How Do I Modernize My Cedar Walls?
8 Ways to Give Wood Walls a More Contemporary Look
Full Story
ROOFSNo Substitute for the Natural Beauty of Wooden Roof Shingles and Shakes
This natural, renewable roof option brings weathered character and nostalgic appeal to traditional-style homes
Full Story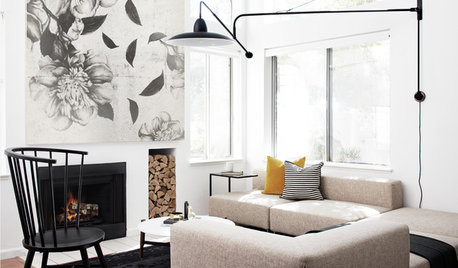
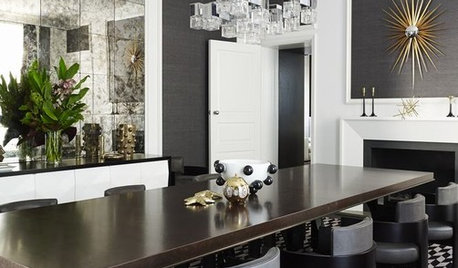
HOUZZ TOURSHouzz Tour: High Contrast Shakes Up a Townhouse
A tight budget and a run-of-the mill space didn’t stop two designers from whipping up chic interiors
Full Story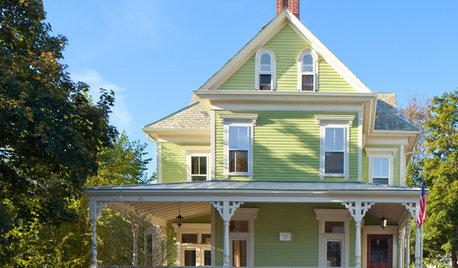
TRADITIONAL HOMESHouzz Tour: Redo Shines Light on 19th-Century Newport Beauty
The renovated Rhode Island home boasts gorgeous woodwork, an appealing wraparound porch and a newly spacious kitchen
Full Story


Fori