


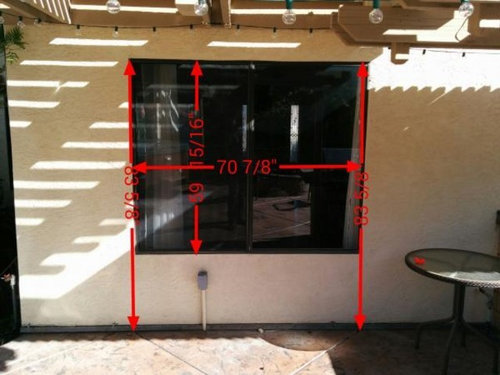
Stucco On French Door Installation
shaklee3
10 years ago
Sort by:Oldest
Comments (67)
Related Stories

GREAT HOME PROJECTSHow to Install Energy-Efficient Windows
Learn what Energy Star ratings mean, what special license your contractor should have, whether permits are required and more
Full Story
BATHROOM DESIGNShould You Install a Urinal at Home?
Wall-mounted pit stops are handy in more than just man caves — and they can look better than you might think
Full Story
WINDOWSContractor Tips: How to Choose and Install Windows
5 factors to consider when picking and placing windows throughout your home
Full Story
DOORS5 Questions to Ask Before Installing a Barn Door
Find out whether that barn door you love is the right solution for your space
Full Story
BEDROOMSRoom of the Day: French Wall Mural Dazzles in a Chic Bedroom
Eliminating an unused door freed up wall space for a stunning re-creation of an 18th-century French portrait
Full Story
RUSTIC STYLEHouzz Tour: A California Country Home With a French Accent
A new house mixes modern touches with the timeless beauty of stone walls, rustic doors, old olive trees — and vineyards all around
Full Story
HOUZZ TOURSMy Houzz: French Colonial Mansion in India
A businessman's gracious, expansive beach house welcomes a host of international visitors
Full Story
HOUZZ TOURSMy Houzz: French Country Meets Southern Farmhouse Style in Georgia
Industrious DIYers use antique furniture, collections and warm colors to cozy up their traditional home
Full Story
HOUZZ TOURSHouzz Tour: Undone in the French Quarter
Color and history abound in this ‘unrenovated’ pied-à-terre in the Big Easy
Full Story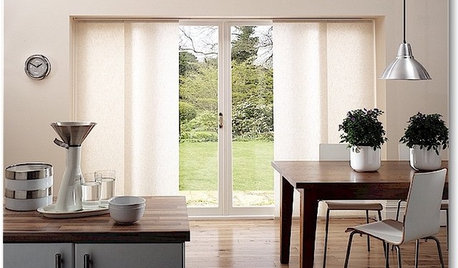
DOORSThe Art of the Window: 12 Ways to Cover Glass Doors
Learn how to use drapes, shutters, screens, shades and more to decorate French doors, sliding doors and Dutch doors
Full Story

shaklee3Original Author
snoonyb
Related Discussions
French Door Installation
Q
French Door Installation
Q
Removal of Gaggenau BO 280, installing GE French Door Wall Oven
Q
New French Doors Installed By Contractor.. Leaks same day. Normal?
Q
shaklee3Original Author
snoonyb
shaklee3Original Author
snoonyb
shaklee3Original Author
shaklee3Original Author
snoonyb
shaklee3Original Author
snoonyb
shaklee3Original Author
snoonyb
shaklee3Original Author
shaklee3Original Author
snoonyb
shaklee3Original Author
snoonyb
shaklee3Original Author
snoonyb
shaklee3Original Author
shaklee3Original Author
shaklee3Original Author
snoonyb
shaklee3Original Author
shaklee3Original Author
shaklee3Original Author
shaklee3Original Author
snoonyb
shaklee3Original Author
shaklee3Original Author
snoonyb
shaklee3Original Author
shaklee3Original Author
snoonyb
shaklee3Original Author
shaklee3Original Author
shaklee3Original Author
shaklee3Original Author
shaklee3Original Author
shaklee3Original Author
shaklee3Original Author
snoonyb
shaklee3Original Author
shaklee3Original Author
shaklee3Original Author
snoonyb
shaklee3Original Author
snoonyb
SLK